AWS EC2 ELB Hands-On | A Step-by-Step Guide
A step-by-step instructions on Elastic Load Balancing (ELB)

Experienced Technical developer with 6+ years' global collaboration.
Proficient in Python, Go, React, Next.js, Django, various databases, Cloud & DevOps (AWS EC2, Docker, Kubernetes), and Big Data tools.
Skilled in data structures and algorithm, API development, and end-to-end software engineering.
Excels in back-end development, front-end design, Root Cause Analysis, and product management to deliver superior user experiences.
Holds a master’s degree in computer engineering.
Launching multiple EC2 instances
To access full details about launching servers please follow AWS EC2 Hands-On | A Step-by-Step Guide
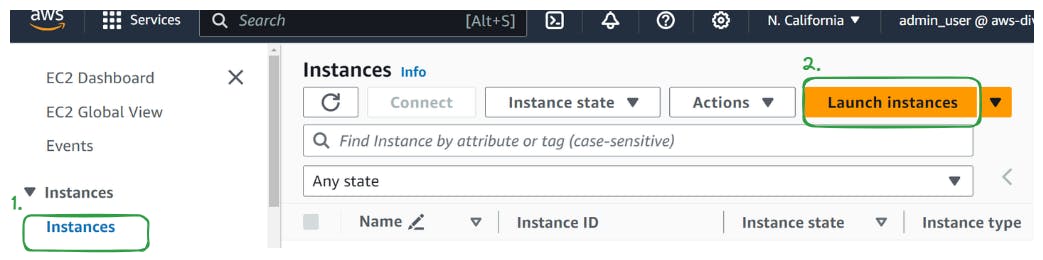
Step 1. Launching a New Instance
In the EC2 dashboard, click on the "Launch Instance" button
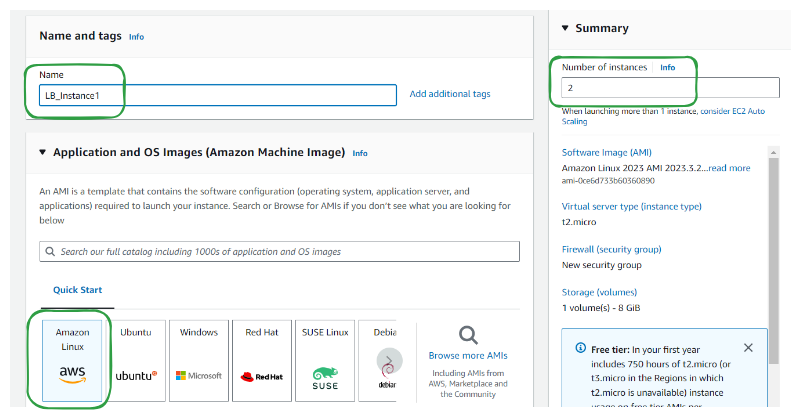
Step 2. Choose Name, AMI, and number of instances
Select an appropriate number of instances to share the load
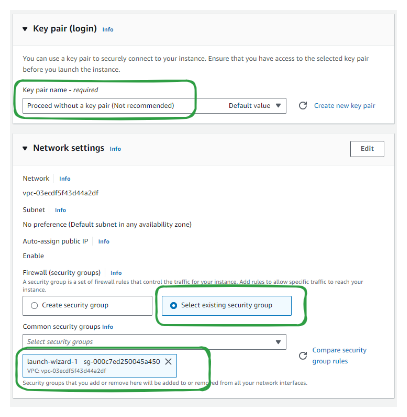
Step 3. Update Key Pair (login), network settings and security group
Let's proceed without Key-pair Login as we are not planning to SSH
Select existing security group "launch wizard" which allowed us HTTP traffic and SSH traffic into our EC2
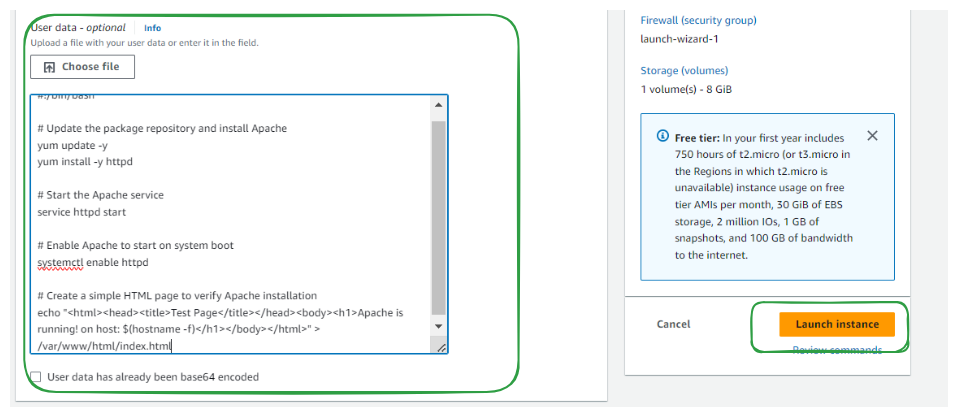
Step 4. Add User Data Script and Launch
- Go to Advance Settings and all the way to the bottom paste user Data.
COPY
#!/bin/bash

# Update the package repository and install Apache
yum update -y
yum install -y httpd

# Start the Apache service
service httpd start

# Enable Apache to start on system boot
systemctl enable httpd

# Create a simple HTML page to verify Apache installation
echo "<html><head><title>Test Page</title></head><body><h1>Apache is running! on host: $(hostname -f)</h1></body></html>" > /var/www/html/index.html
Review Instance Launch: Review the configuration details of your instance.
Click "Launch" to initiate the instance creation process.
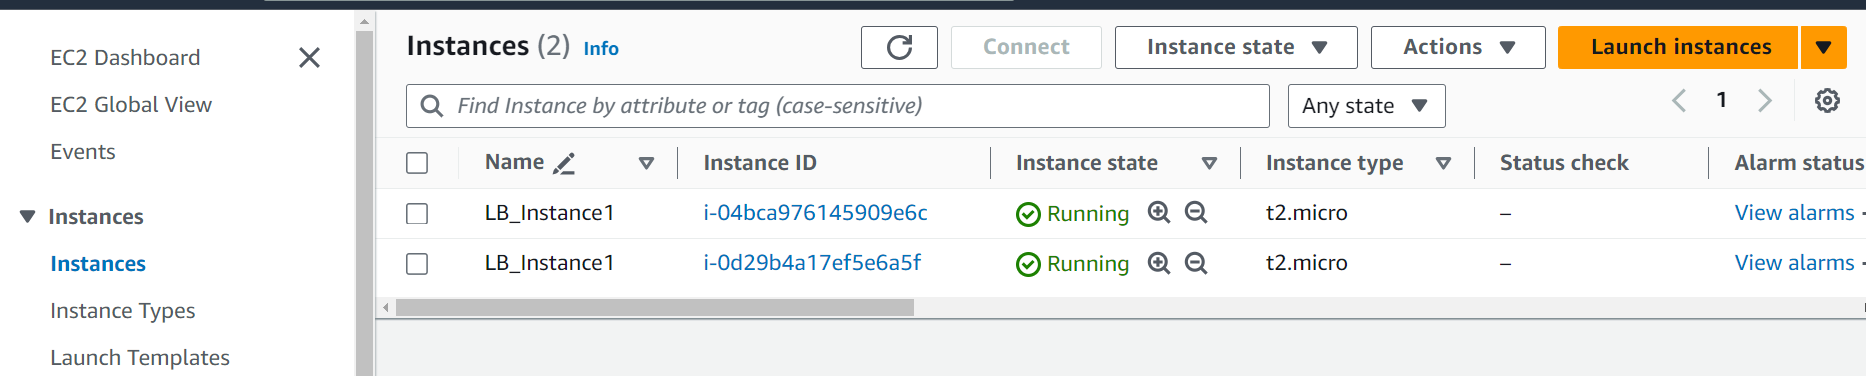
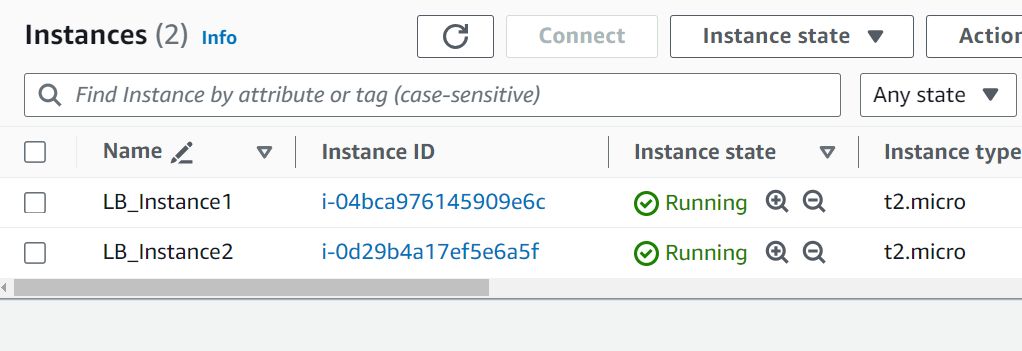
Step 5: Access N copies of instance and rename
Once your instance is launched, you can see the
xnumber of copies of the instance running in your EC2 dashboard where monitor their status.In Below screenshot you can see that the Name is same but the Instance IDs are different
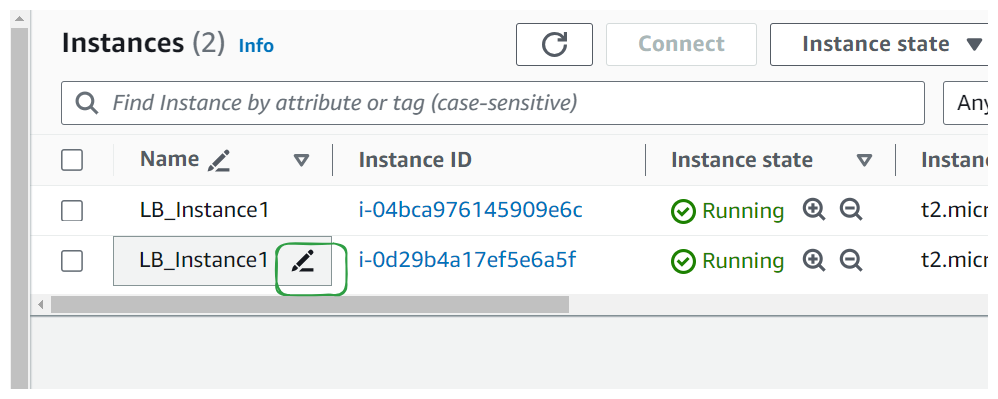
Let's rename them by simply clicking on the pencil icon as we Hover
Once satisfied click the tick to update and save
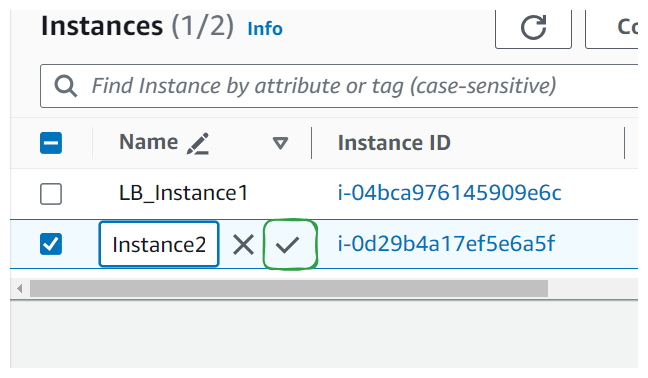
You can now see the two different names
Step 6. Accessing and Managing Your Instance
To access your instance, click on the "Instances" link in the navigation pane, then select your instance from the list.
From here, you can view details about your instance, including its public IP address and status.
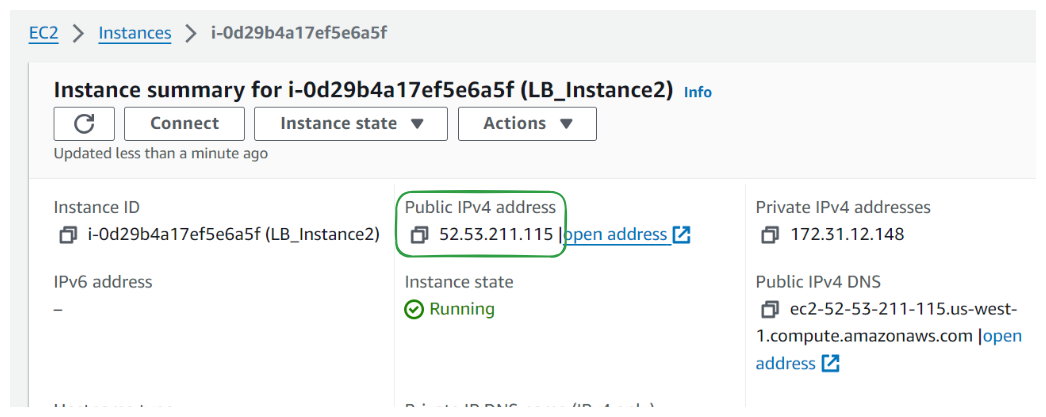
To test the running instance go to http://<IP_address> or click of public IP above, just ensure it is http:// and not https://


Creating Security Group for Load Balancing
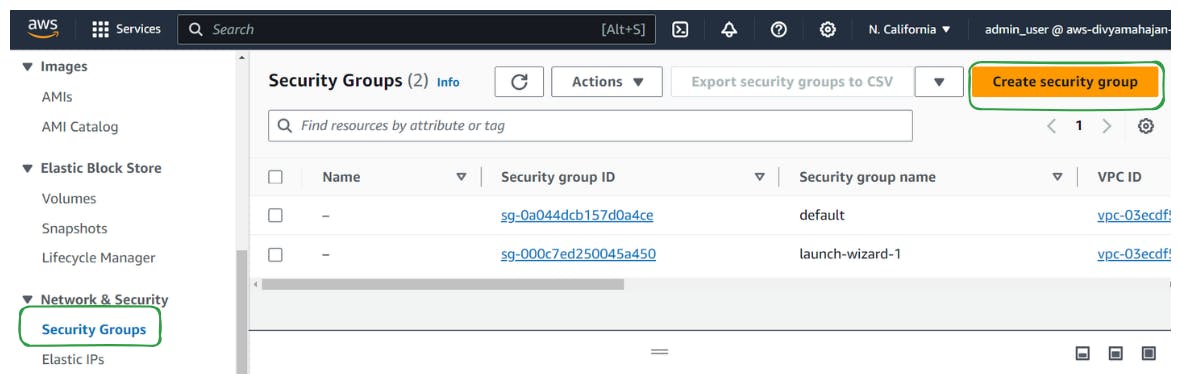
Step 1. Create a New Security Group
In the EC2 dashboard, locate and click on "Security Groups" in the left-hand sidebar under the "Network & Security" section.
Click on the "Create Security Group" button.
Provide a name and description for your security group.
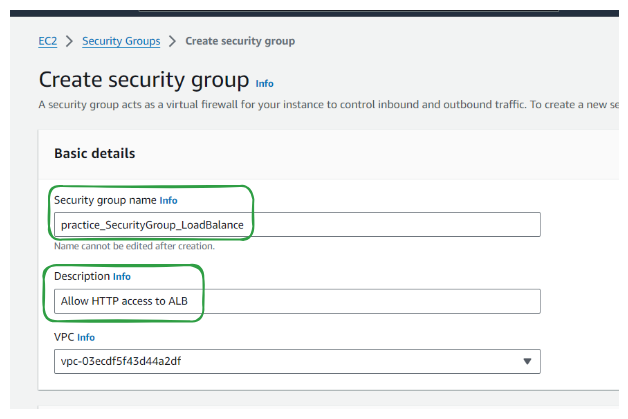
Define inbound and outbound rules based on your requirements. You can specify protocols, ports, and IP ranges for both inbound and outbound traffic.
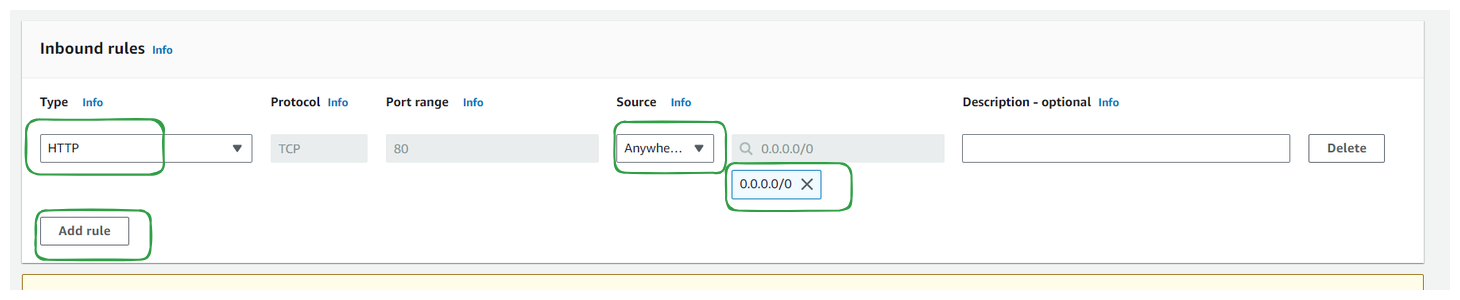
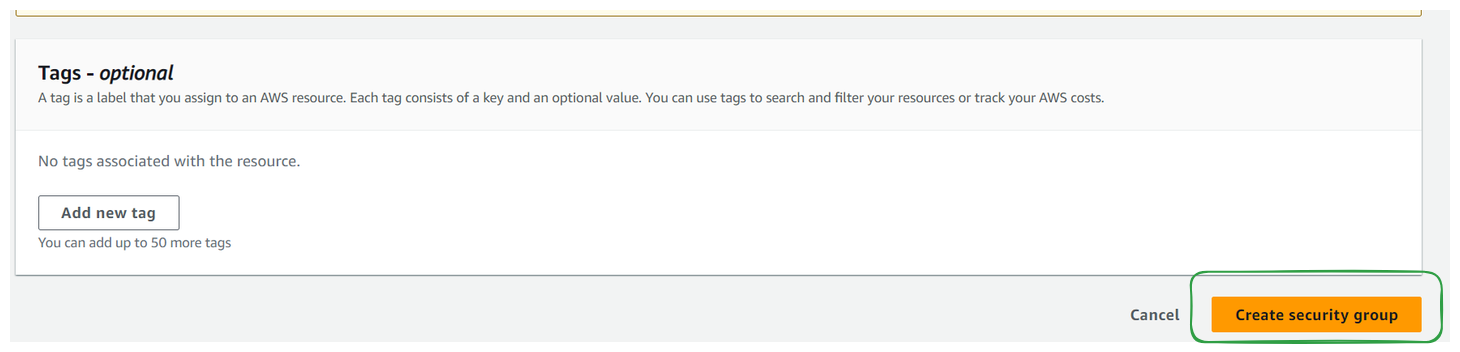
Click on the "Create" button to create your new security group.
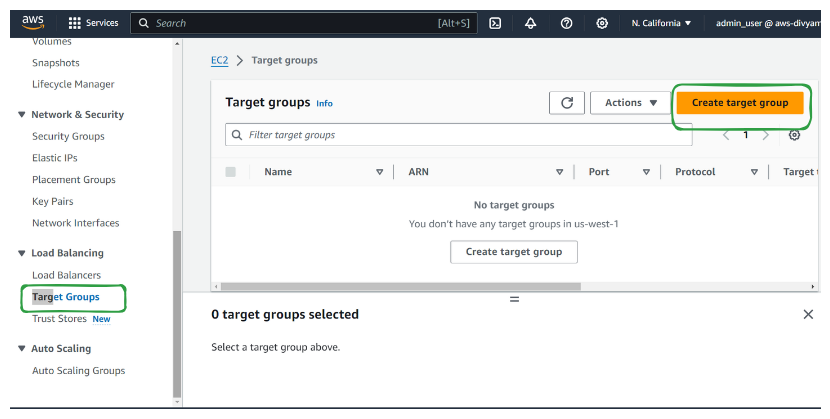
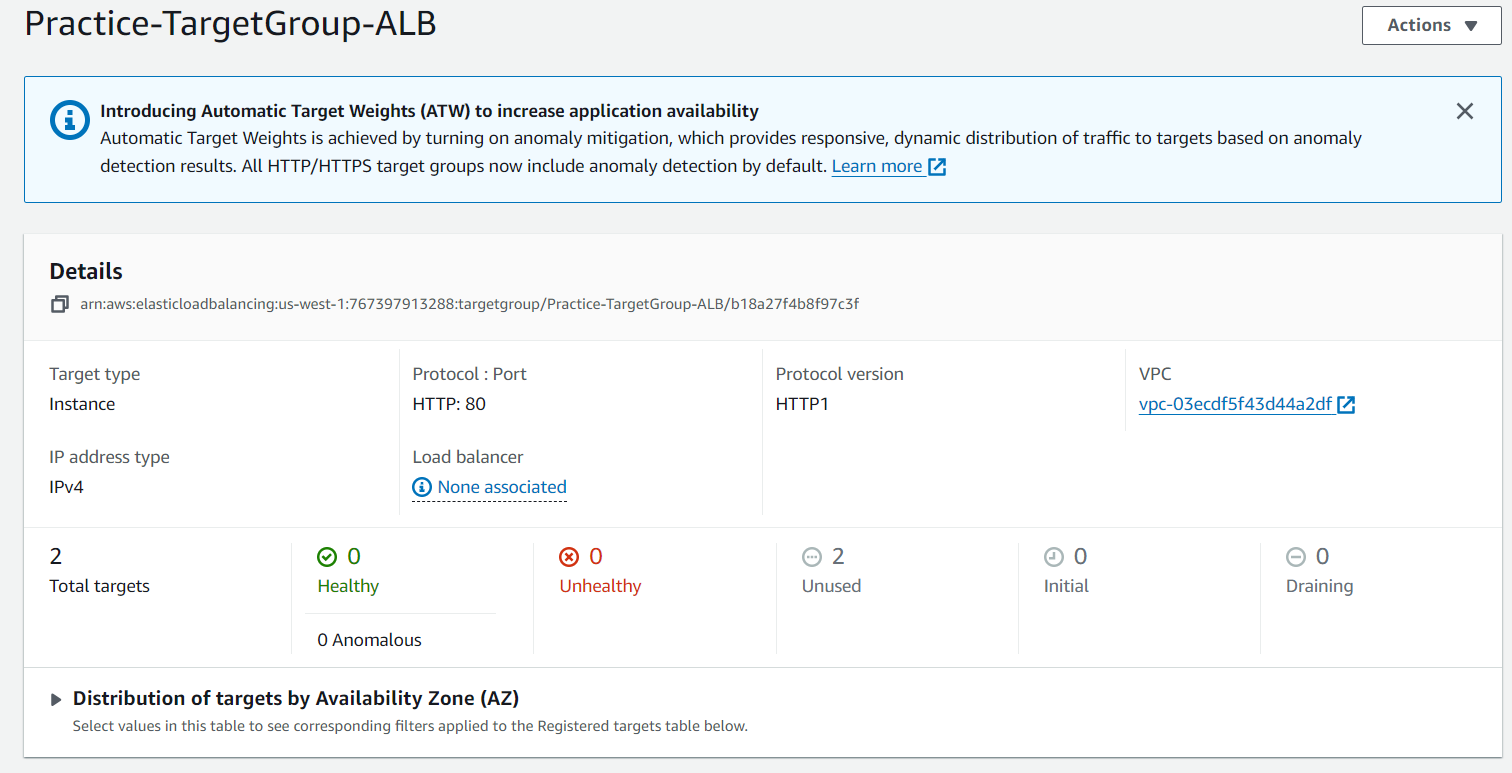
Create Target Groups
Step 1. Create target group**
Log in to the AWS Management Console and navigate to the EC2 dashboard.
Under the "Load Balancing" section in the navigation pane, click on "Target Groups."
Click the "Create target group" button.
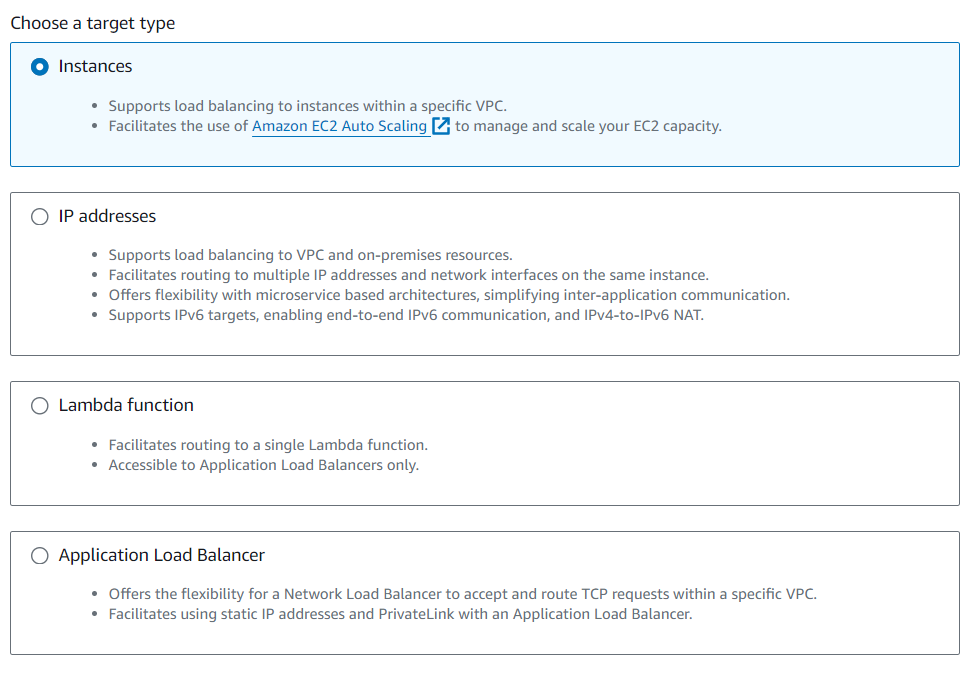
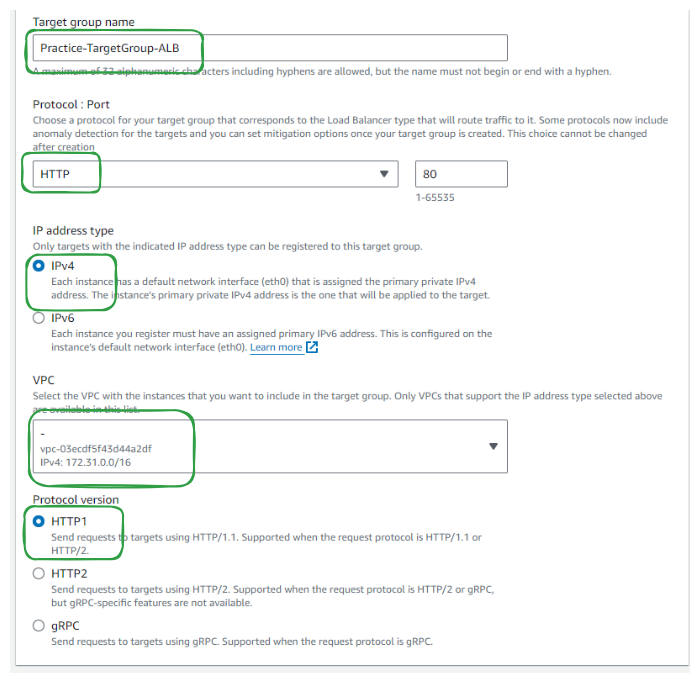
Step 2. Basic configuration
Settings in this section can't be changed after the target group is created.
Choose Target Types:
Instances: Balances load within a VPC, works with EC2 Auto Scaling.
IP addresses: Balances load to VPC and on-premises resources, supports multiple IPs and interfaces, ideal for microservices and IPv6.
Lambda function: Routes to a single Lambda function, exclusive to Application Load Balancers.
Application Load Balancer: Handles TCP requests within a VPC, supports static IPs and PrivateLink.
As seen for EC2 Auto scaling we will choose "Instances"
Specify a name and optional description for the target group.
Choose the protocol and port for the target group, aligning with your application's settings.
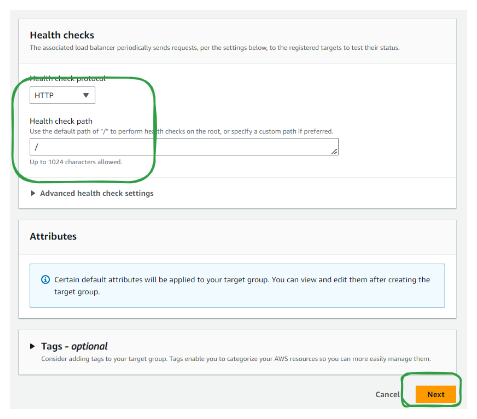
Step 3: Configure health checks
Configure health checks to monitor target health, including protocol, port, and interval.
2. Click on "Next"
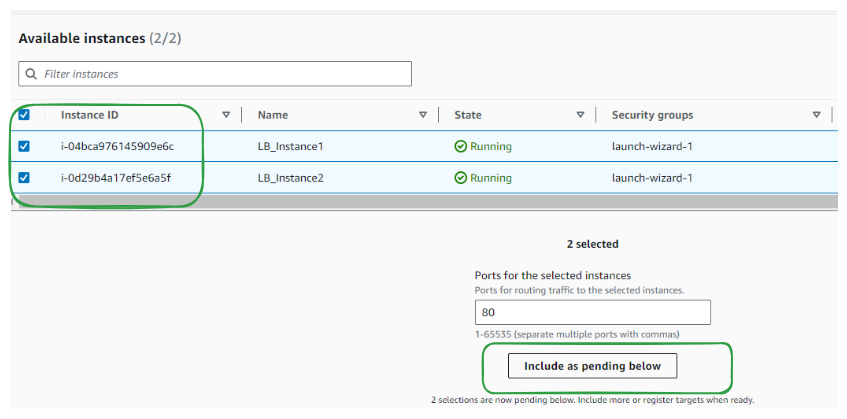
Step 4: Register targets
Set targets by registering instances manually or using an AWS Auto Scaling group.
Review the configuration and click "Create target group" to finalize.
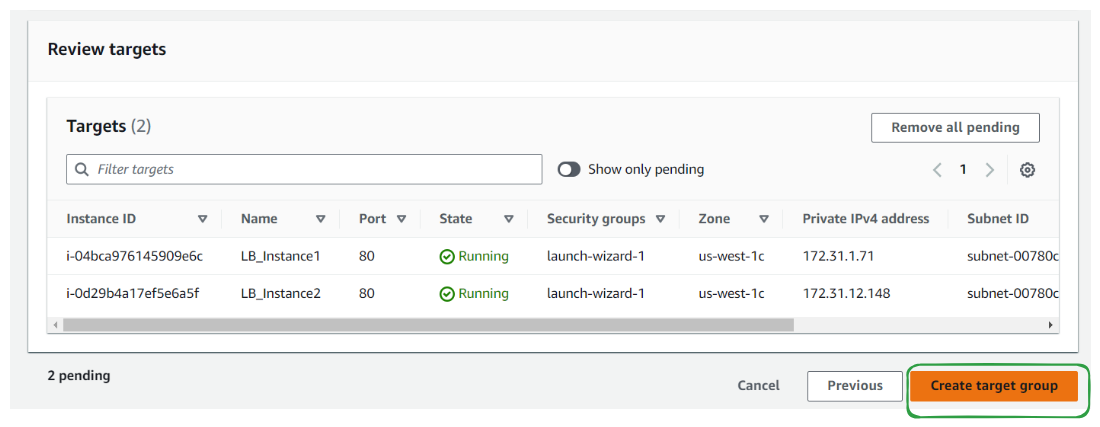
After creation, associate the target group with a load balancer or adjust settings as needed for your application architecture.
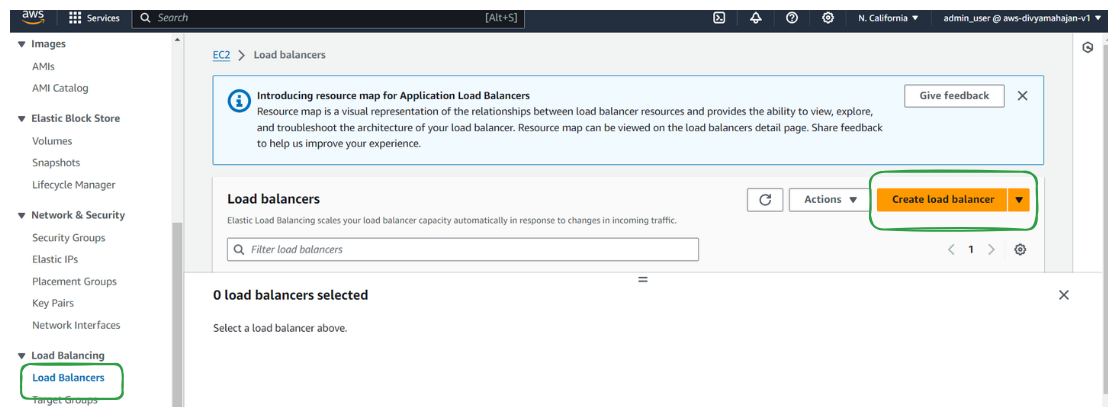
Create a Load Balancer (ALB)
Step 1: Create Load Balancer
Navigate to the EC2 dashboard
Click on "Load Balancers" in the navigation pane.
Click on "Create Load Balancer"
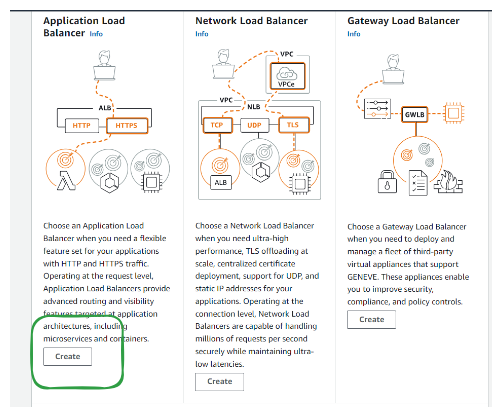
Step 2: Choose Load Balancer Type
You can choose the type of load balancer you want to create (Classic Load Balancer, Application Load Balancer, Network Load Balancer, Gateway Load Balancer).
You can learn the details about Types of load balance in AWS ELB Elastic Load Balancing Type
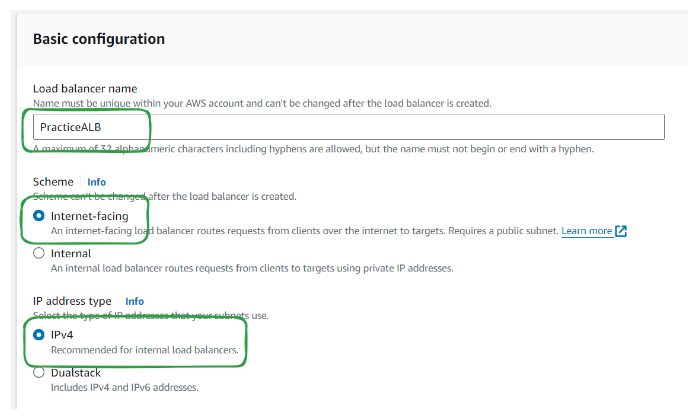
Step 3: Basic configuration
Add Load balancer name, Scheme and IP address type
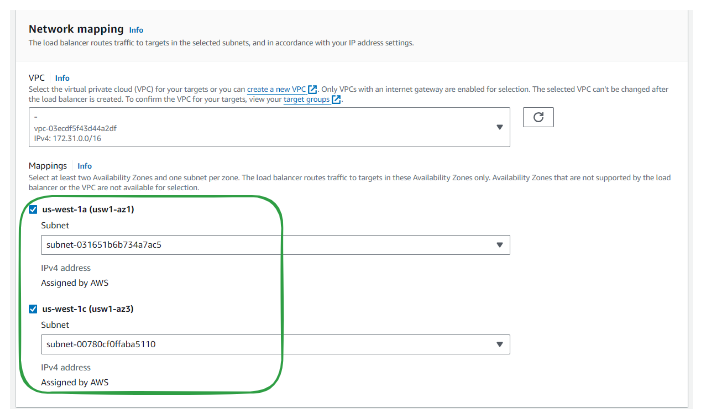
Step 4: Configure Network mapping
The load balancer routes traffic to targets in the selected subnets, and in accordance with your IP address settings.
Select at least two Availability Zones and one subnet per zone.
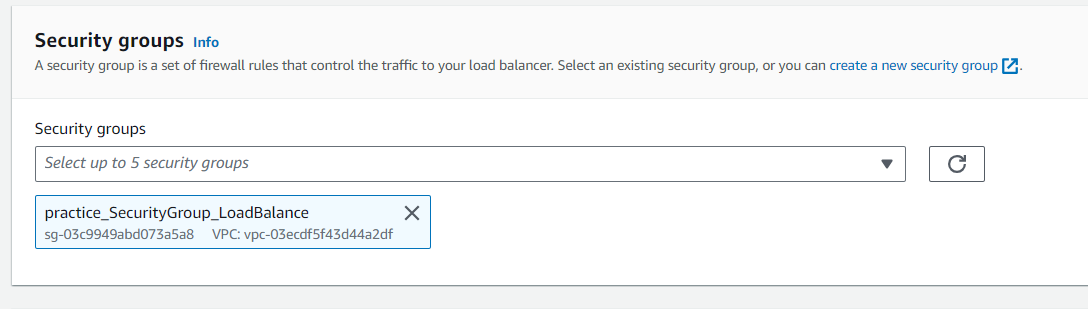
Step 5: Add Security groups
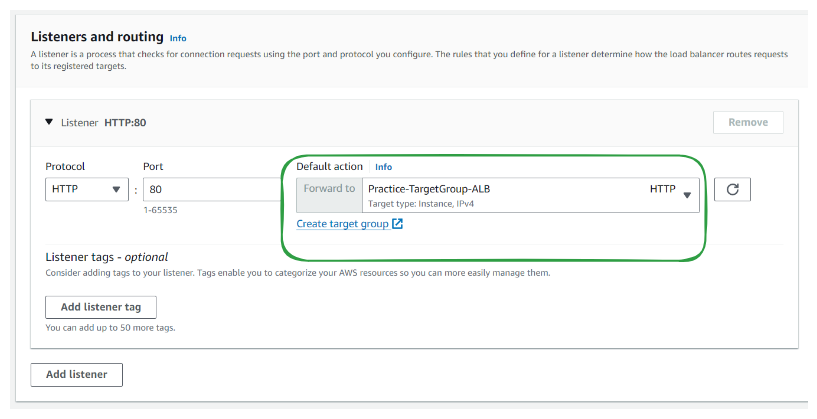
Step 6: Listeners and routing
A listener is a process that checks for connection requests using the port and protocol you configure. The rules that you define for a listener determine how the load balancer routes requests to its registered targets.
Add EC2 instances or target groups to the load balancer.
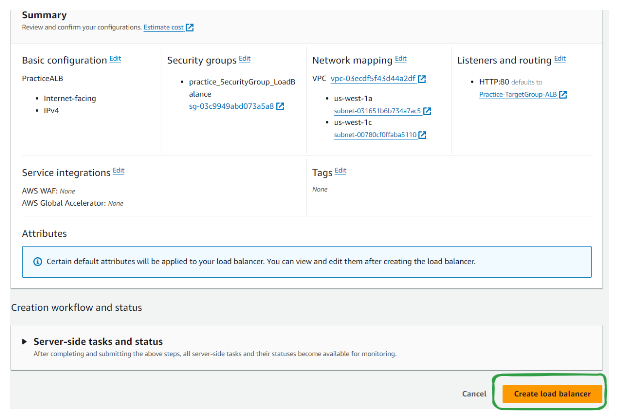
Step 7: Review and create the load balancer.
Testing and Monitoring
Go to the "Load Balancers" section in the EC2 dashboard.
Locate the load balancer associated with your Auto Scaling Group.
Click on the load balancer to view its details.
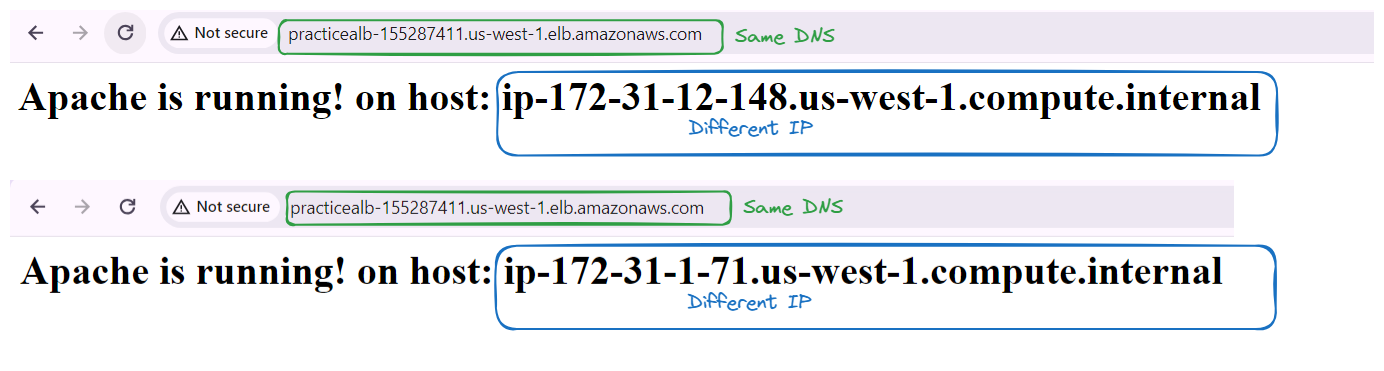
Copy the DNS name of the load balancer from the dashboard.
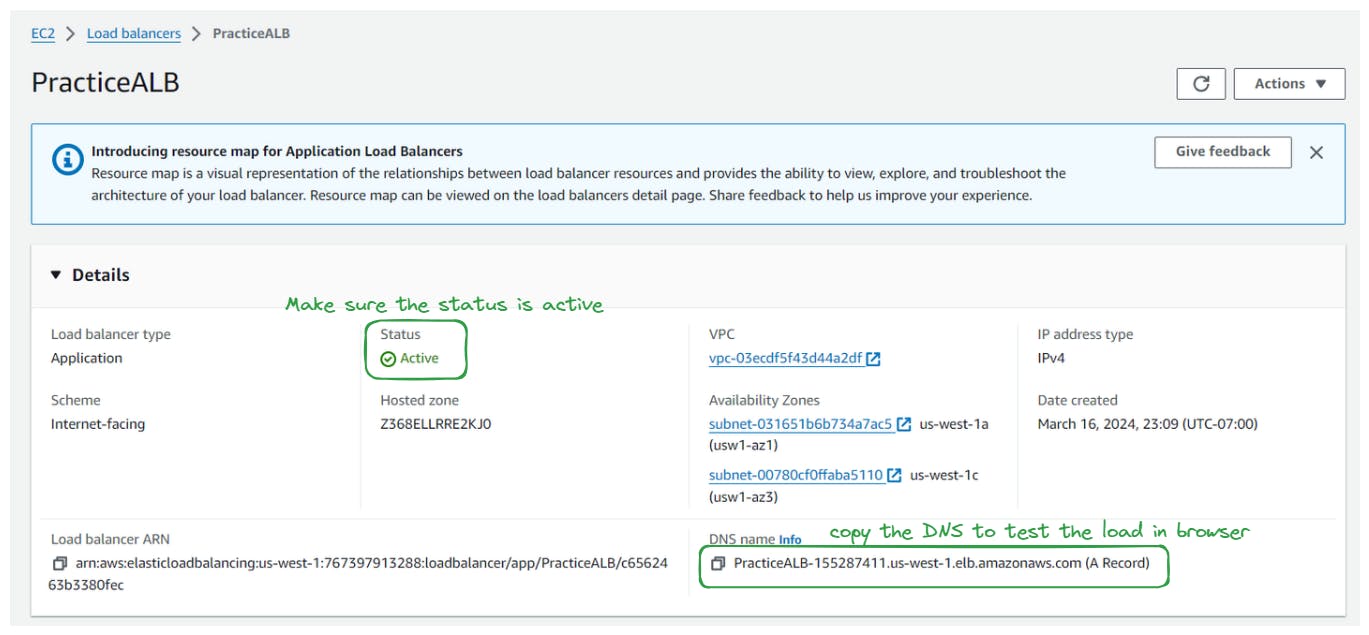
Paste the DNS name into a text editor or another location for future reference or testing purposes.
Optionally, you can open a web browser and paste the DNS name into the address bar to access your application through the load balancer.
Add load by refreshing to see the load being distributed to Different IP