AWS IAM: Hands-On | A Step-by-Step Guide
A step-by-step instructions on user management, security settings, and programmatic access, ensuring a robust and secure AWS environment.


Setting Up Your AWS Account:
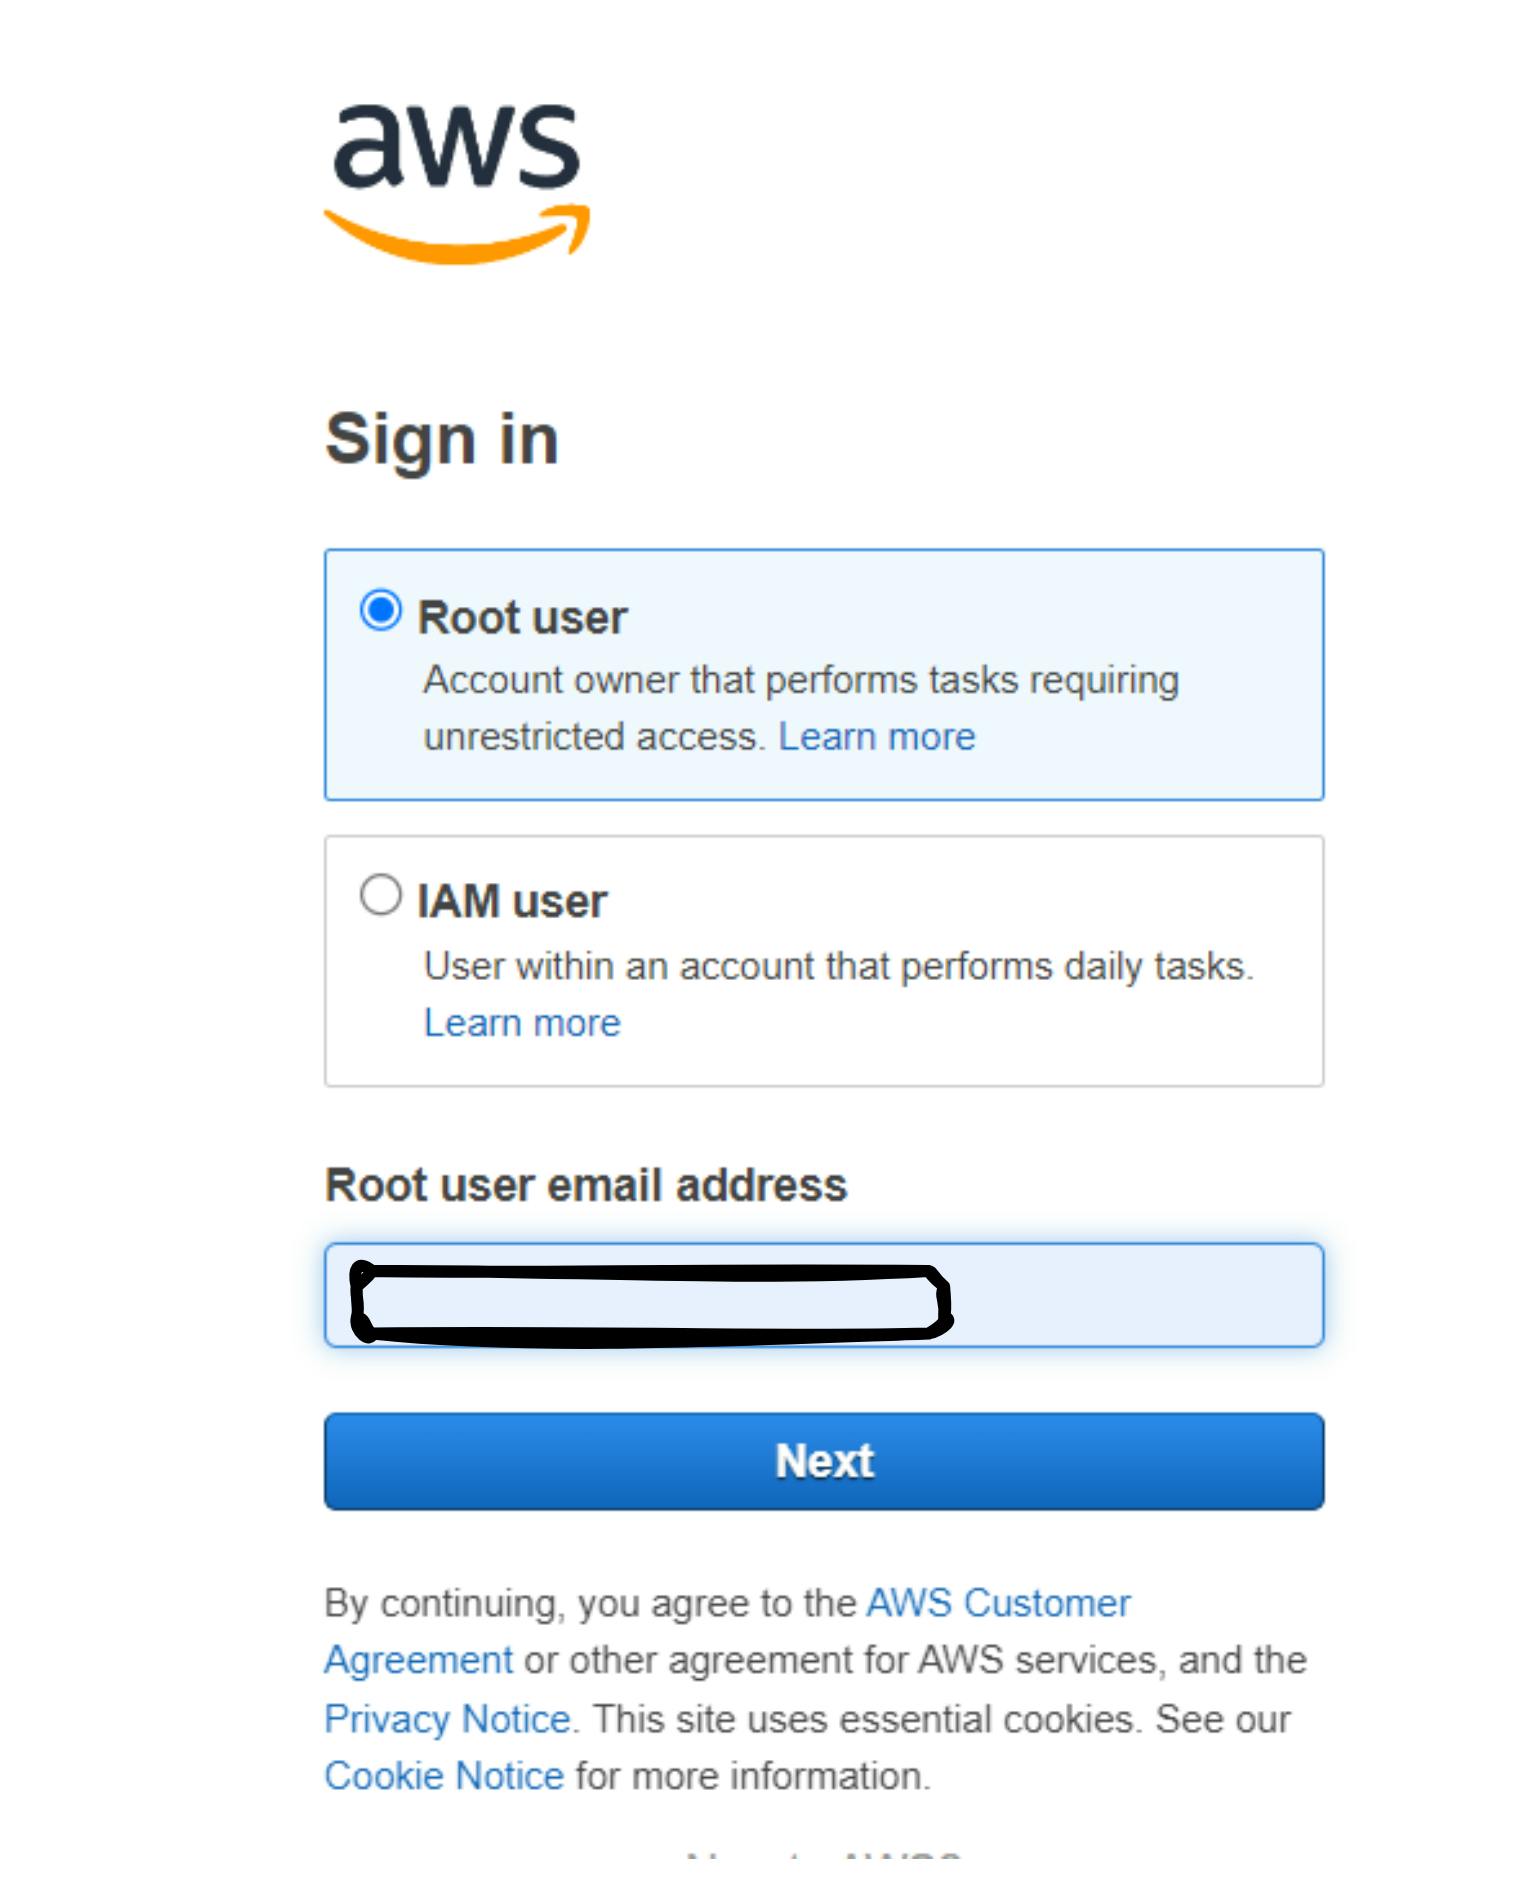
Step 1: Sign in to the AWS Management Console:
Open a web browser and navigate to the AWS Management Console (https://aws.amazon.com/console/).
Sign in using your AWS account credentials.
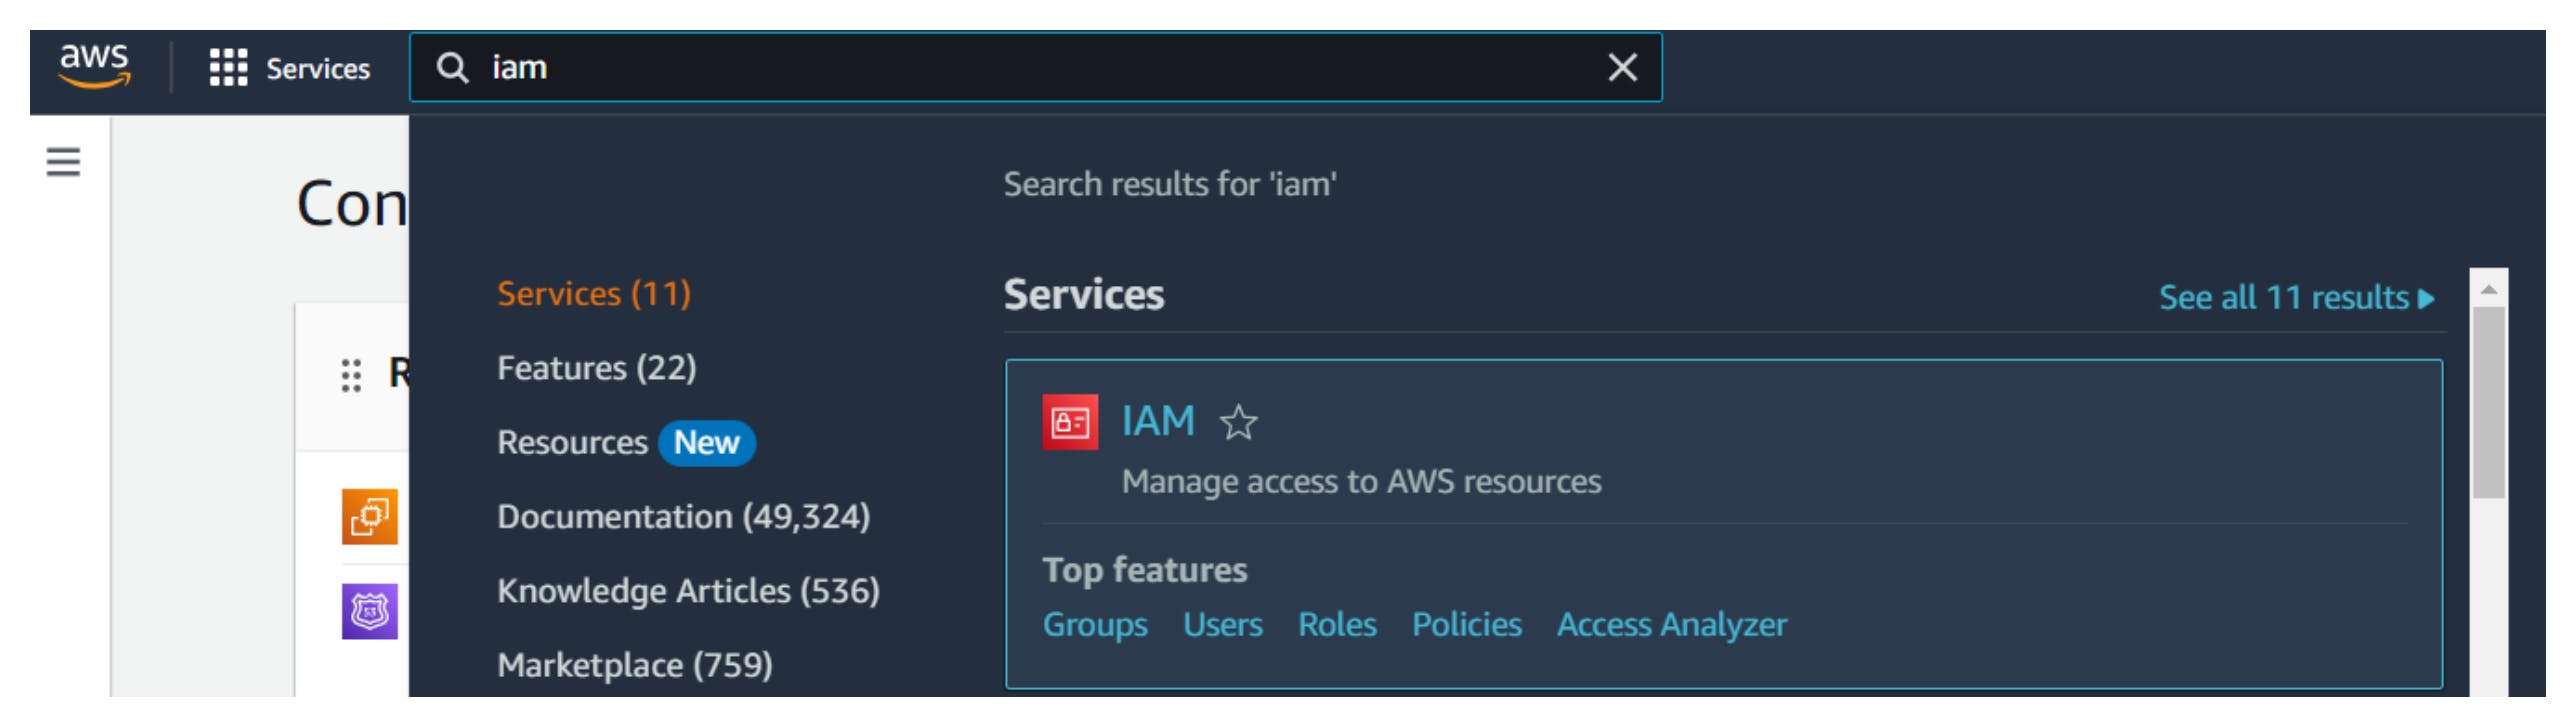
Step 2: Navigate to the IAM Dashboard and update Account alias:
Once logged in, navigate to the IAM (Identity and Access Management) service. You can find IAM under the "Security, Identity & Compliance" section
Step 3: Edit the Account Alias (Optional):
Under the "Account alias" section, click on the "Customize" button or the pencil icon to edit the account alias.
Enter the desired account alias in the provided text box. The alias must be between 3 and 63 characters long and can contain letters, numbers, and hyphens (-), but it cannot start or end with a hyphen.
Click on the "Check availability" button to ensure the alias is unique.
Once the alias is available and meets the requirements, click on the "Save changes" button to set the new account alias.

Creating Permissions and Policy:
Creating Custom Policies
From the IAM dashboard, select "Policies" from the left-hand menu.
Click on the "Create policy" button.
Choose between creating a policy using the visual editor or by writing your own JSON policy.
If using the visual editor, select the service, actions, and resources for which you want to create permissions. If writing JSON, paste your policy document.
Review and validate your policy.
Once satisfied, click on "Review policy".
Provide a name and description for your policy, then click on "Create policy".

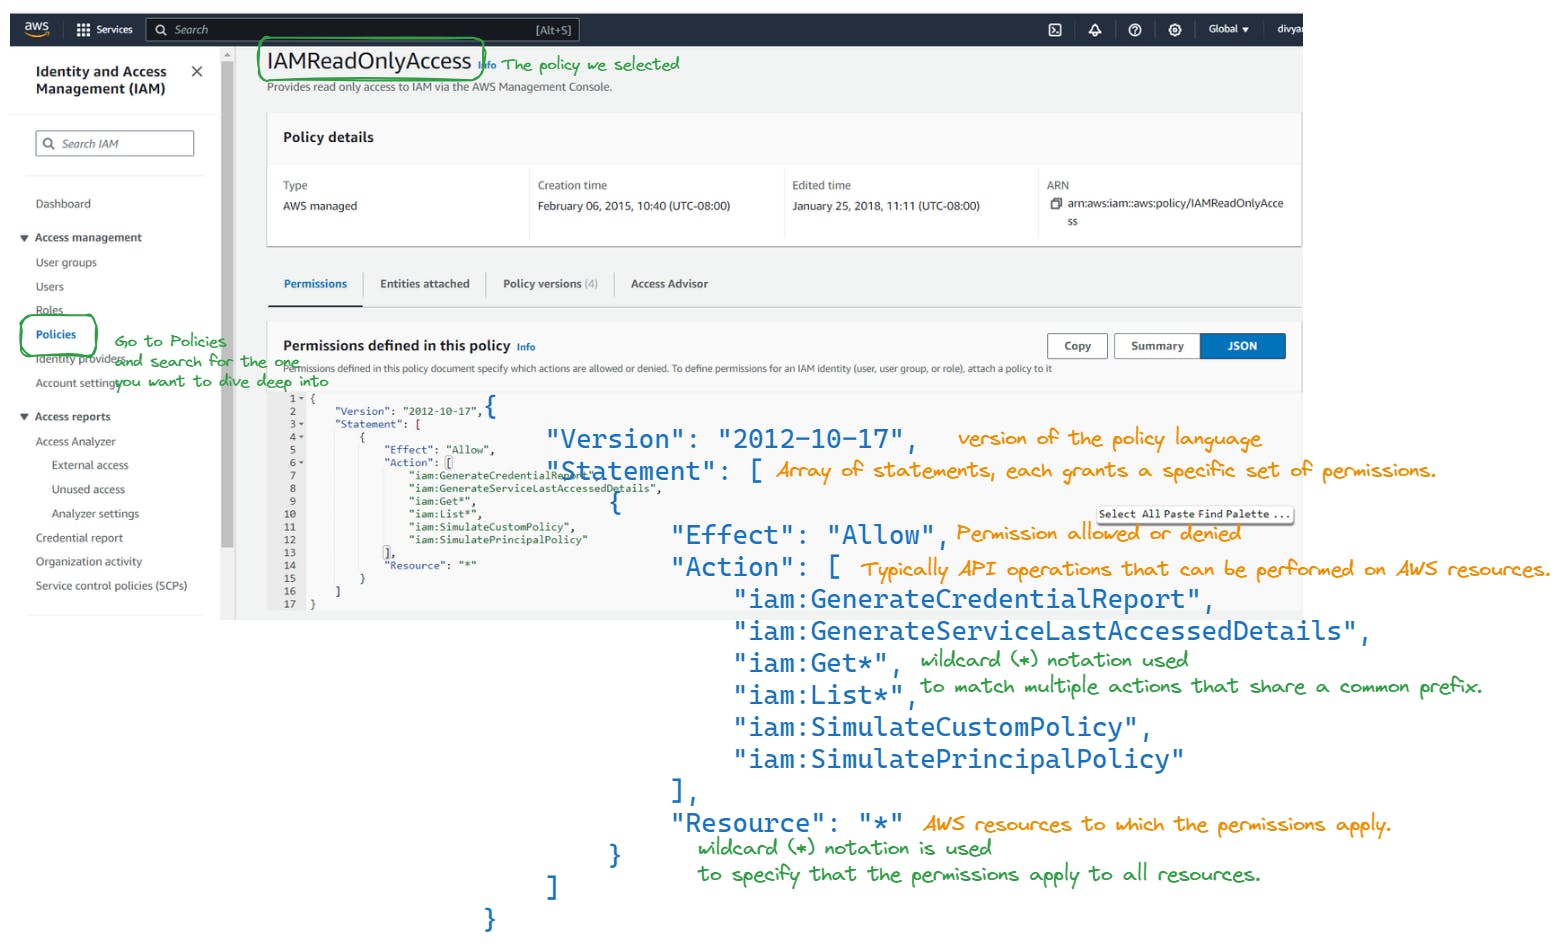
Analyzing existing Policies
Group Management in IAM:
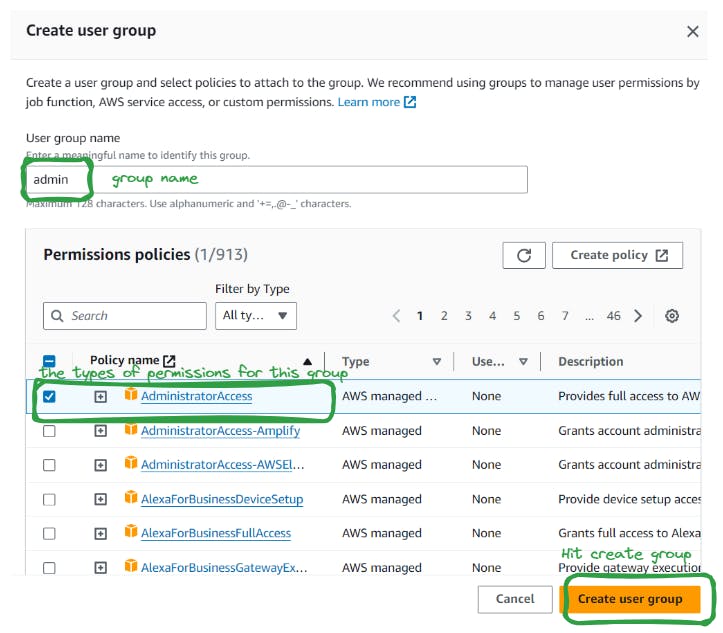
Creating a Group
In the IAM dashboard, select "Groups" from the sidebar menu.
Click on the "Create New Group" button.
Provide a name for the group and click "Next Step."
Select the policies you want to attach to this group. You can choose from AWS Managed Policies or create custom policies.
Review your selections and click "Create Group."

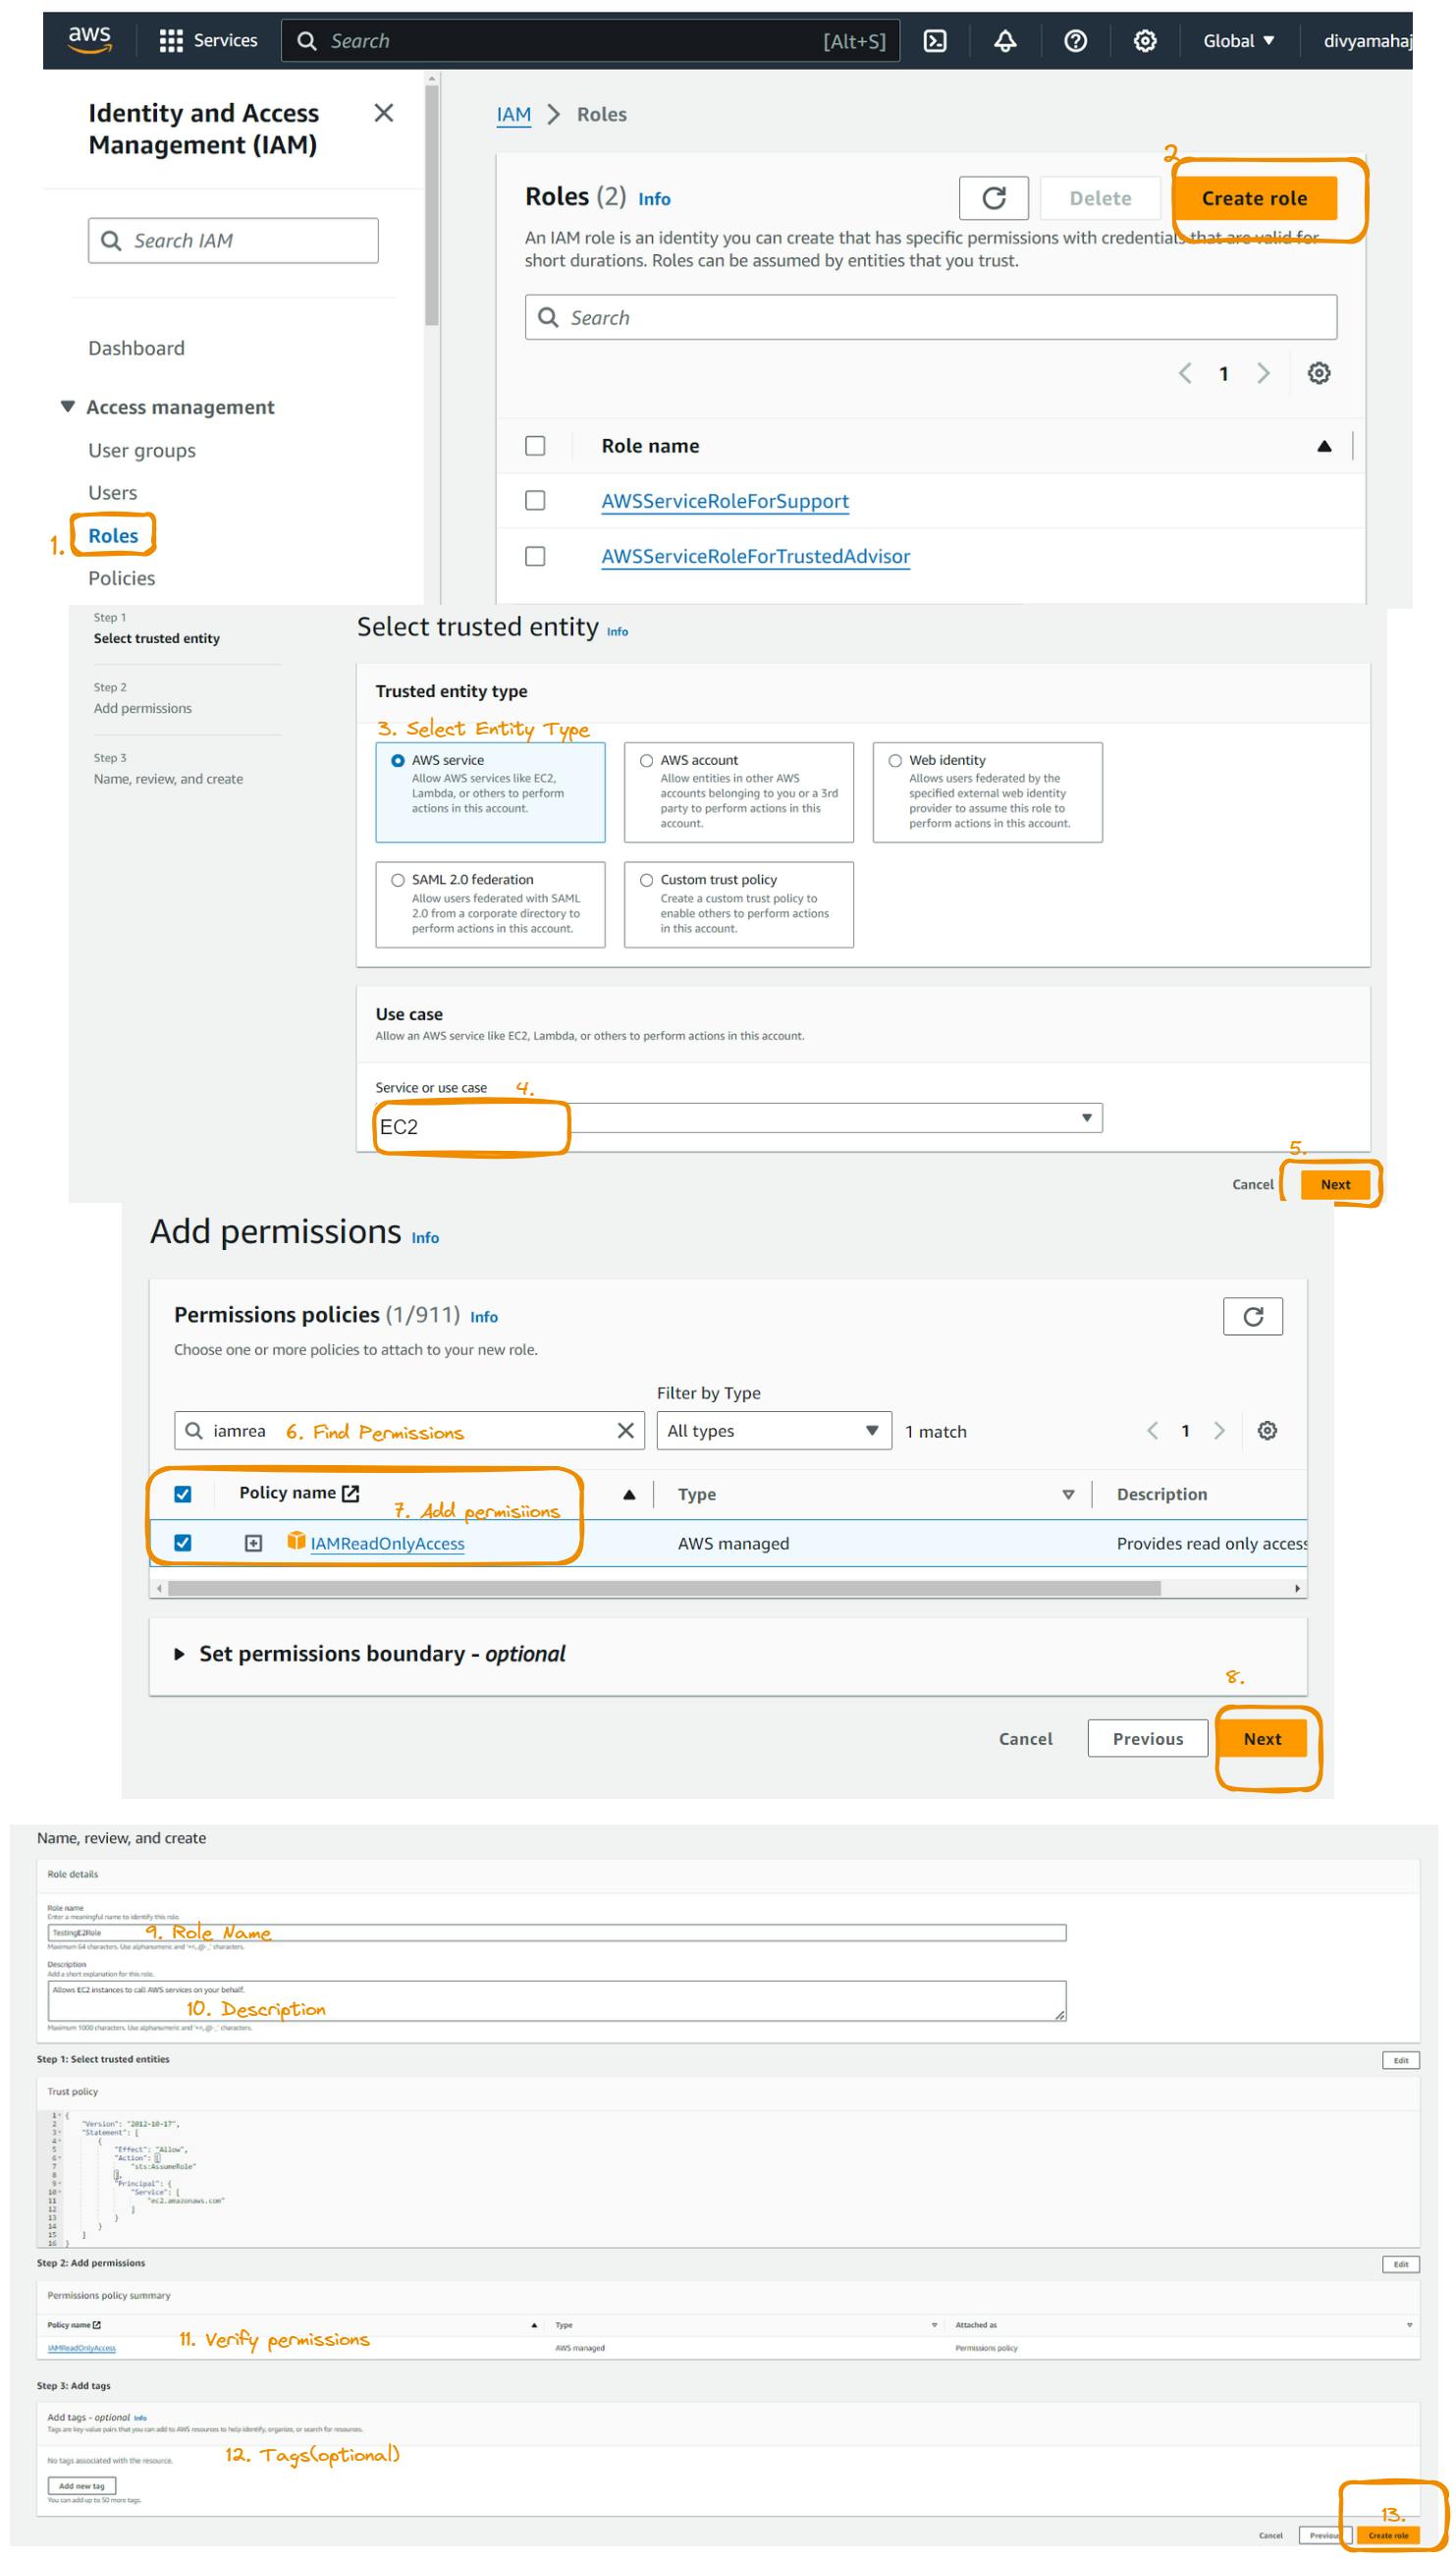
Role Management in IAM:
Creating a Role
From the IAM dashboard, select "Groups" from the left-hand menu.
Click on the "Create group" button.
Provide a name and optional description for your group.
Attach policies to the group by selecting from existing policies or creating a new one.
Review and validate the group configuration.
Once satisfied, click on "Create group".
User Management in IAM:
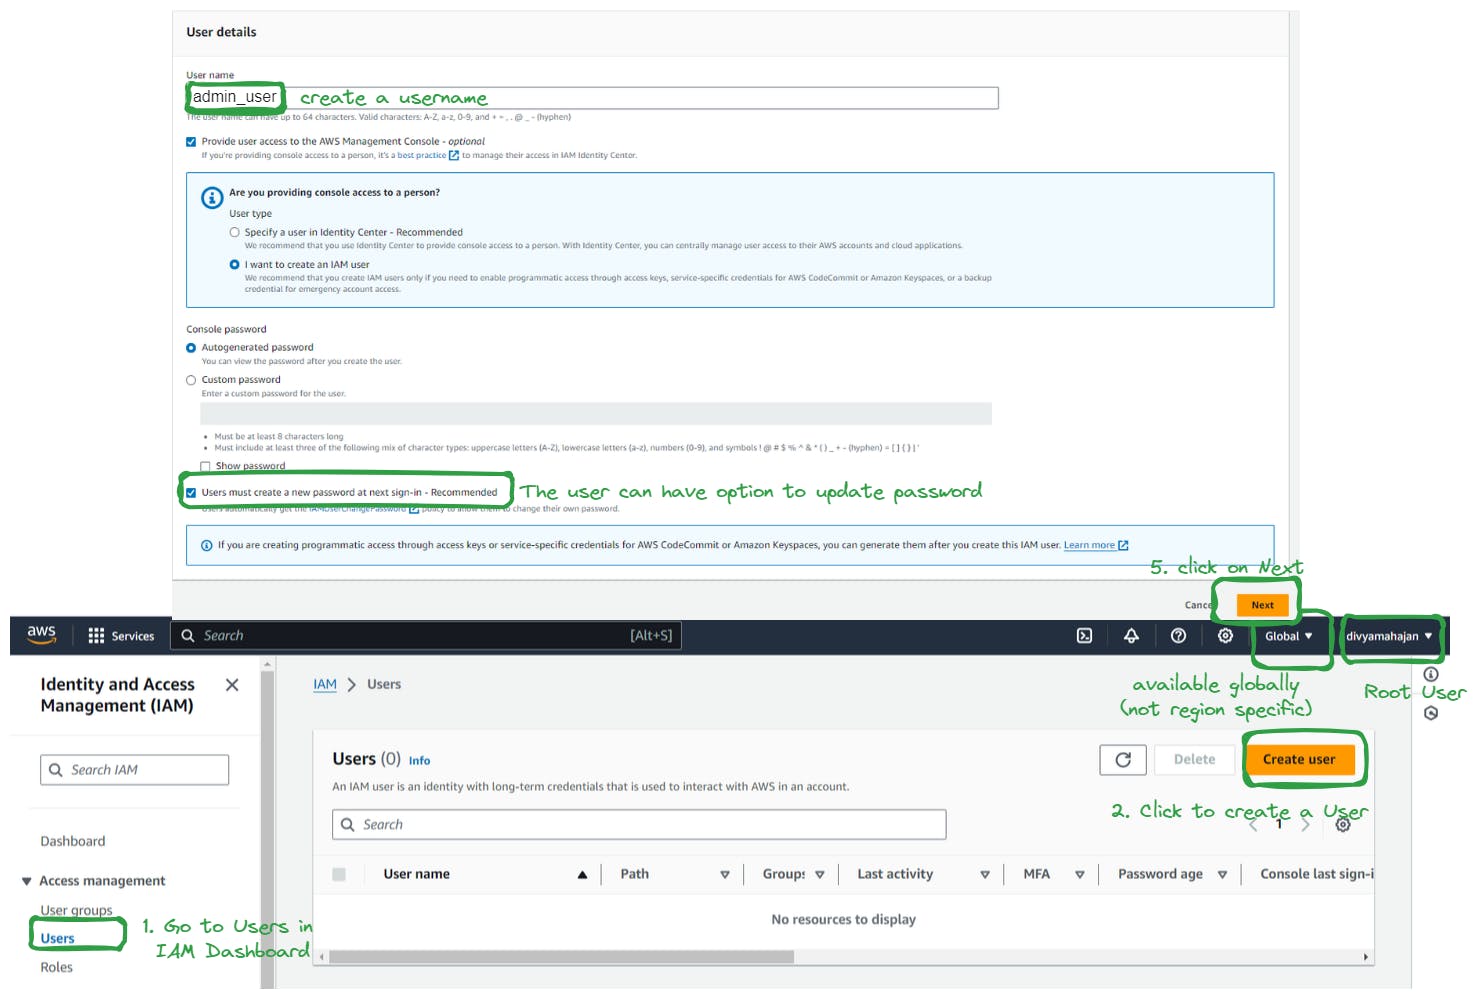
Step 1: Creating a New User
In the IAM dashboard, select "Users" from the sidebar menu.
Click on the "Add user" button.
Enter the username for the new user and choose the access type (programmatic access, AWS Management Console access, or both).
Click "Next: Permissions."
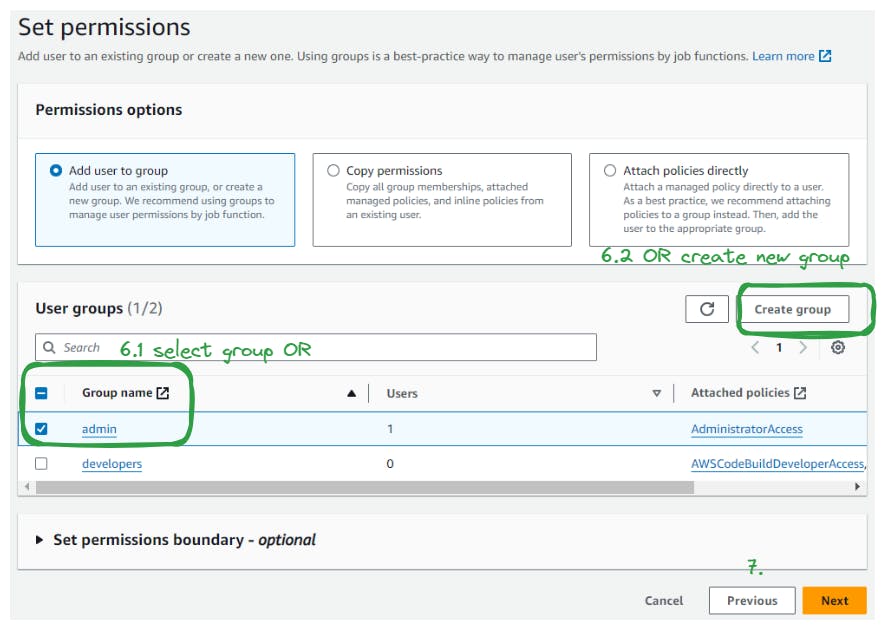
Step 2: Assigning Groups and Policies to Users:
Choose the option to "Add user to group" and select the group you created earlier.
Optionally, you can attach inline policies directly to the user by selecting the "Attach existing policies directly" option and choosing the desired policies.
Review the permissions and click "Next: Tags."
Step 3: Adding Tags (Optional):
You can optionally add tags to the user for easier management and tracking.
Click "Next: Review."
Step 4: Reviewing and Finalizing User Creation:
Review the user's configuration, including username, access type, group membership, and attached policies.
If everything looks correct, click "Create user."

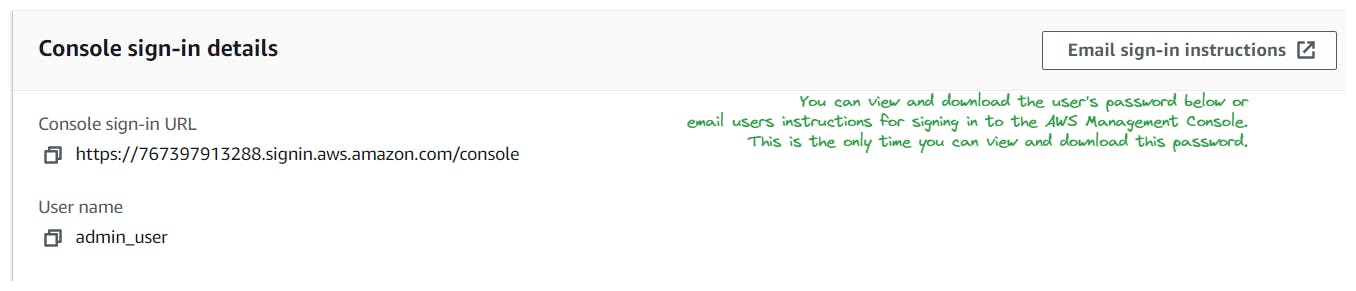
Step 5: Access and Share Credentials (if applicable):
After the user is created, you'll be provided with options to download the user's security credentials (such as access keys or password) if you selected programmatic access.
Share the credentials securely with the user, ensuring they can access the AWS resources according to their permissions.
Step 6: Verifying User Setup
Once the user is created, you can verify their setup by logging in to the AWS Management Console using the user's credentials (if applicable) or by testing programmatic access using the provided access keys.

Enhancing Security with IAM Features:
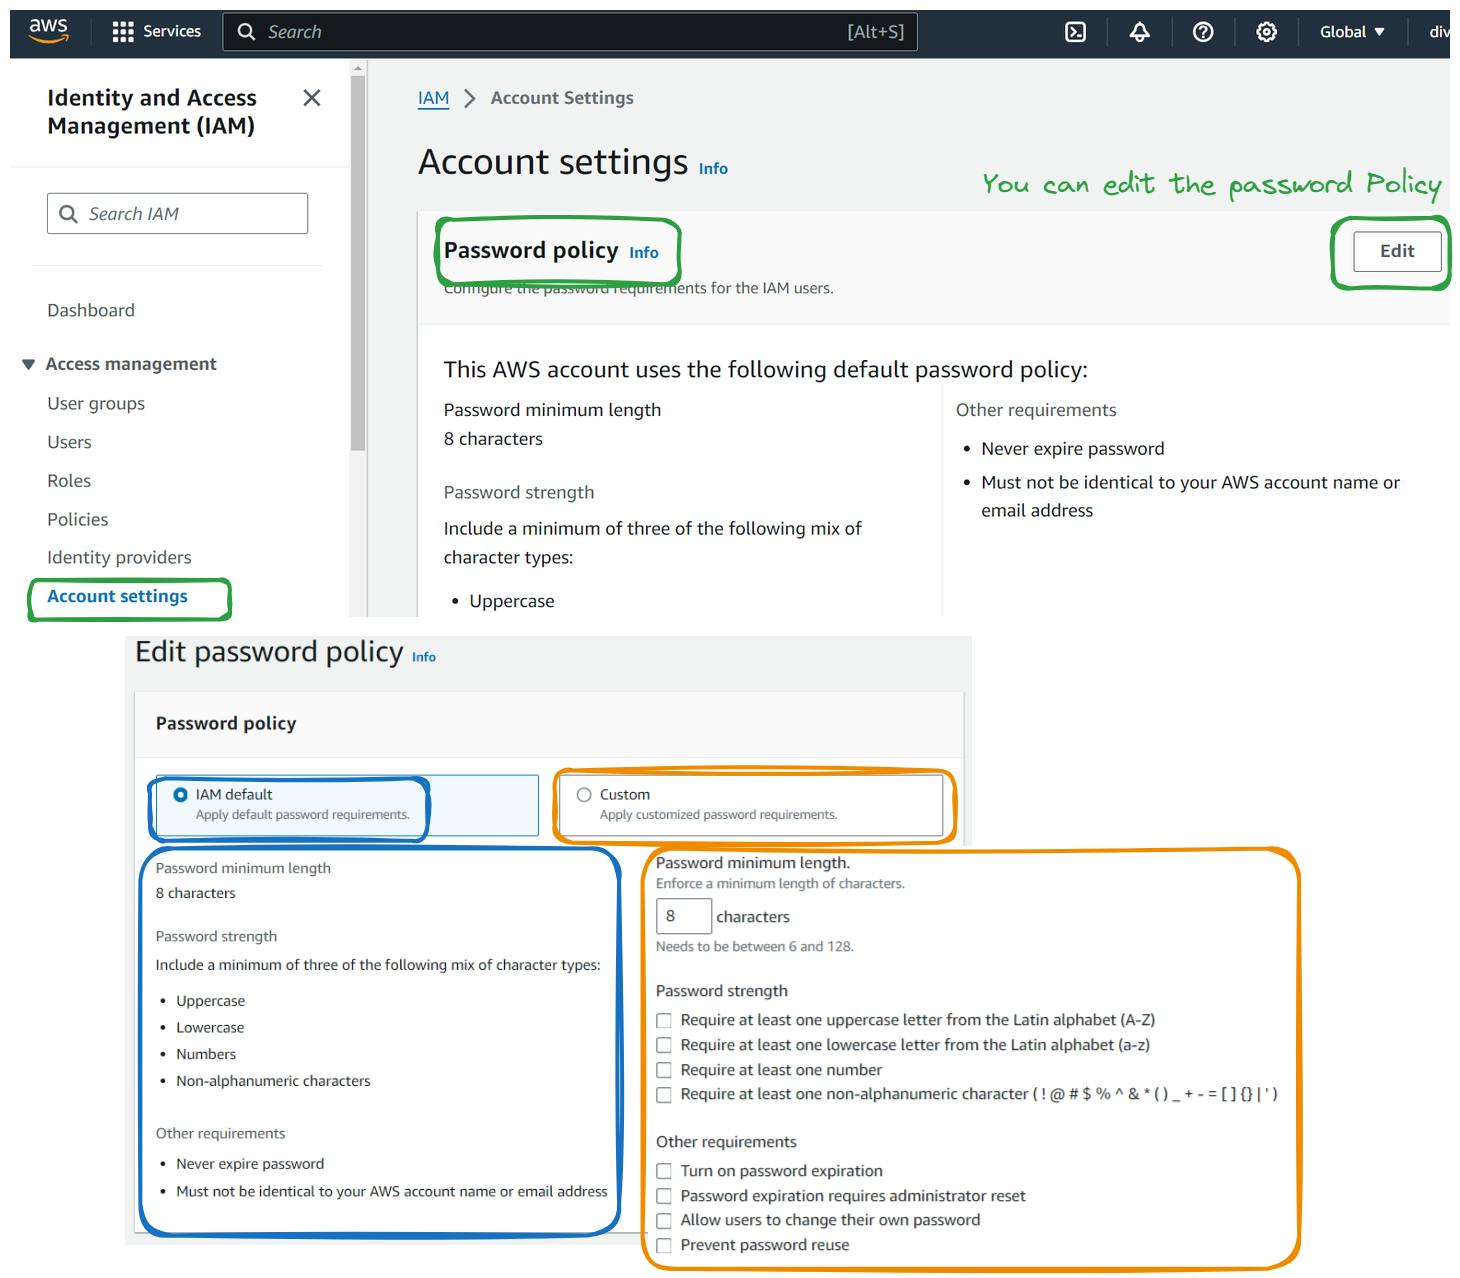
Setting up Password Policy:
Sign in to the AWS Management Console.
Navigate to the IAM (Identity and Access Management) dashboard.
In the left-hand menu, click on "Account settings."
Scroll down to the "IAM Password Policy" section.
Click on the "Edit" button.
Set the password policy according to your organization's requirements. This typically includes requirements such as minimum password length, including uppercase and lowercase letters, numbers, and special characters, and password expiration.
Click on "Apply password policy" to save your changes.
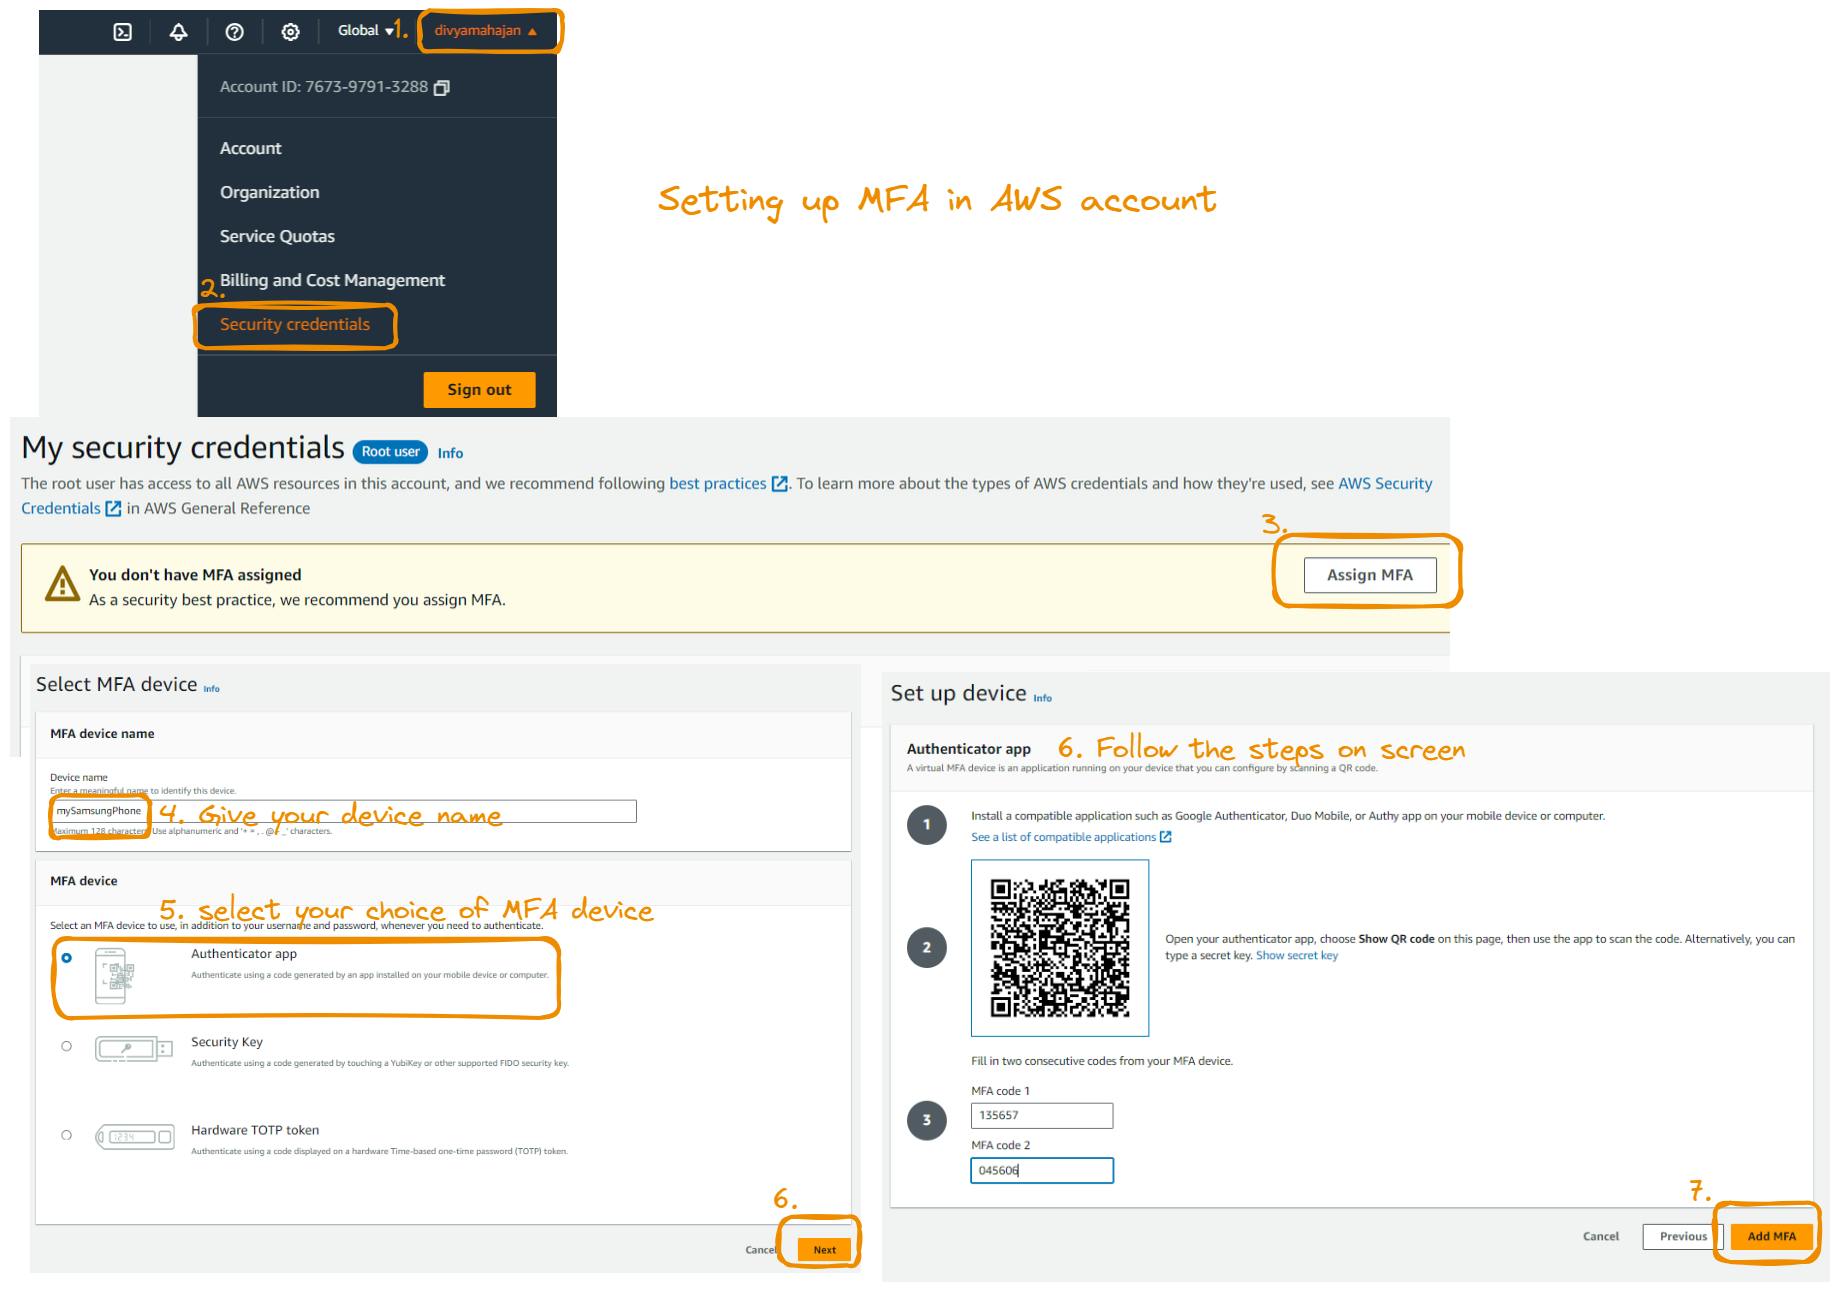
Enabling Multi-Factor Authentication (MFA):
In the IAM dashboard, click on "Users" in the left-hand menu.
Select the user for whom you want to enable MFA.
Click on the "Security credentials" tab.
Under "Assigned MFA device," click on "Manage."
Follow the instructions to set up MFA for the user. This may involve using a virtual MFA device, hardware MFA device, or SMS text message.
Complete the setup process by entering the MFA code generated by your chosen device.
Once MFA is enabled, a green checkmark will appear next to "Assigned MFA device" for the user.
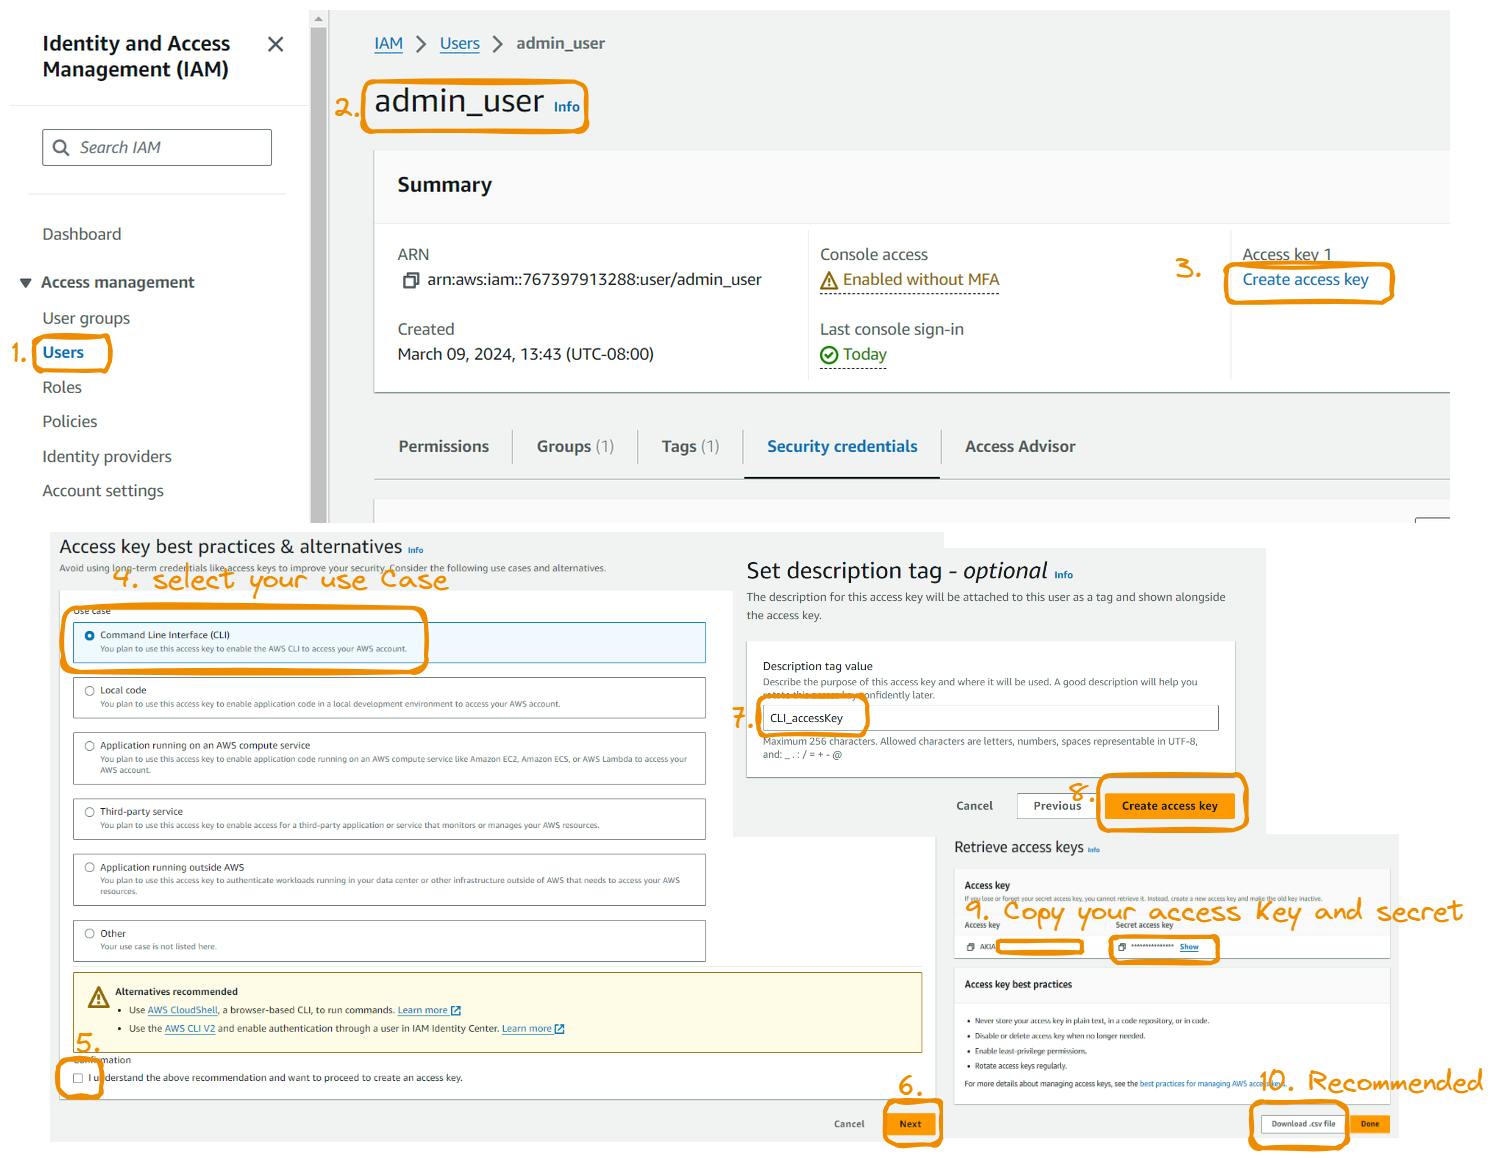
Programmatic Access with Access Keys:
Creating an Access Key:
In the IAM dashboard, click on "Users" in the left-hand menu.
Select the user for whom you want to create an access key.
Click on the "Security credentials" tab.
Under "Access keys," click on "Create access key."
Make note of the access key ID and secret access key that are generated. These will be needed to authenticate with the AWS CLI.
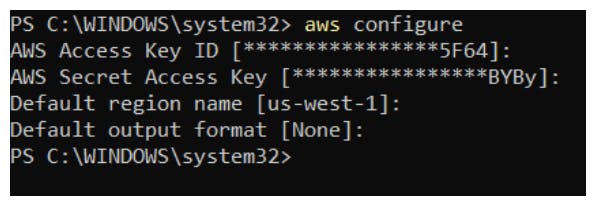
Using Access Key with the AWS CLI:
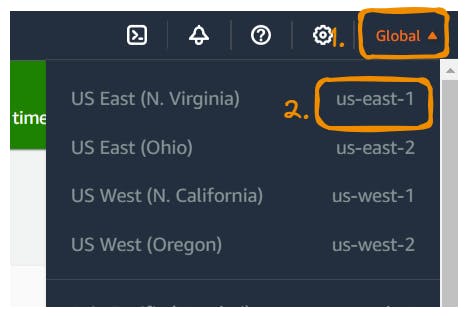
Make a note of your region name. It will be required
Install and configure the AWS CLI on your local machine if you haven't already done so.https://docs.aws.amazon.com/cli/latest/userguide/cli-chap-install.html
Open a terminal or command prompt.
confirm that AWS Cl is installed
aws --version
Use the
aws configurecommand to set up the AWS CLI with your access key ID, secret access key, AWS region, and default output format (JSON, text, or table).aws configureEnter your access key ID and secret access key when prompted, along with your preferred AWS region and output format.
Once configured, you can use the AWS CLI to interact with AWS services and resources using the permissions associated with the IAM user's access key.