
Amazon S3: Bucket Policy Hands-On | A Step-by-Step Guide
A step-by-step instructions for creating a bucket policy in Amazon S3 to allow public access to files

Experienced Technical developer with 6+ years' global collaboration.
Proficient in Python, Go, React, Next.js, Django, various databases, Cloud & DevOps (AWS EC2, Docker, Kubernetes), and Big Data tools.
Skilled in data structures and algorithm, API development, and end-to-end software engineering.
Excels in back-end development, front-end design, Root Cause Analysis, and product management to deliver superior user experiences.
Holds a master’s degree in computer engineering.
Here's a step-by-step guide for creating a bucket policy in Amazon S3 to allow public access to files:
Step 1: Navigate to Amazon S3 console
Open your web browser and go to the AWS Management Console at https://console.aws.amazon.com/.
Sign in to your AWS account using your credentials.
Once logged in, locate and click on "S3" under the "Storage" category. This will open the Amazon S3 console.
Step 2: Create S3 Bucket
Ensure you have created your S3 bucket. If not, follow the steps outlined in the "AWS S3 Console Hands-On | A Step-by-Step Guide" tutorial available at: https://partnerpens.hashnode.dev/aws-s3-console-hands-on-a-step-by-step-guide
Step 3: Navigate to Bucket Settings
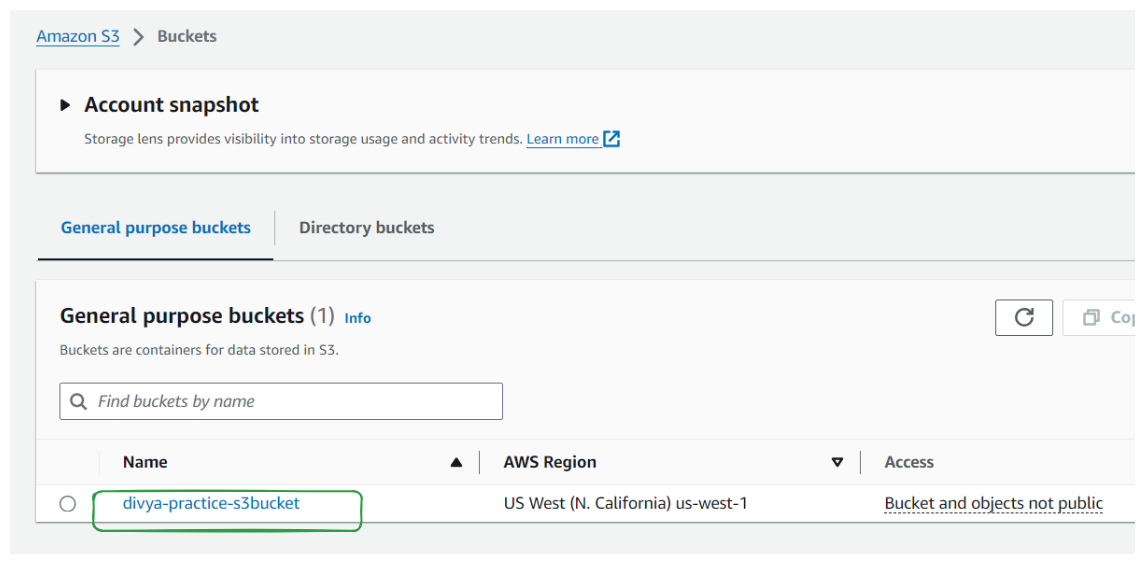
In the S3 console, you'll see a list of your buckets. Click on the name of the bucket you want to apply the policy to. If you have many buckets, you may need to scroll or use the search bar to find the desired bucket.
Select the bucket you want to apply the policy to.
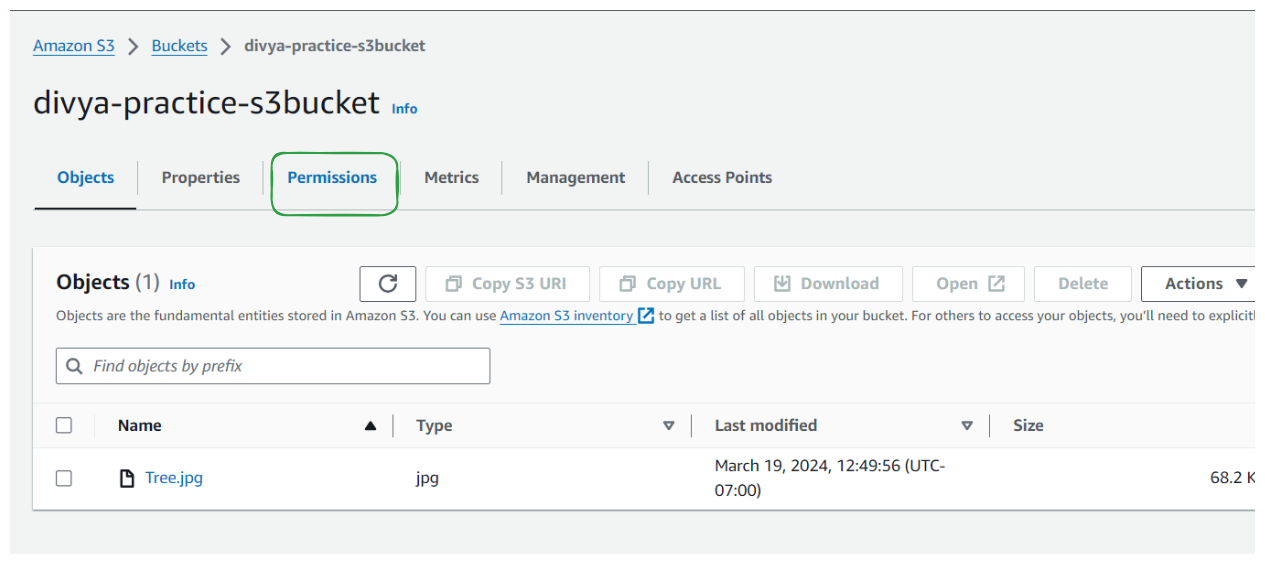
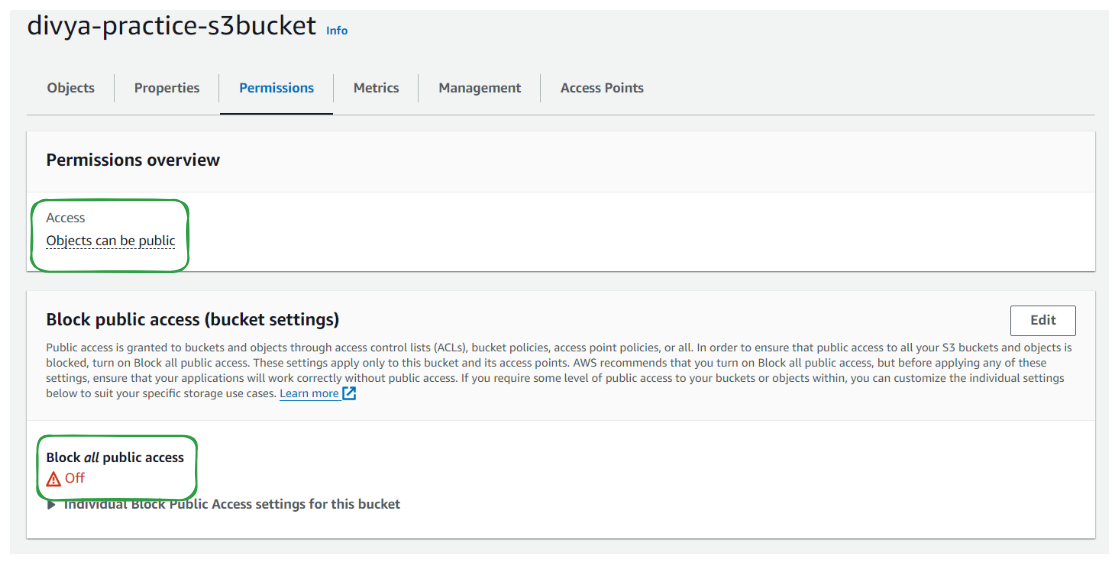
Click on the "Permissions" tab.
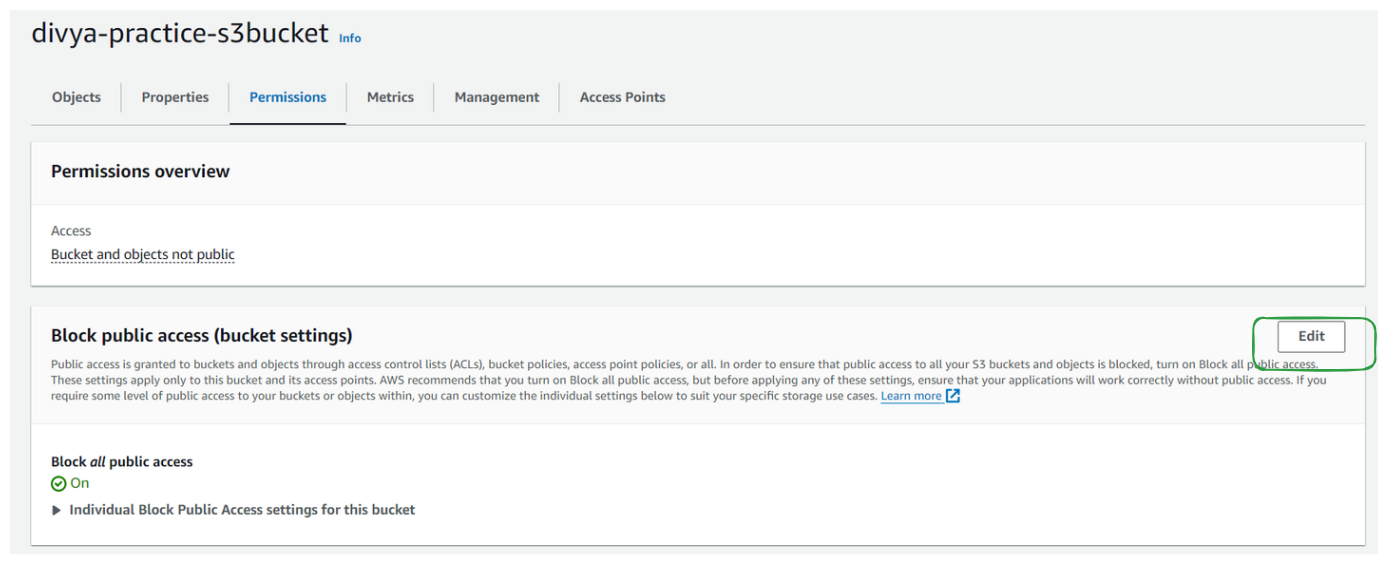
Step 4: Allow Public Access
Under the "Public access settings for this bucket" section, click on "Edit".
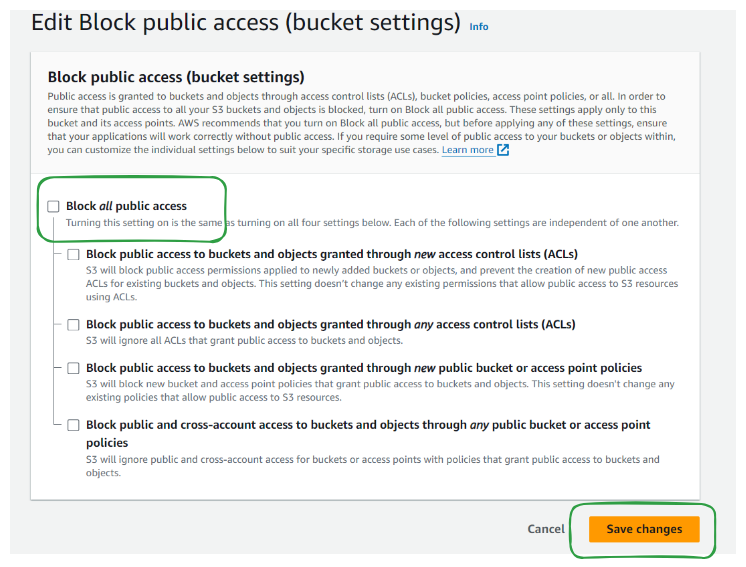
Untick the option that restricts public access to the bucket.
Confirm the change by clicking "Save".
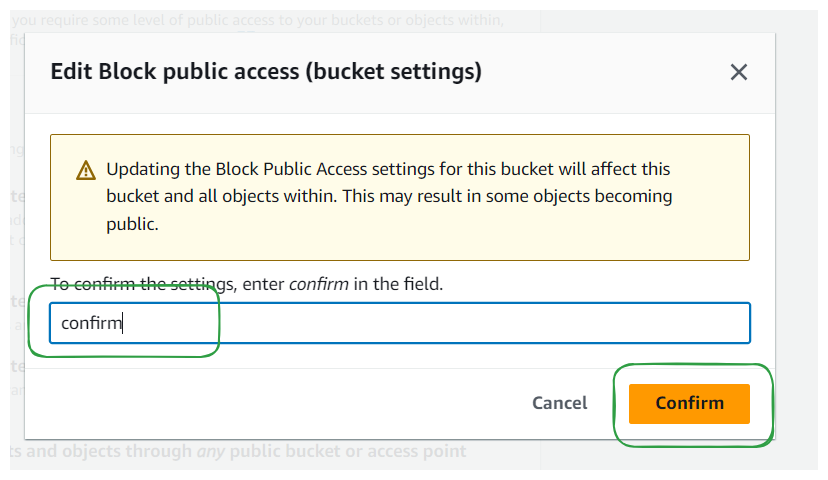
Note: This action allows public access to the bucket, so use it with caution, ensuring it's appropriate for your use case.
To confirm the settings, enter confirm in the field. and click confirm button
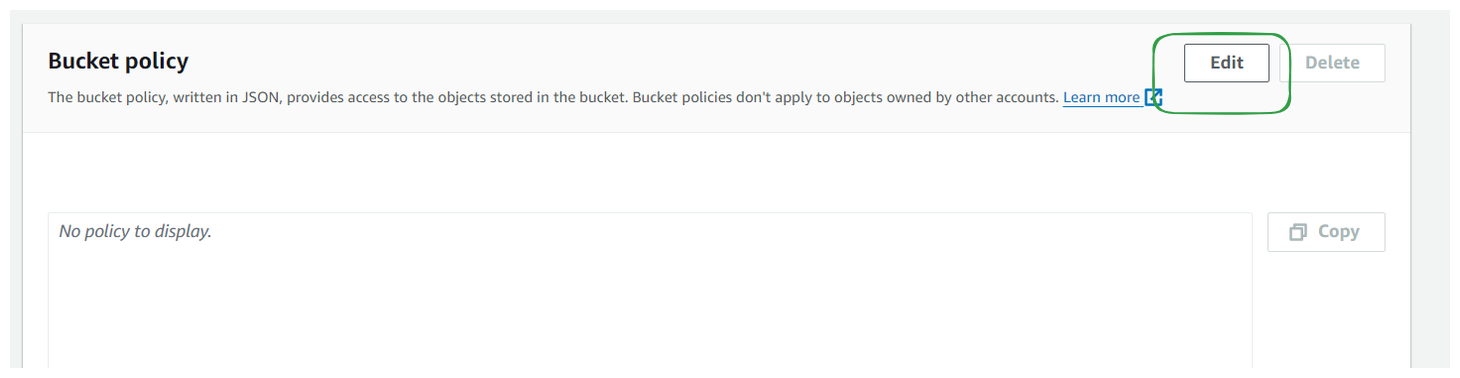
Step 5: Create Bucket Policy
Scroll down to the "Bucket policy" section.
Since there's no policy currently, click on "Edit bucket policy".
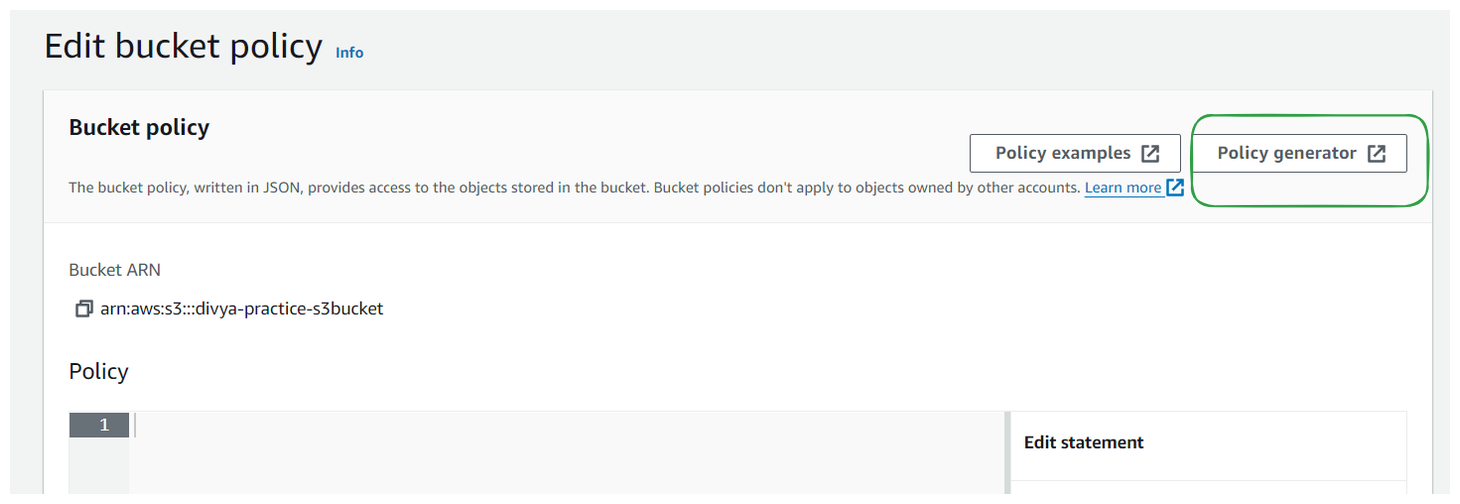
You can explore example policies provided in the documentation, but for this guide, we'll use the Policy Generator.
Step 6: Use Policy Generator
Click on "Policy Generator" to open the AWS Policy Generator.
Select the policy type as "S3 Bucket Policy".
For the Principal, enter "*", indicating access for anyone.
Choose the action "GetObject" to allow reading objects from the bucket.
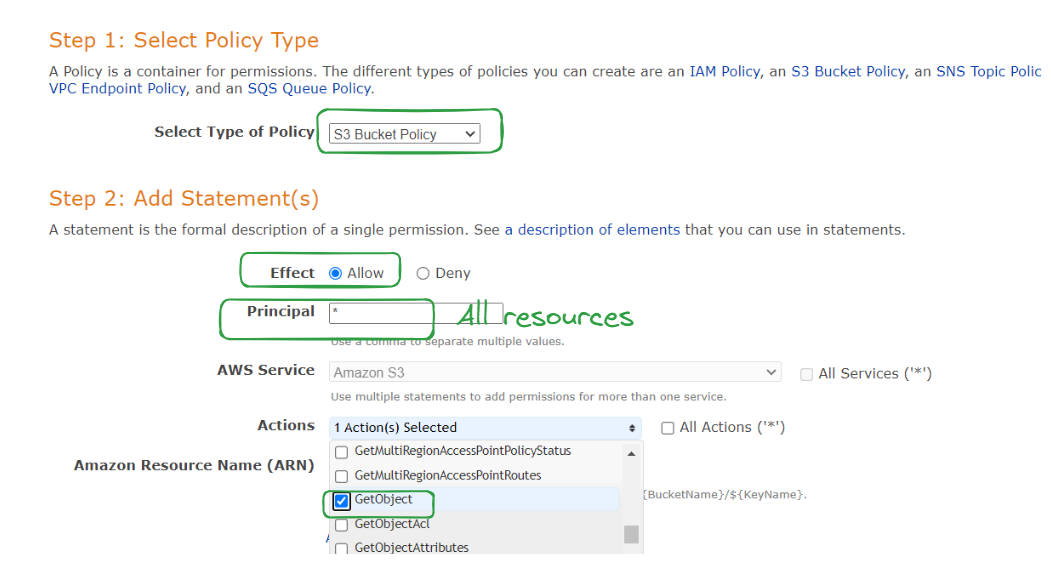
Specify the Amazon Resource Name (ARN) as the bucket name followed by "/" to apply to all objects within the bucket. Example ARN: arn:aws:s3:::your-bucket-name/
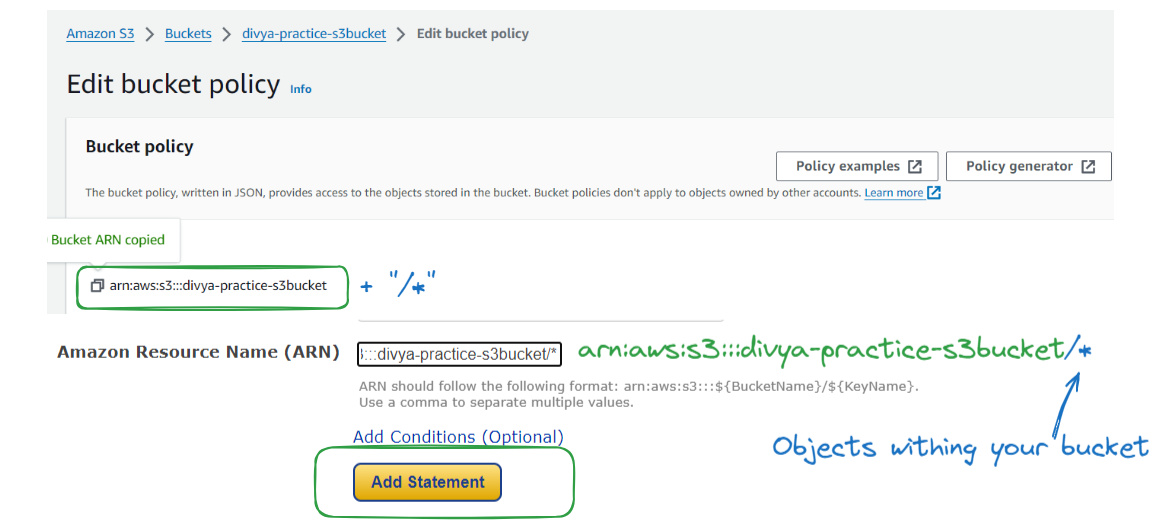
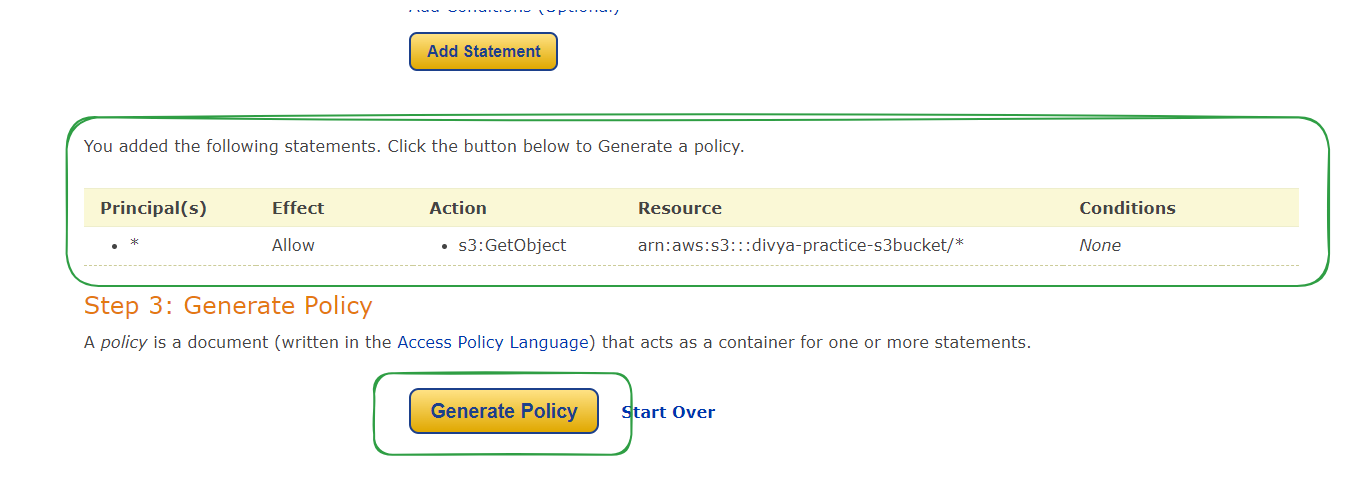
Generate the policy.
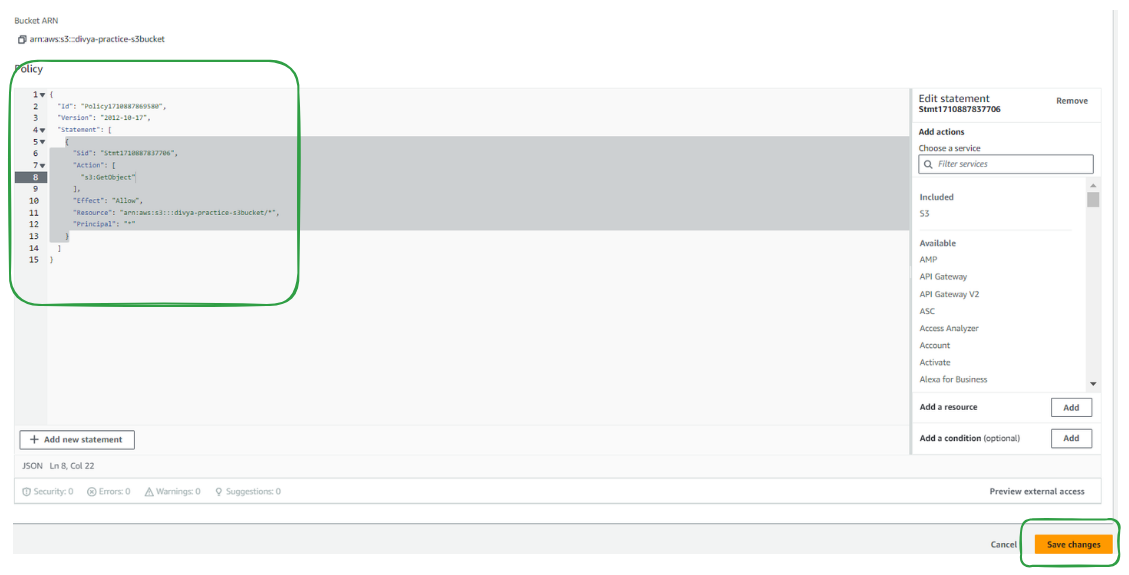
Step 7: Apply Policy
Copy the generated policy from the Policy Generator.
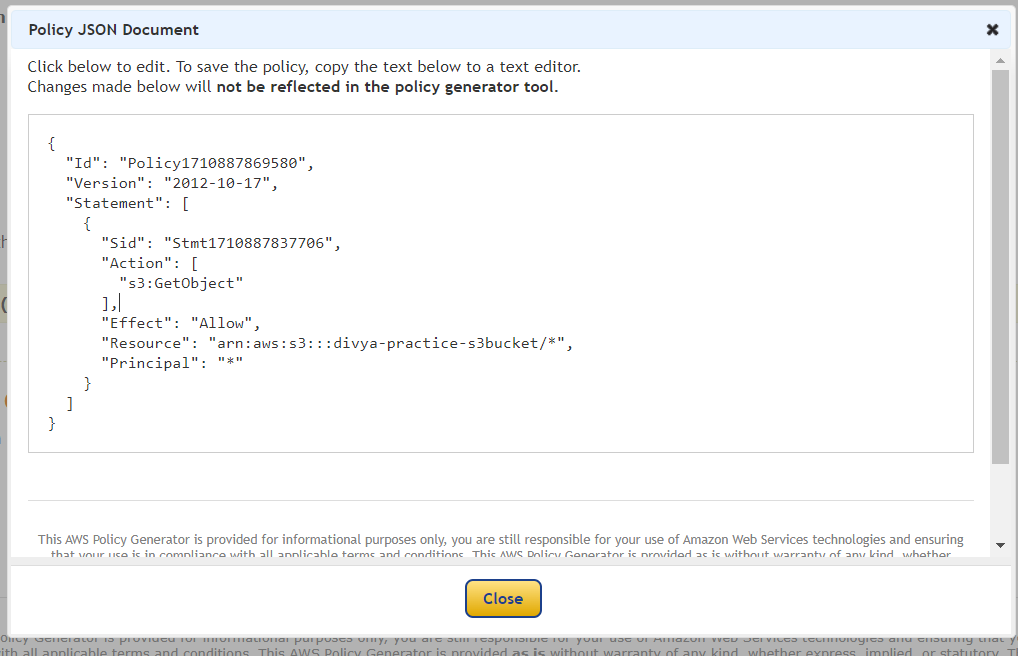
Paste the policy into the bucket policy editor in the S3 console.
Save the changes.
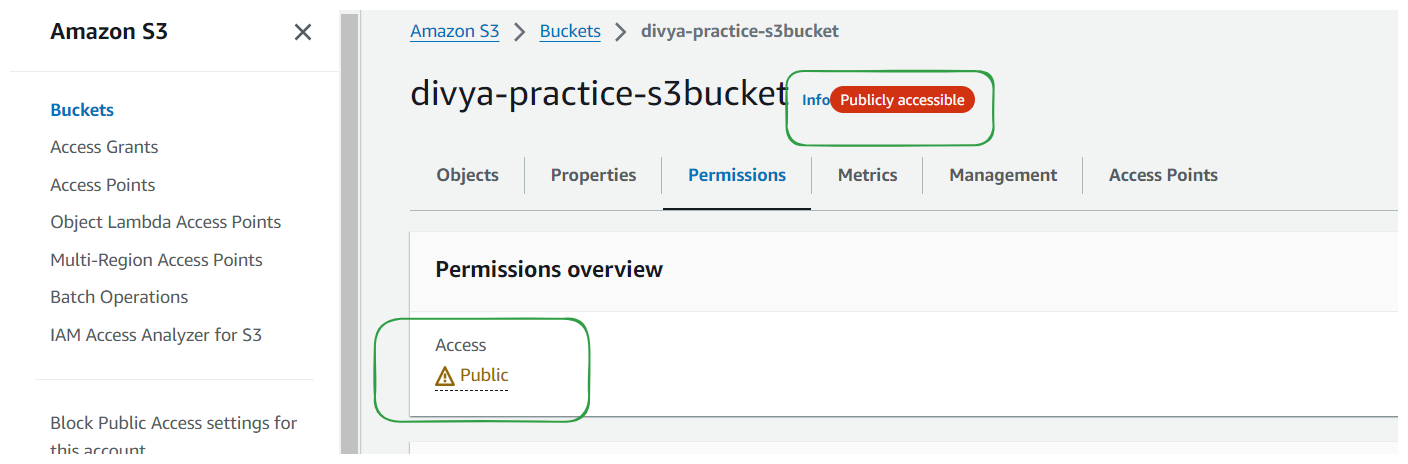
Step 8: Verify Public Access
Confirm that the access is set to public under the "Permissions" tab.
Copy the public URL of an object inside the bucket
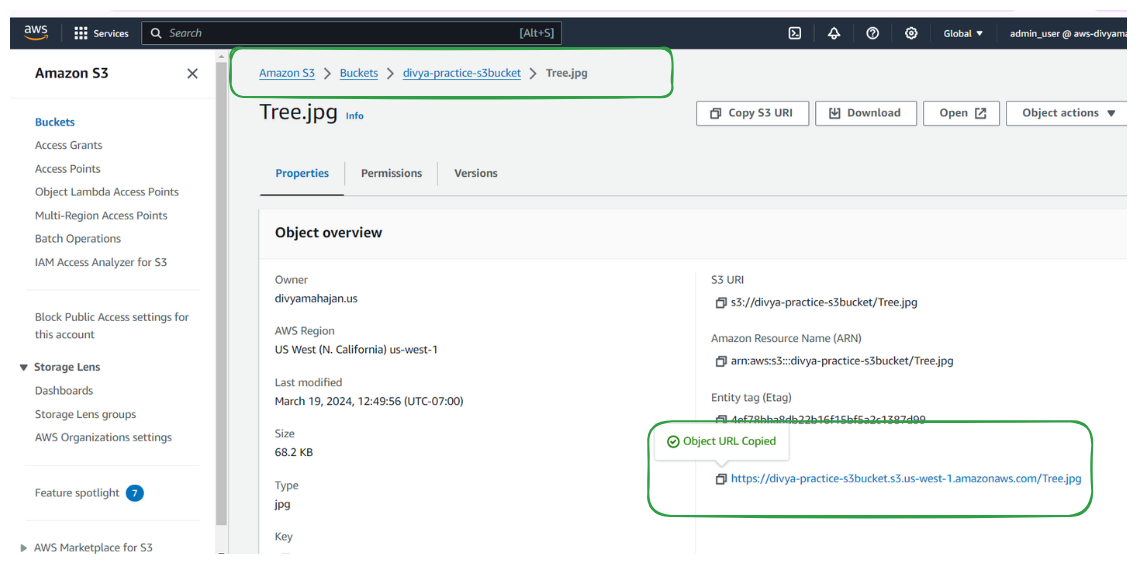
Paste the public URL of an object in the bucket in browser to ensure it's accessible from anywhere on the internet. Example: https://s3.amazonaws.com/your-bucket-name/your-file.jpg

Conclusion
Your bucket is now publicly accessible, and any files uploaded to it will be accessible using their public URLs.
Ensure that this level of access aligns with your security requirements and use case.
That concludes the process of creating a bucket policy to allow public access to files stored in Amazon S3.


