AWS Snow Family: Hands-On | A Step-by-Step Guide
A step-by-step instructions on Leveraging AWS Snow Family Services
Table of contents
- Step 1: Order a Snow Family Device
- Step 2: Select Snow Device Type
- Step 3: Choose Pricing Option and Storage Types
- Step 4: Specify Data Loading Destination
- Step 5: Configure Features and Options
- Step 6: Choose Encryption Options
- Step 7: Grant Access and Define Shipping Details
- Step 8: Review Job Summary
- Conclusion:
Step 1: Order a Snow Family Device
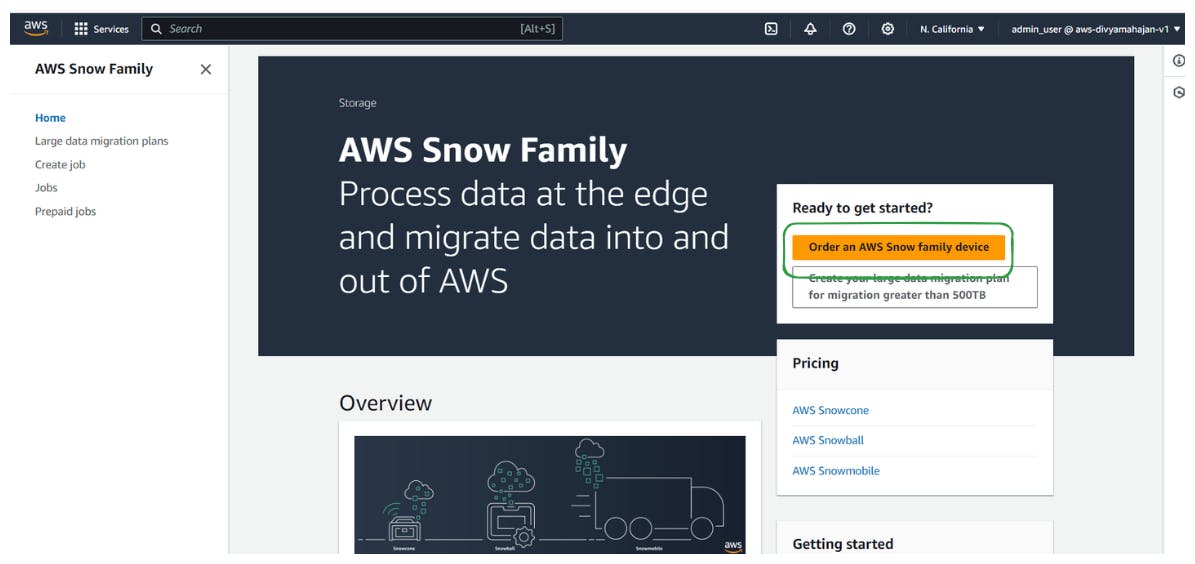
Access the AWS Snow Family service from the AWS Management Console.

Click on "Order an AWS Snow family device"
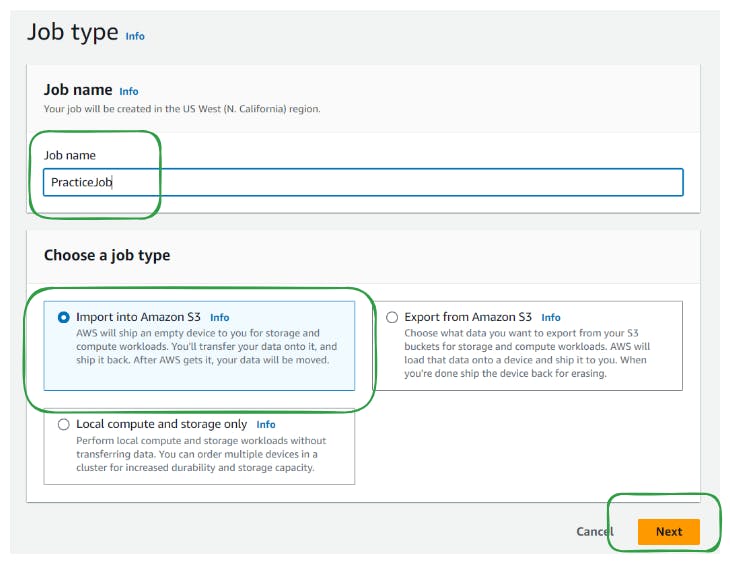
Name your job (e.g., "PracticeJob") and select the job type.
Choose from various job types, including importing data into Amazon S3, exporting data from Amazon S3, local compute and storage only, or importing virtual tapes into AWS Storage Gateway.
Step 2: Select Snow Device Type
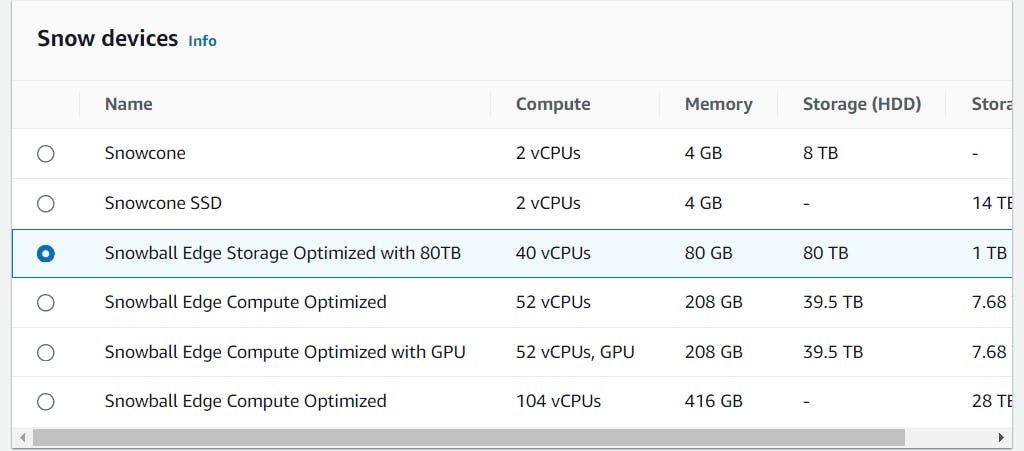
Choose from available Snow devices, such as Snowcone, Snowcone SSD, Snowball Edge Storage Optimized, Snowball Edge Compute Optimized, or Snowball Edge Compute Optimized with GPUs, based on your requirements.
Step 3: Choose Pricing Option and Storage Types
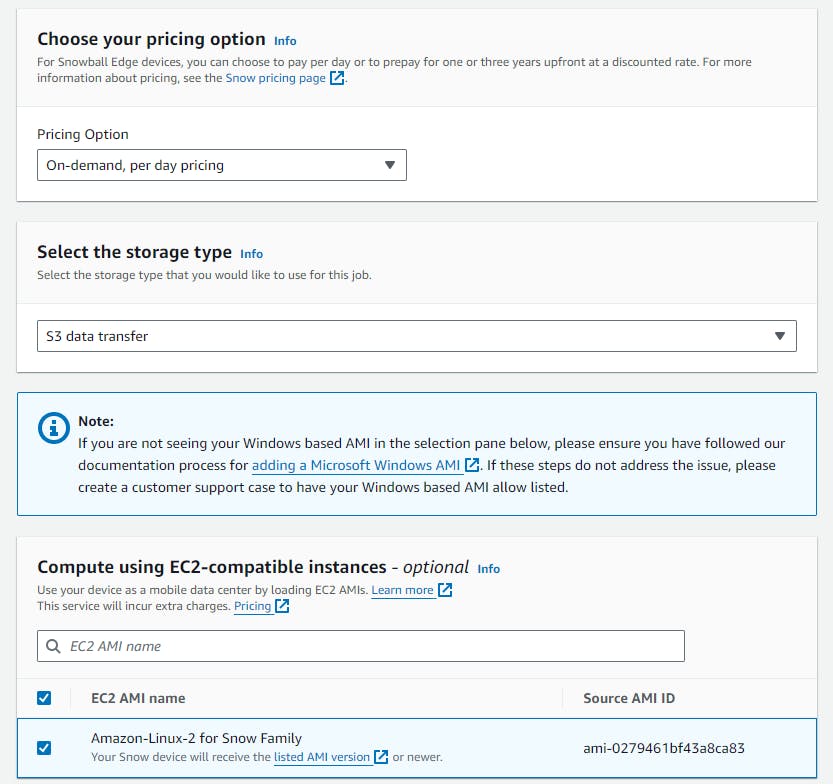
Select a pricing option (on-demand, monthly, or commitment for one or three years) and specify the storage types (S3 data transfer) for the Snow device.
Choose the appropriate Amazon Machine Image (AMI) for the compute instance on the Snow device.
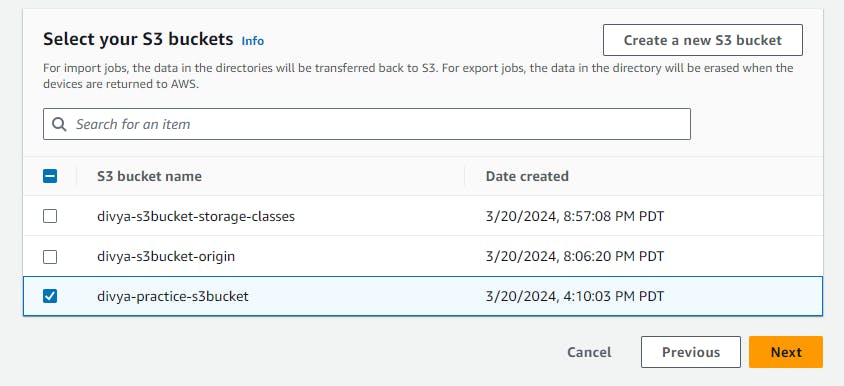
Step 4: Specify Data Loading Destination
Specify the destination S3 bucket where the data will be loaded onto the Snow device.
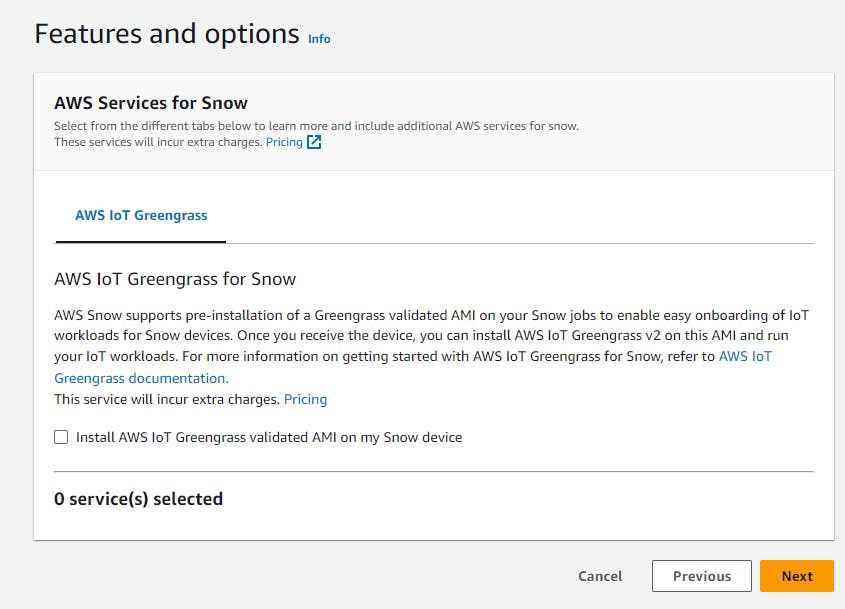
Step 5: Configure Features and Options
Optionally, configure additional features such as IoT Greengrass for IoT capabilities on the Snow device, and remote device management using OpsHub or Snowball Clients.
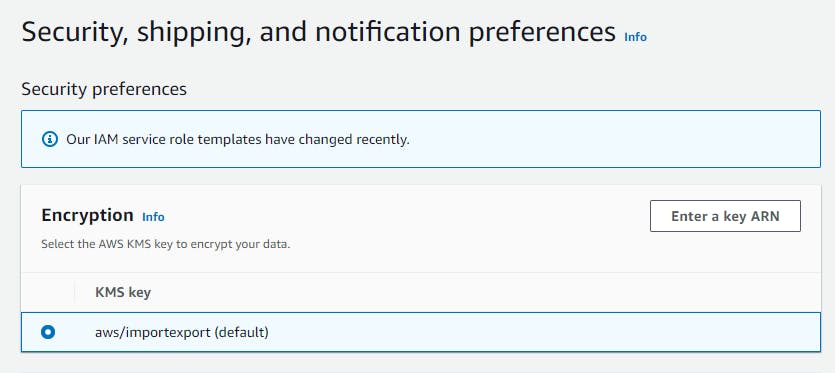
Step 6: Choose Encryption Options
Select the encryption type for the Snowball device, including the option to use a custom AWS Key Management Service (KMS) key for encryption.
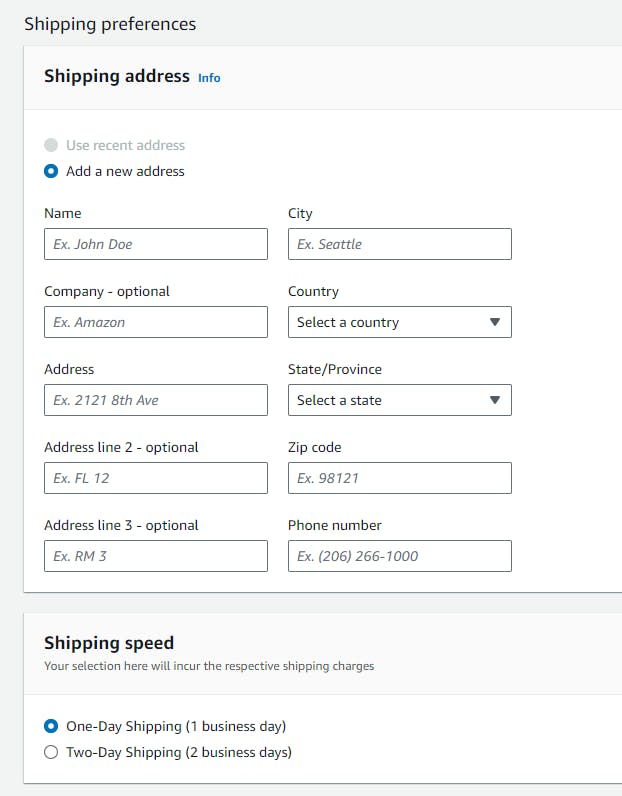
Step 7: Grant Access and Define Shipping Details
Create a service role to grant access to Amazon S3 and Simple Notification Service (SNS) for publishing actions and sending data.

Provide shipping details, including the destination address, shipping speed, and SNS notification preferences for job status changes.
Step 8: Review Job Summary
- Review the job summary to ensure all configurations are accurate before proceeding with the Snow Family job.
Conclusion:
AWS Snow Family services offer a range of options for importing and exporting data between on-premises environments and the AWS Cloud.
Snow devices provide remote compute capabilities and can be tailored to specific use cases based on storage and compute requirements.
Familiarize yourself with the different Snow device types and their respective features to choose the most suitable option for your data migration needs.
