

AWS EC2 EBS Hands-On | A Step-by-Step Guide
A step-by-step instructions on EC2 Instance Storage: EBS (Elastic Block Store)


Create New EBS (Elastic Block Store) Volume
In the EC2 dashboard, locate and click on "Volumes" in the left-hand sidebar under the "Elastic Block Store" section.
Click on the "Create Volume" button.
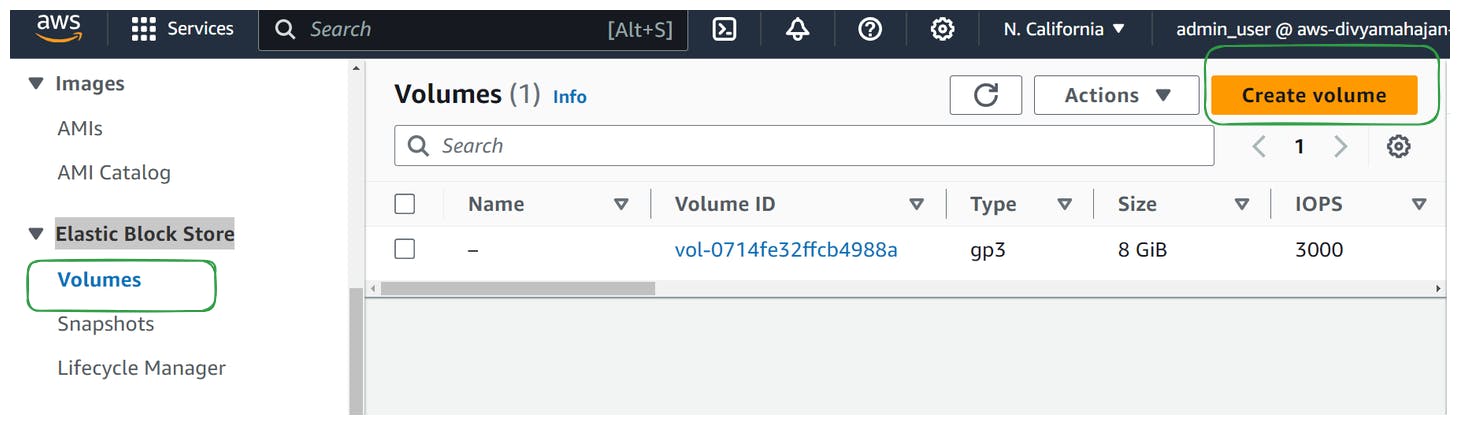
Select Volume Type, Size, Select availability zone same as your instance, tags, encryption( if required) and create.

Click on the "Create" button to create your new security group.
Attach the Volume to EC2 Instance
In the EC2 dashboard, locate and click on "Volumes" in the left-hand sidebar under the "Elastic Block Store" section.
Select the newly created Volume from the volume dashboard.
Click on the "Actions" dropdown menu and choose "Attach Volume".
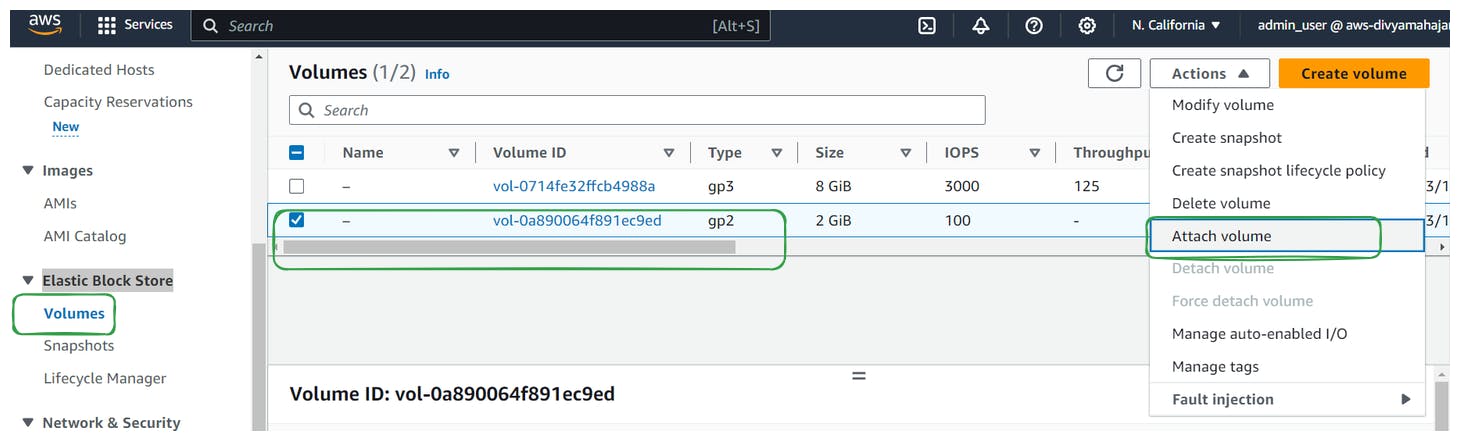
Select the instance(s) you want to associate with the Volume and click "Attach Volume."

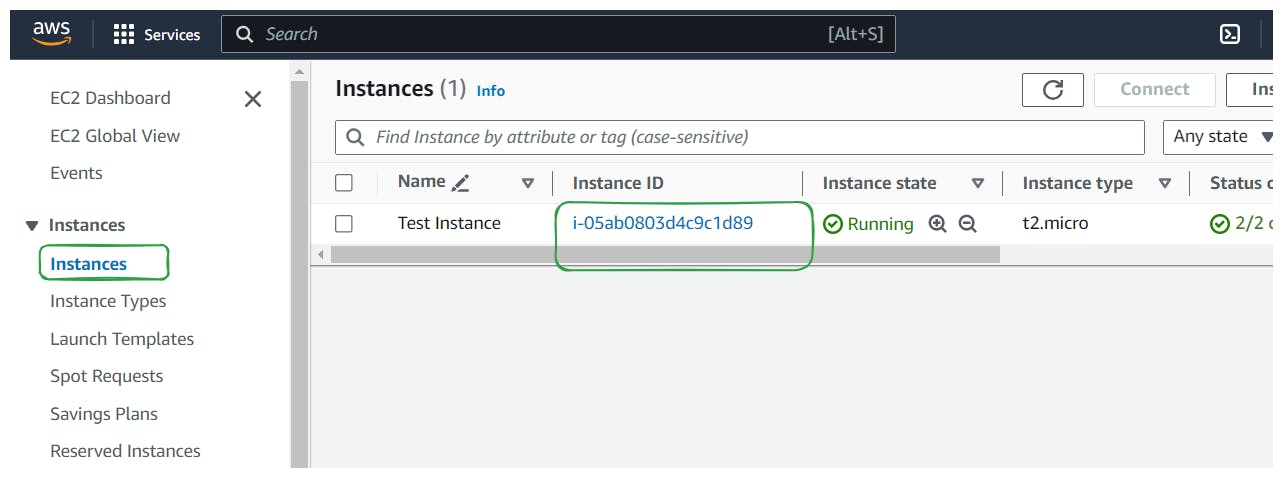
Review EC2 Instance
In the EC2 dashboard, locate and click on "Instance" in the left-hand sidebar under the "Instances" section.
Go to you running Instance from Instances Interface's list
Go to storage Tab, where you should be seeing newly attached Volume
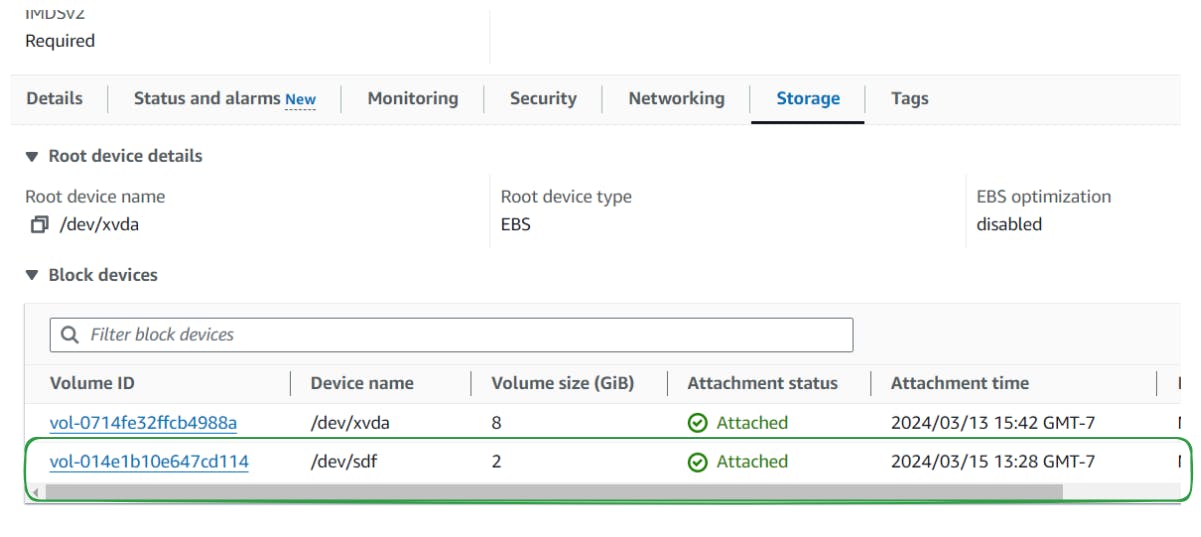
We created 8GiB Volume and the default ID was attached by default. We can analyze the existing EBS volumes, attached to our instance by default

You can scroll all the way to the right to check the "Delete on termination flag" which is by default on for root volume.

Let's click on the Volume ID

We reached Volume interface with our Volume Id's filter. Let's go inside it
Click on the Volume ID and analyze it

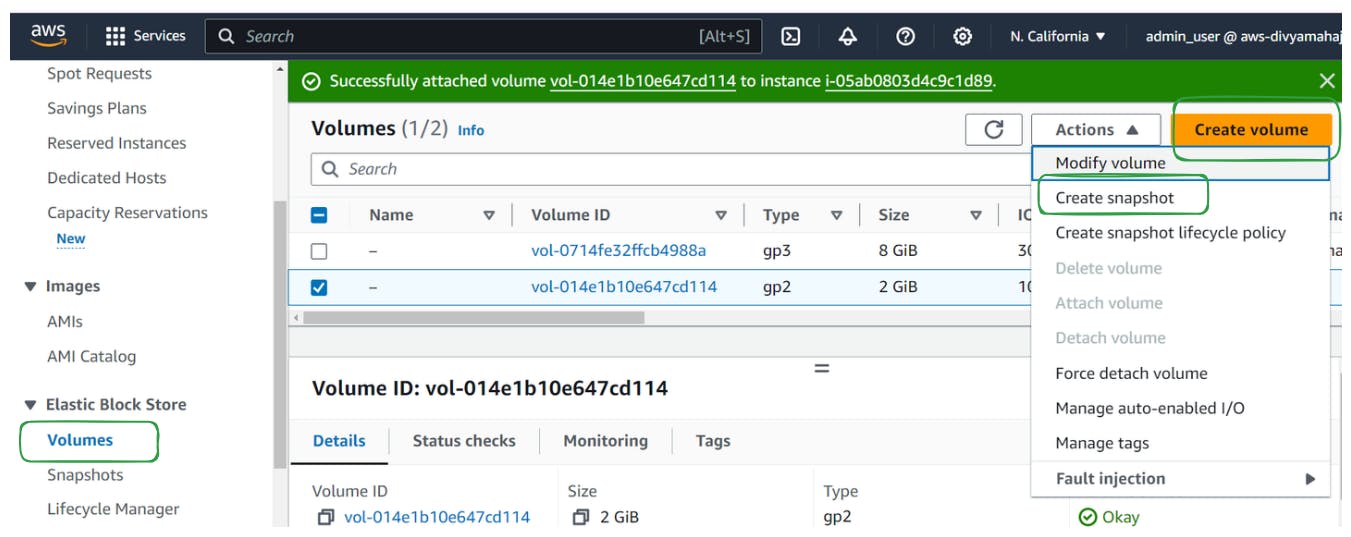
Create EBS Snapshots
In the EC2 dashboard, locate and click on "Volumes" in the left-hand sidebar under the "Elastic Block Store" section.
Select the newly created Volume from the volume dashboard.
Click on the "Actions" dropdown menu and choose "Create Snapshot".
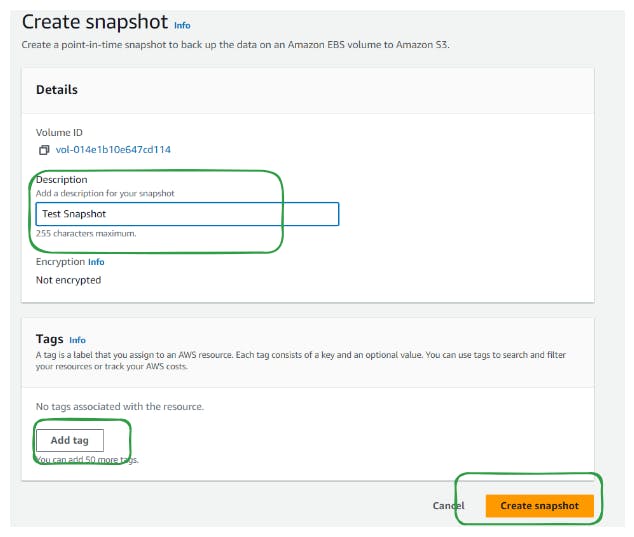
Add Description, Tags, and click Create Snapshot
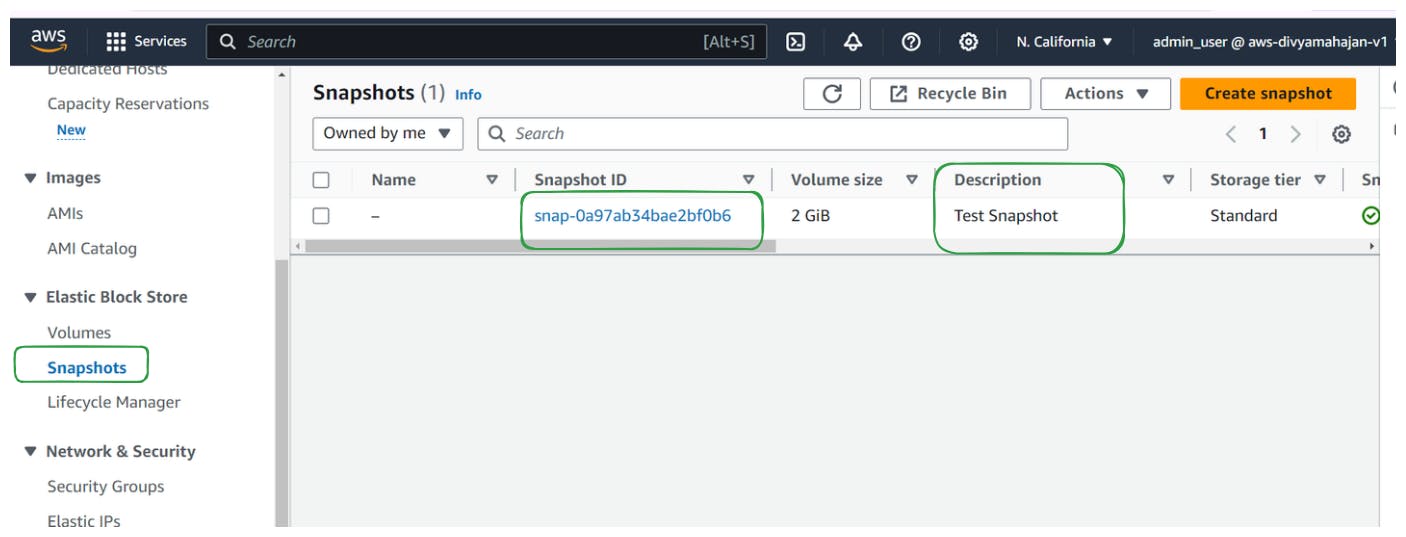
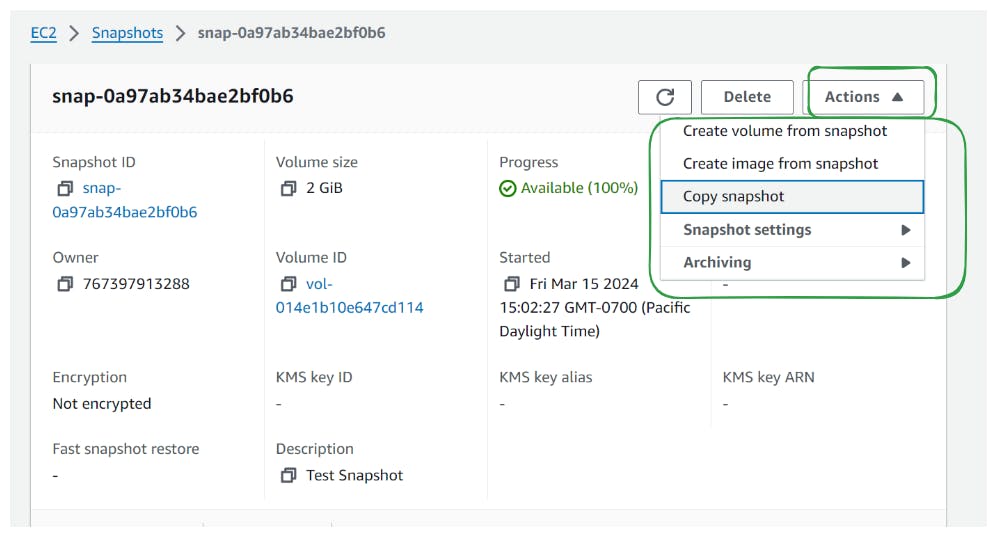
Review the snapshots in the "Snapshots" tab and then click on the desired created snapshot to review it
Now you can click on "Actions" and
Create Volumes of snapshots
create a copy to another region
create image from snapshots
This is very handy for backup and restore, in case of disaster to create a duplicate volume from last backed up stage of the Volume via snapshot.
Create Retention Rule of Recycle Bin
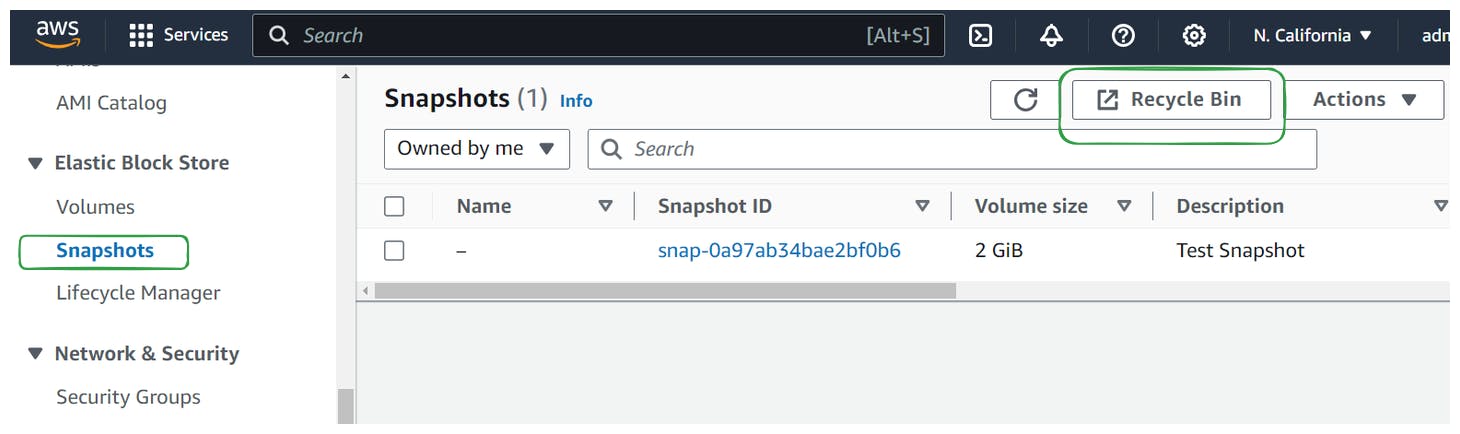
In the EC2 dashboard, locate and click on "Snapshots" in the left-hand sidebar under the "Elastic Block Store" section.
Click on "Recycle Bin"
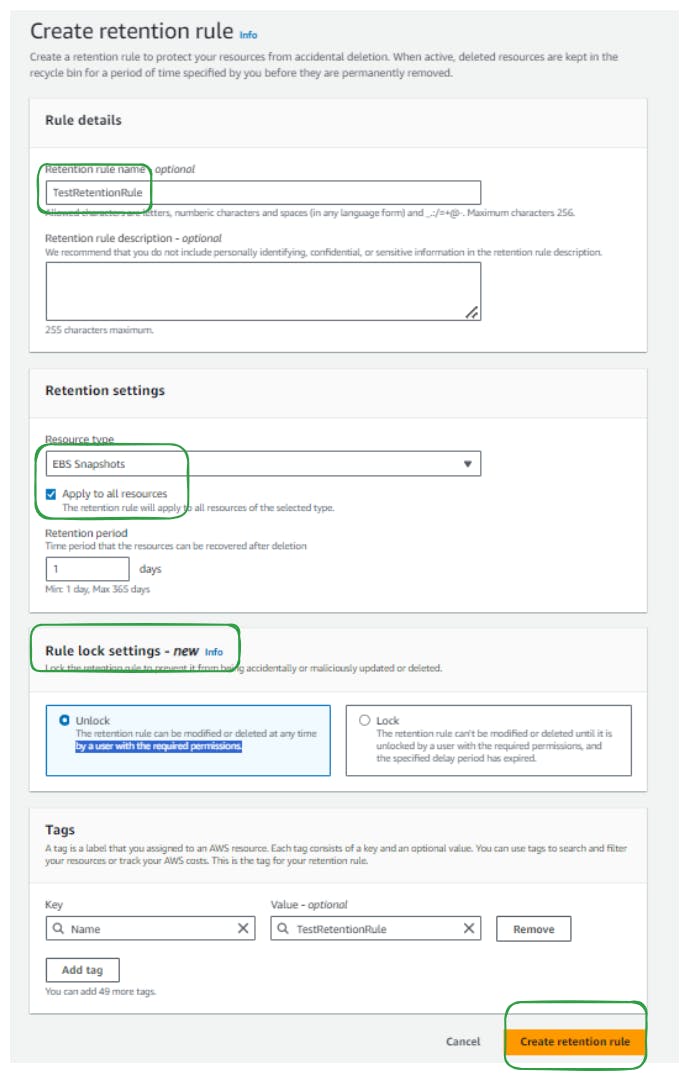
Click on "create retention rule"

Add Retention rule name
Add Retention settings like Resource type as snapshots or AMI Images
You can choose resources or apply to all resource, and add Retention period Rule
Lock settings allow you to locked where the retention rule can't be modified or deleted or unlocked to modify and delete any time by a user with the required permissions.
Click on create
To Test it Let's delete our snapshot
In the EC2 dashboard, locate and click on "Snapshots" in the left-hand sidebar under the "Elastic Block Store" section.
Select the snapshot to be deleted
Go to "Actions" and click "Delete snapshot"

Let's go back to "Recycle Bin" and review it in the resources of Recycle Bin
We can select and click on "recover" for recovery
