
Amazon S3 Versioning: Hands-On | A Step-by-Step Guide
A step-by-step instructions on exploring Versioning in Amazon S3

Experienced Technical developer with 6+ years' global collaboration.
Proficient in Python, Go, React, Next.js, Django, various databases, Cloud & DevOps (AWS EC2, Docker, Kubernetes), and Big Data tools.
Skilled in data structures and algorithm, API development, and end-to-end software engineering.
Excels in back-end development, front-end design, Root Cause Analysis, and product management to deliver superior user experiences.
Holds a master’s degree in computer engineering.
Step 1: Navigate to Amazon S3 console
Open your web browser and go to the AWS Management Console at https://console.aws.amazon.com/.
Sign in to your AWS account using your credentials.
Once logged in, locate and click on "S3" under the "Storage" category. This will open the Amazon S3 console.
Step 2: Create S3 Bucket and host Static website
Ensure you have created your S3 bucket. If not, follow the steps outlined in the "AWS S3 Console Hands-On | A Step-by-Step Guide" tutorial available at: S3 Console Hands-On | A Step-by-Step Guide
For Testing It would be great if you create a static website. You can follow the steps outlined in the Amazon S3 Static Website Hosting: Hands-On | A Step-by-Step Guide
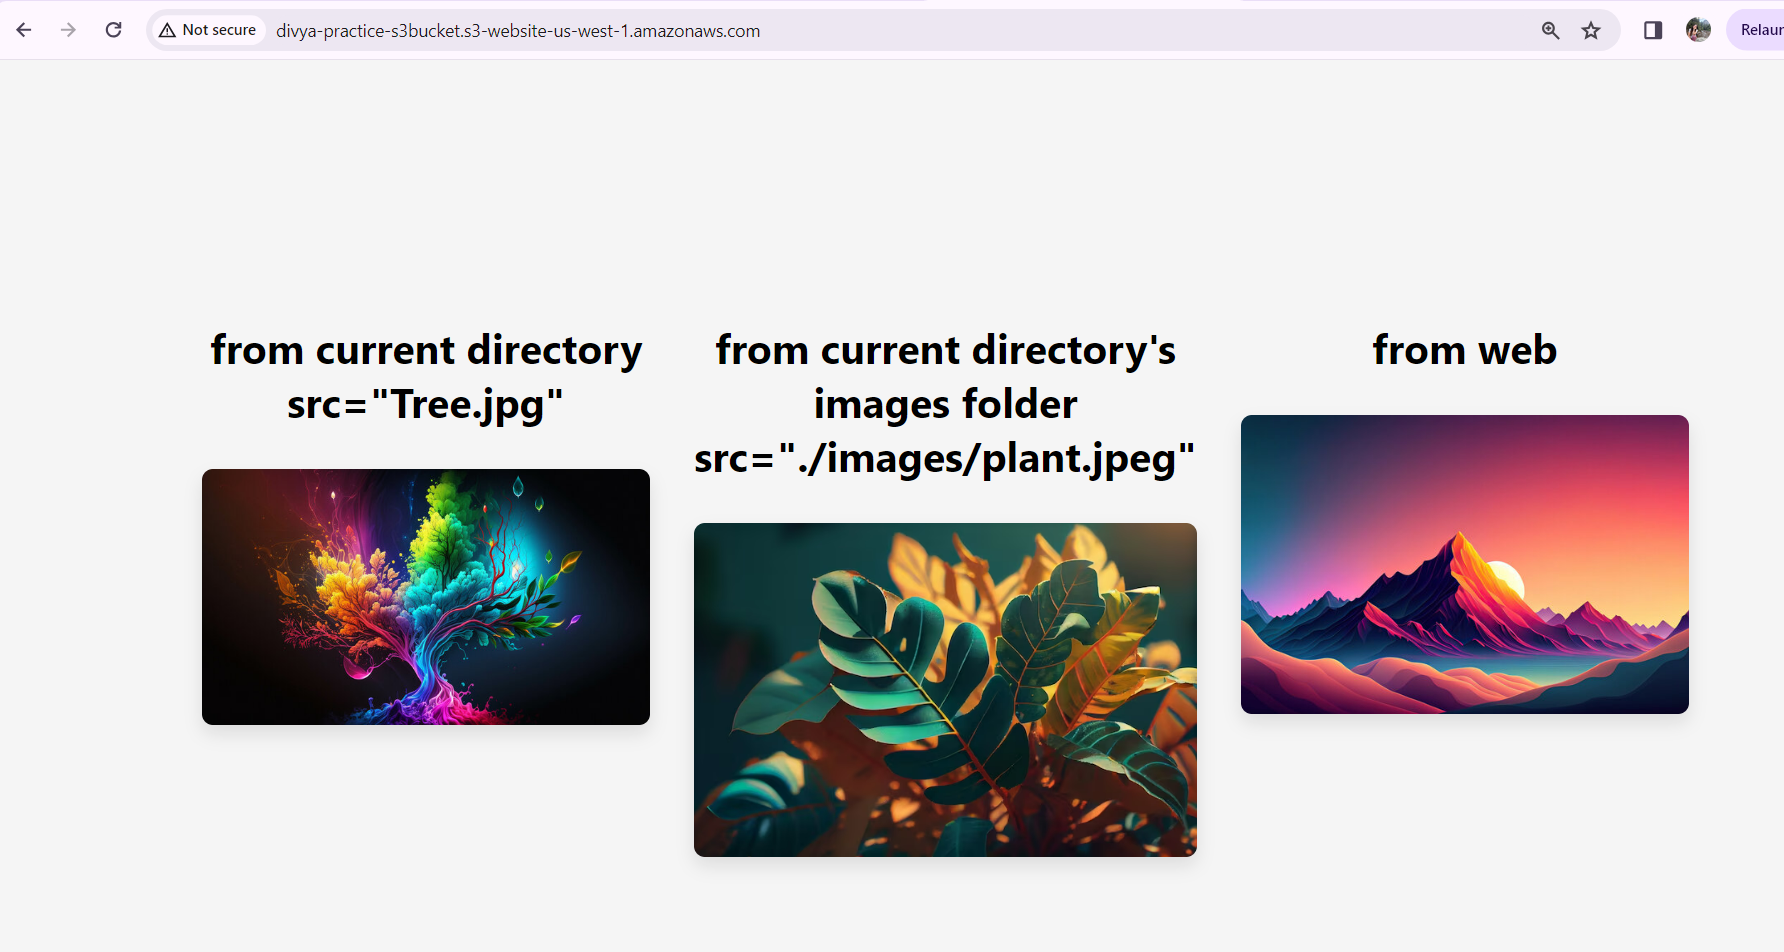
Your Static Website looks like below
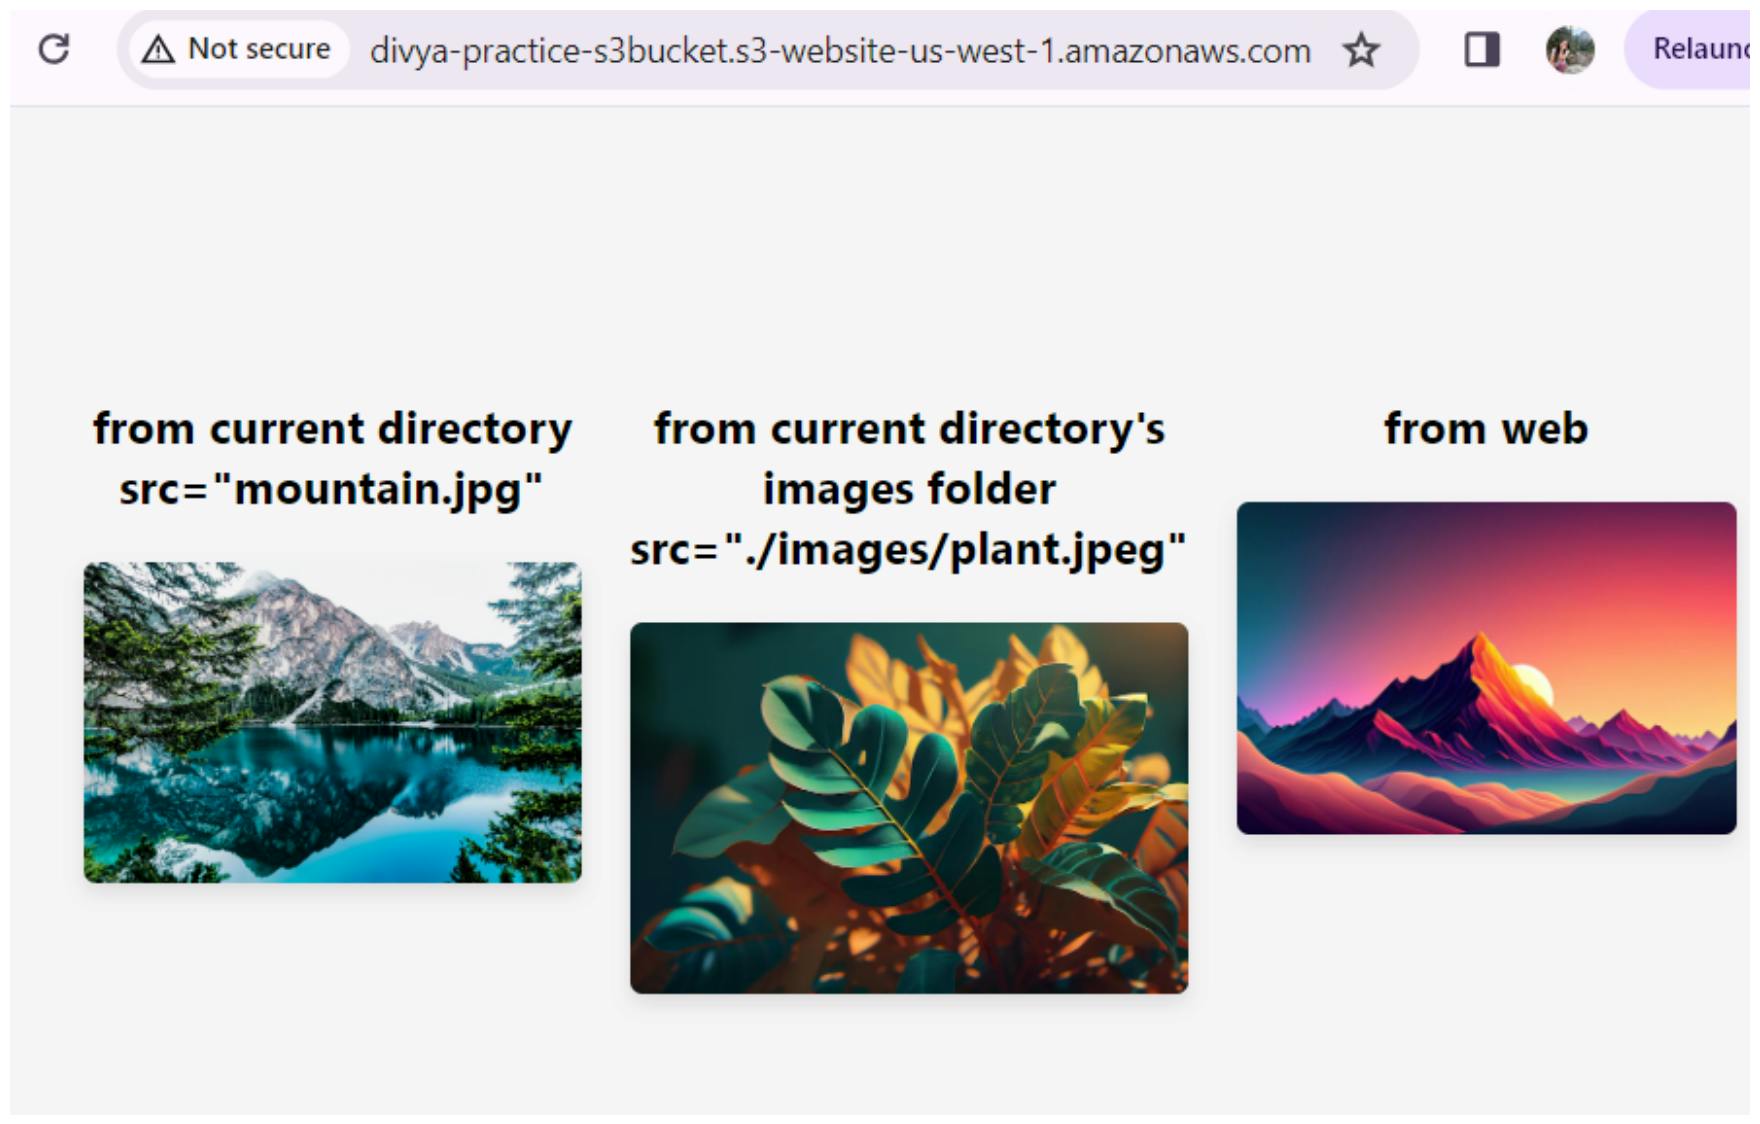
- You can see the updates
Step 3: Enable Bucket Versioning
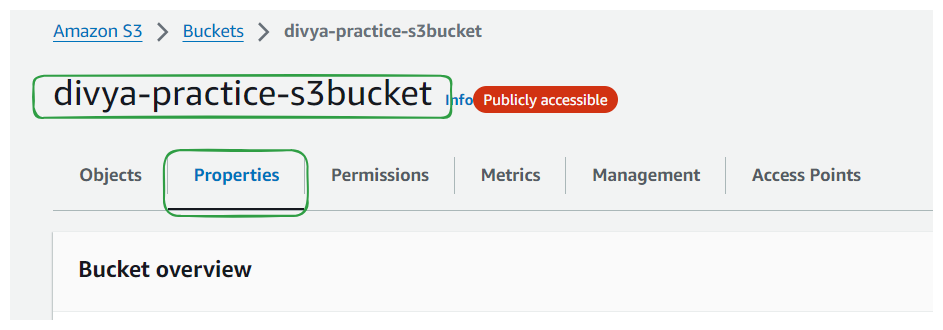
Navigate to your S3 bucket properties.
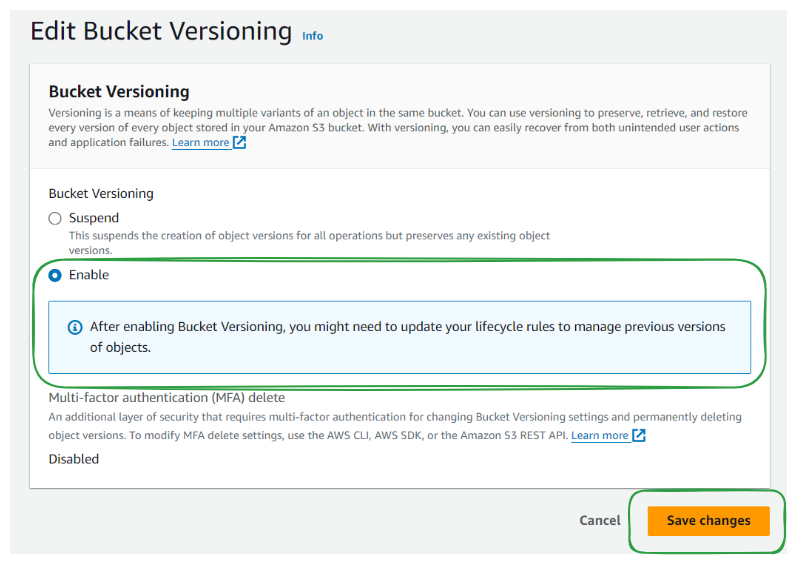
Find the "Bucket versioning" setting and edit it.

Enable versioning to allow the creation of multiple versions of files.
Step 4: Update Website Content
Locate the website URL and access the file you want to update (e.g., index.html).
We created this file in Step 4 while creating Static website
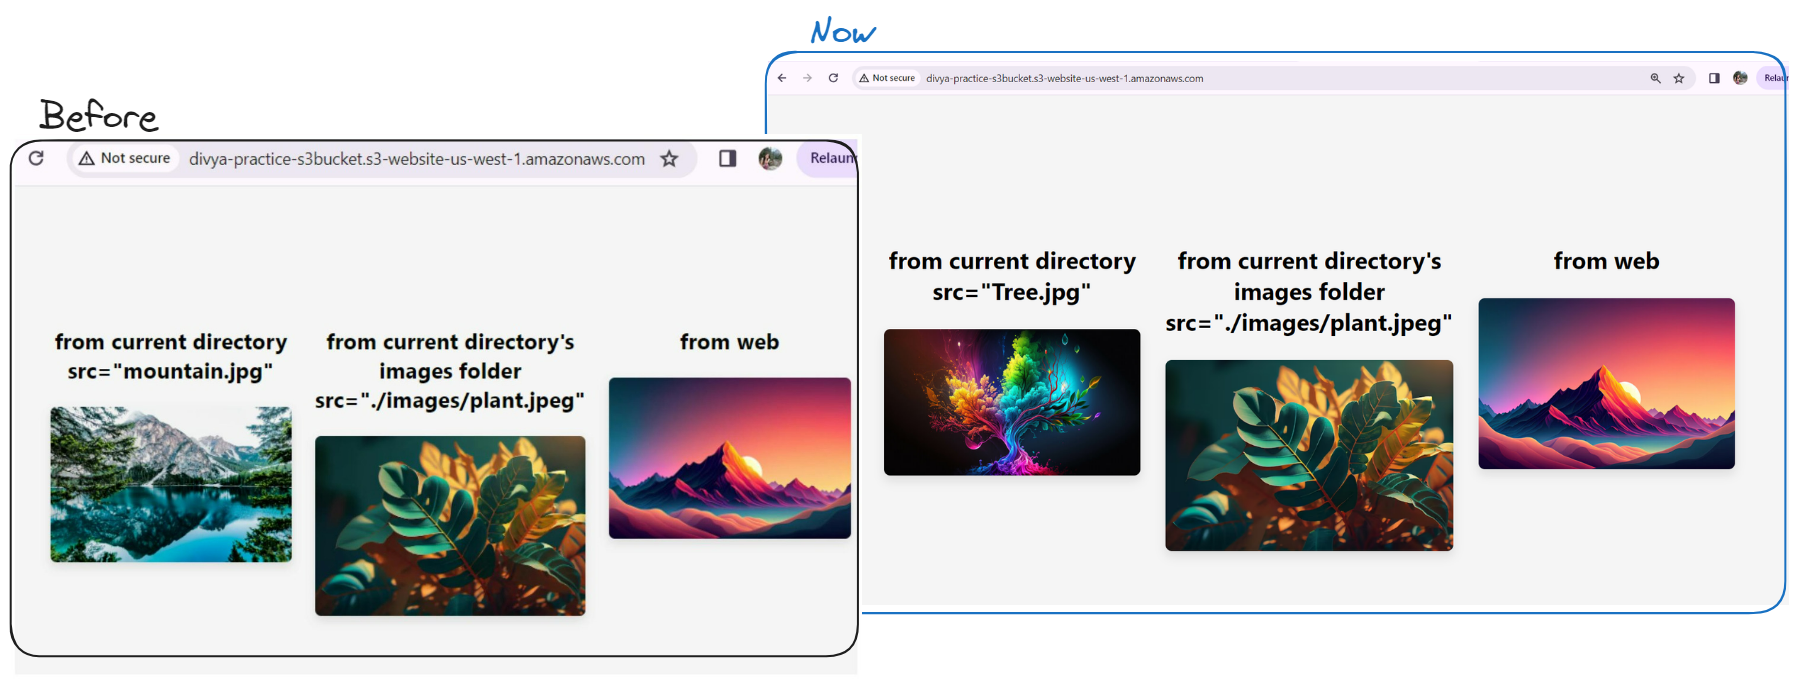
Edit the file content as desired (e.g., change
src="mountain.jpg"tosrc="tree.jpg").<!Same as existing code> <div class="column"> <h3>from current directory src="Tree.jpg" </h3> <img class="image" src="Tree.jpg" alt="Mountain from current directory"> </div> <!Same as existing code>Save the changes and re-upload the file to the bucket same as Step 5: Upload Index HTML File.
Step 5: Test the updated websites
Scroll down to the "Properties" section again and find the "Static website hosting" option.
Copy the bucket website endpoint URL provided.

Paste the bucket website endpoint URL into your browser's address bar and navigate to it.
Step 6: View File Versions
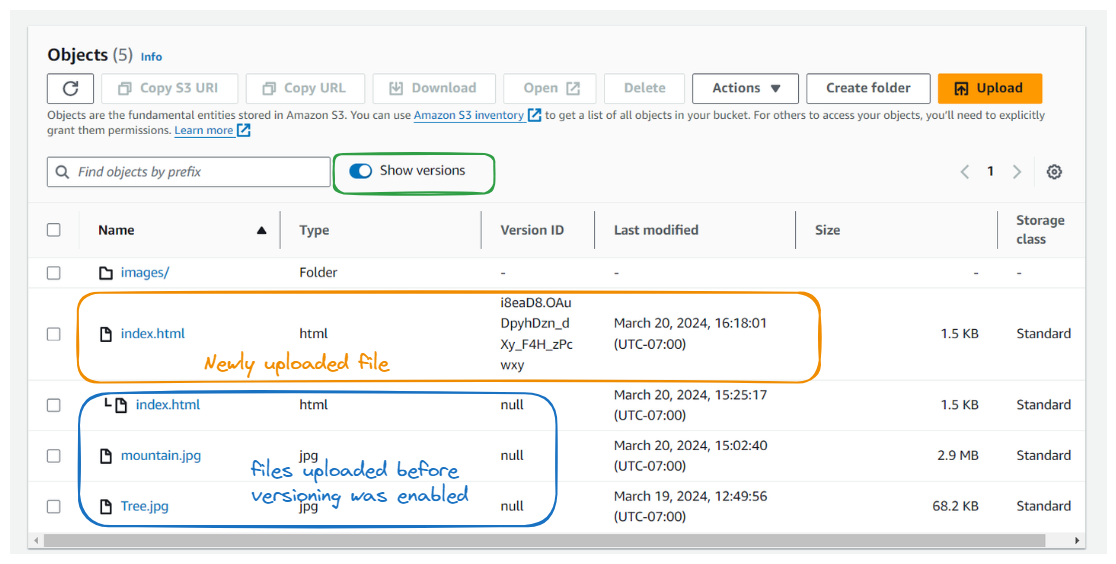
Enable the "Show versions" toggle to display version IDs for files.
Notice that files uploaded before versioning was enabled have a null version ID.
Newly uploaded files have unique version IDs.
Step 7: Rollback to Previous Version
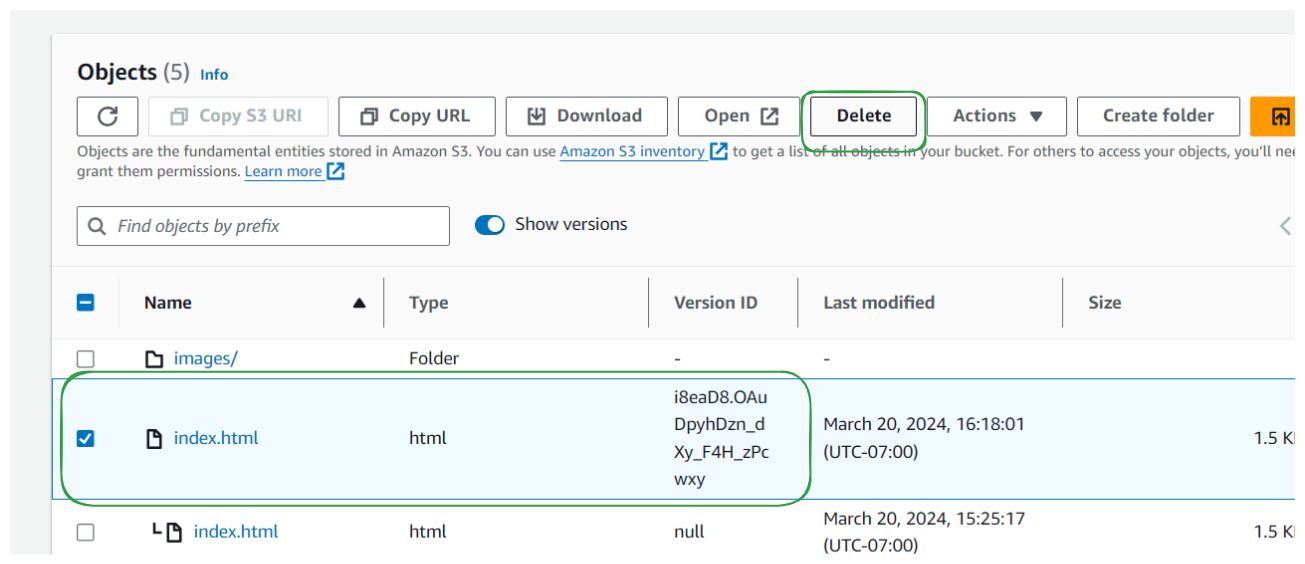
Select the specific version ID you want to rollback to (e.g., the version with "I love coffee").
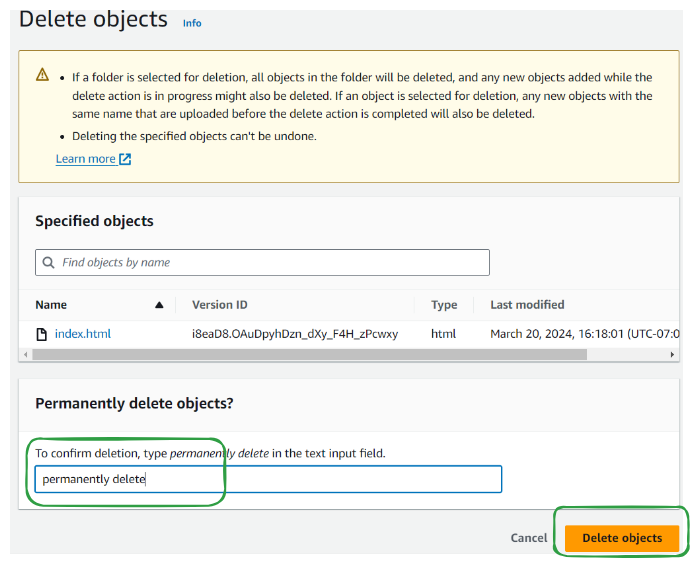
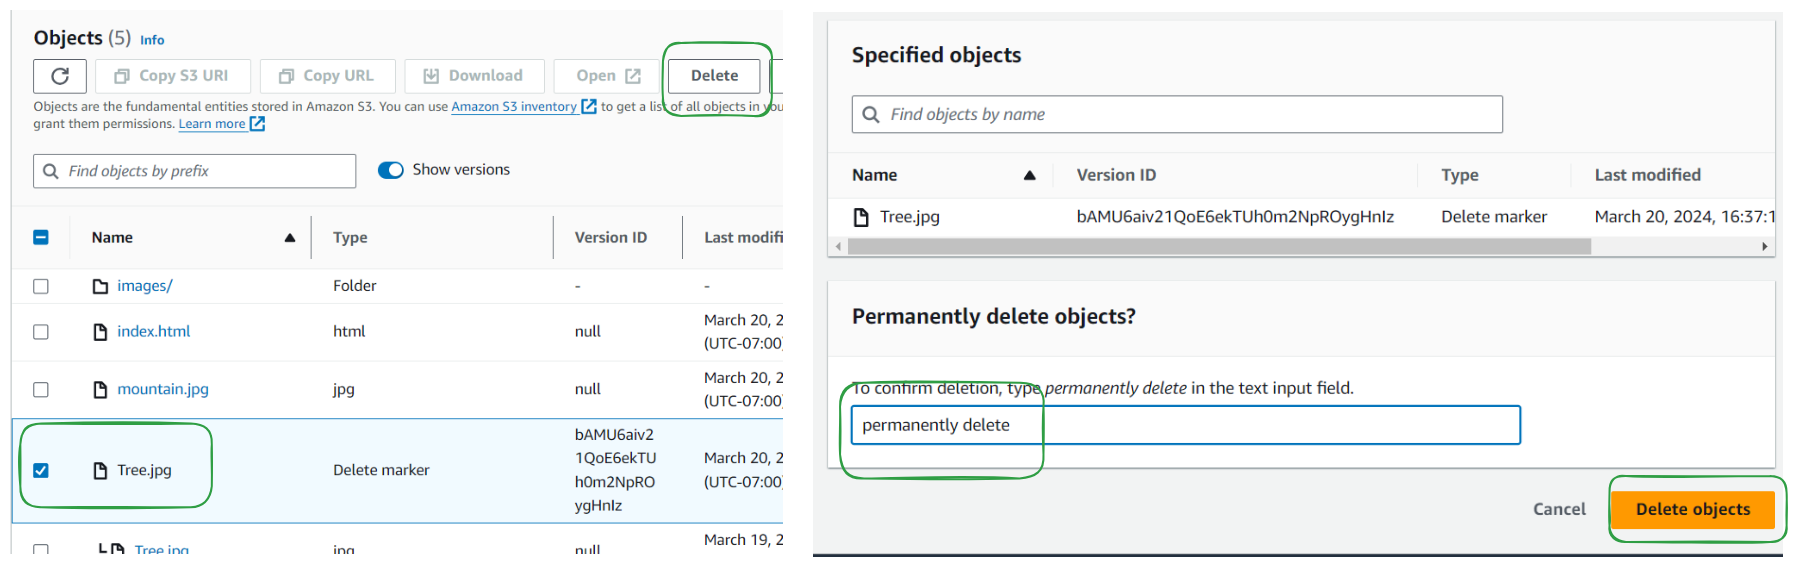
Permanently delete the current version to revert to the selected version.
Confirm the deletion by typing "permanently delete" and clicking "delete objects."
Test the Updates in the Static Website which is restored to original state
Step 8: Handle Delete Markers
Disable the "Show versions" toggle to hide version IDs and Delete an object
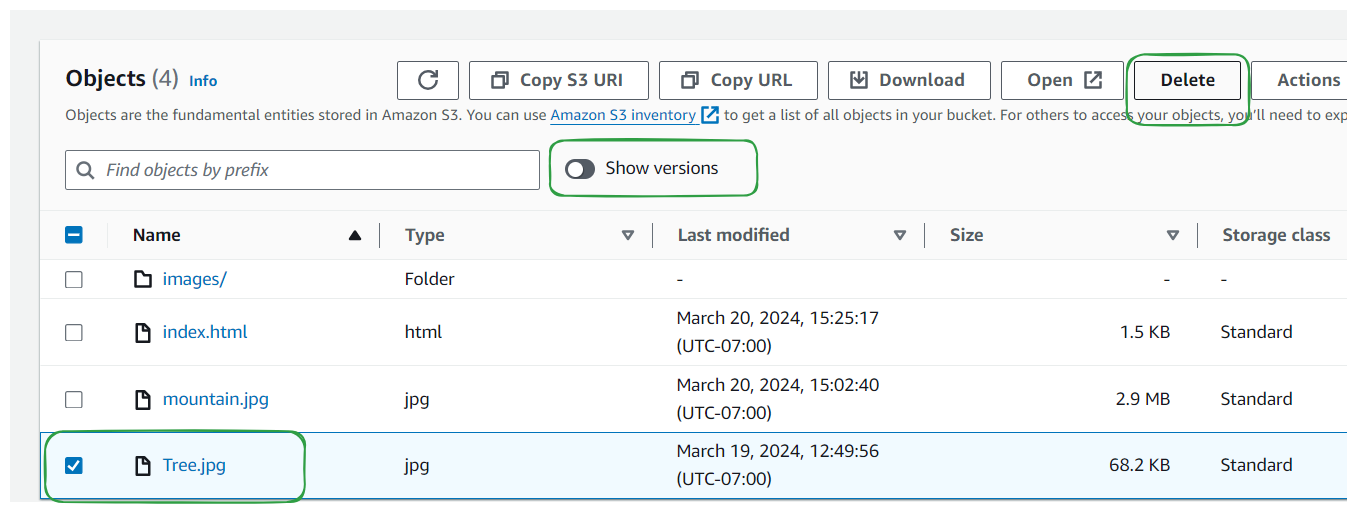
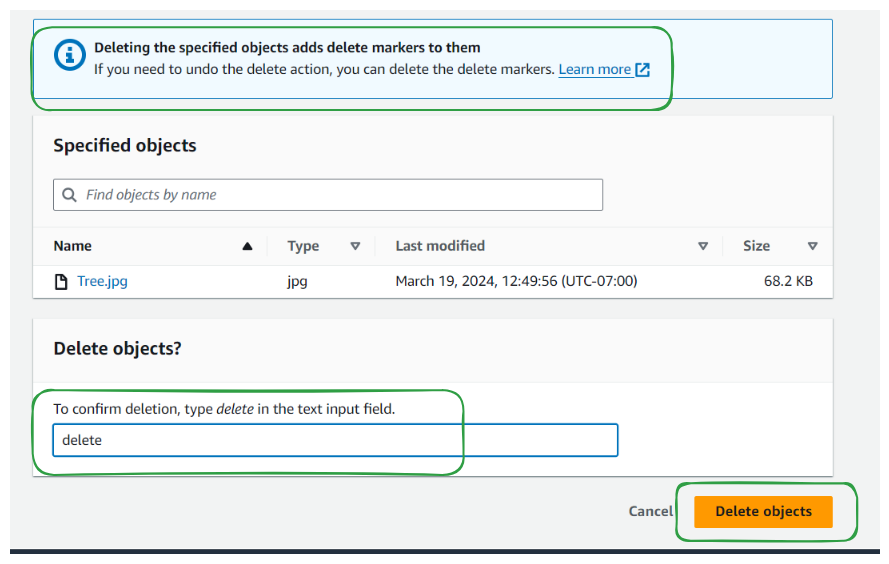
Delete an object by adding a delete marker, Type "delete" and click delete.
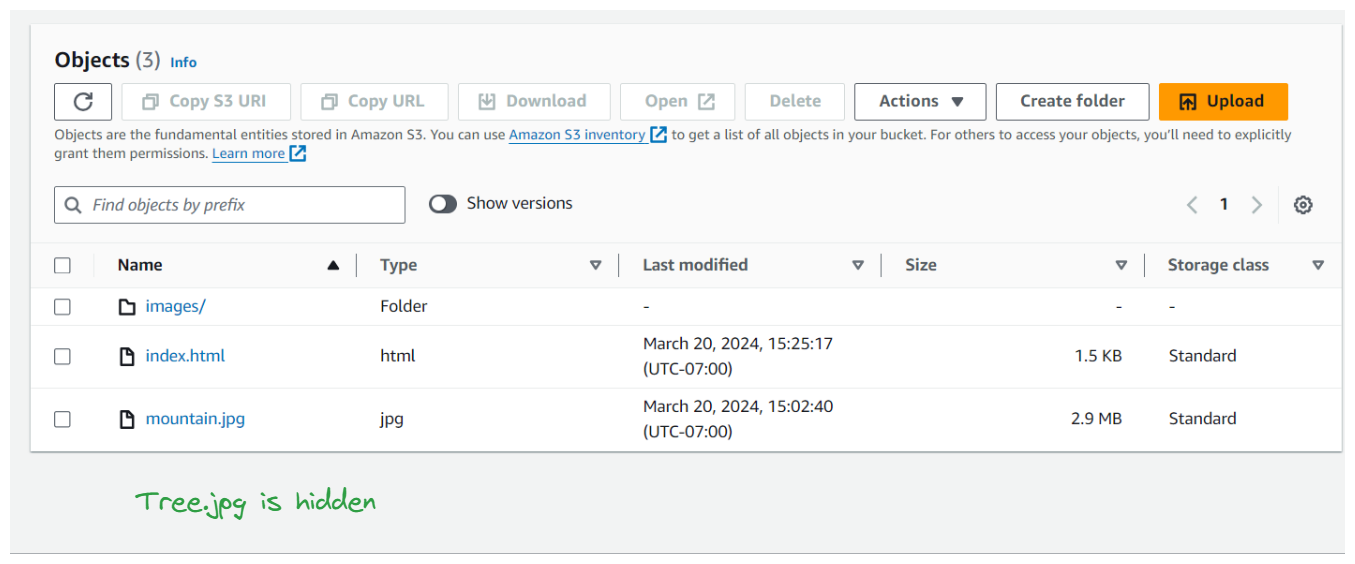
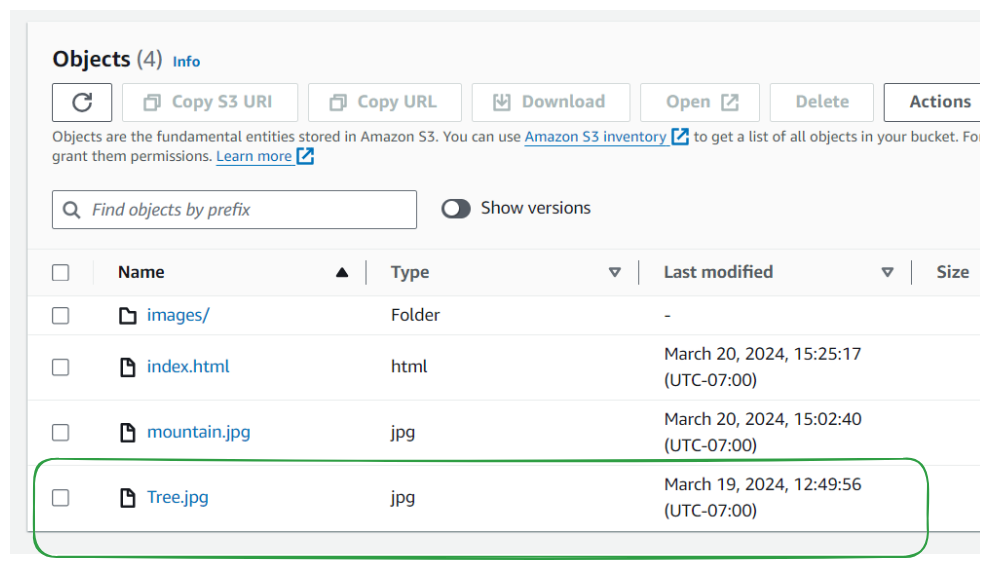
It is Now not visible in the buckets
However, It hides the object without permanently deleting it, and we can still see it in when we toggle "show versions"
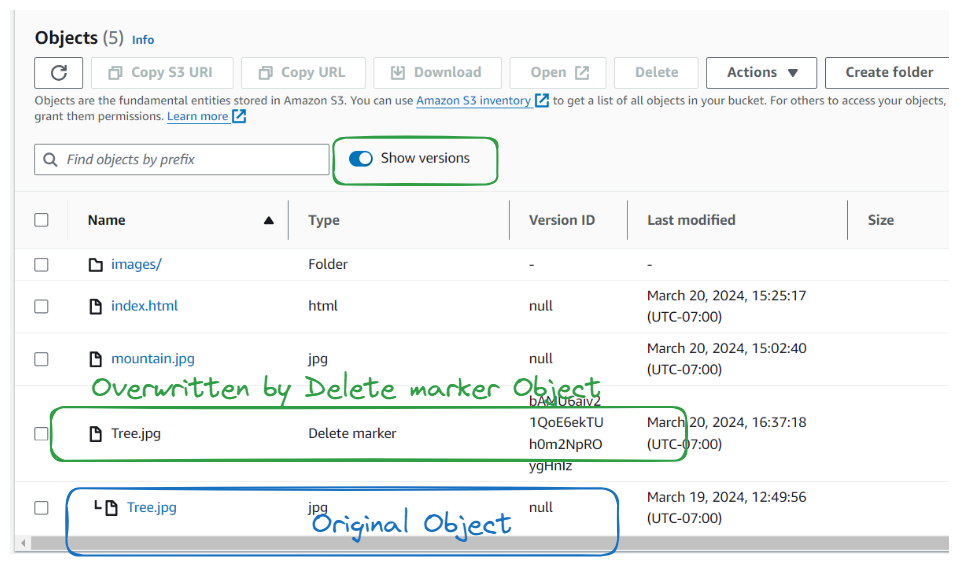
Restore the deleted object by permanently deleting the delete marker. This is same as Step 7: Rollback to Previous Version
Verify changes by refreshing the bucket.
Step 8: Experiment with Versioning
Explore additional features of versioning, such as adding multiple versions and deleting objects.
Observe the effects of versioning on file management and website functionality.
Conclusion
Versioning in Amazon S3 allows for efficient file management and easy rollback of changes.
Experimenting with versioning features enhances your understanding of S3 capabilities and best practices.


