
AWS EC2 ASG Hands-On | A Step-by-Step Guide
A step-by-step instructions on Auto Scaling Groups (ASG)

Experienced Technical developer with 6+ years' global collaboration.
Proficient in Python, Go, React, Next.js, Django, various databases, Cloud & DevOps (AWS EC2, Docker, Kubernetes), and Big Data tools.
Skilled in data structures and algorithm, API development, and end-to-end software engineering.
Excels in back-end development, front-end design, Root Cause Analysis, and product management to deliver superior user experiences.
Holds a master’s degree in computer engineering.
AWS Auto Scaling Groups (ASGs) empower you to efficiently manage the elasticity of your infrastructure, ensuring your applications remain responsive and cost-effective under varying workloads. In this comprehensive guide, we'll walk you through the process of setting up and optimizing an AWS Auto Scaling Group, step by step.
Creating a Launch Template
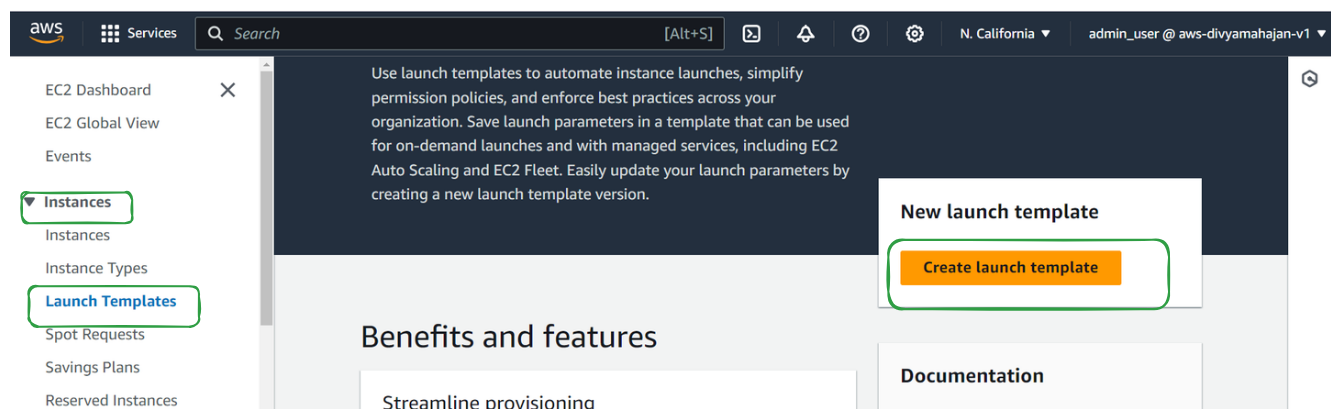
Step 1: Create a New Launch Template:
Log in to your AWS Management Console and navigate to the EC2 Dashboard.
From the EC2 Dashboard, go to "Launch Templates" under the "Instances" dropdown menu.
Click "Create launch template.
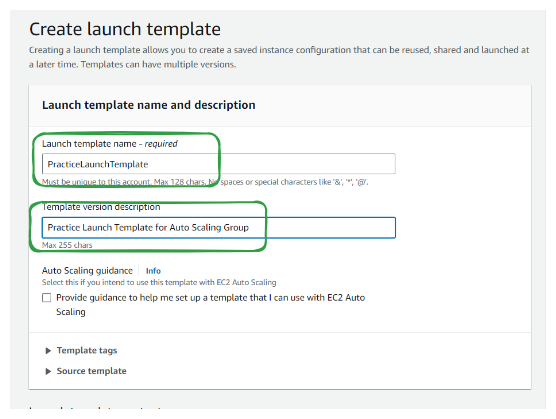
Step 2: Configure Details:
Provide a name and description
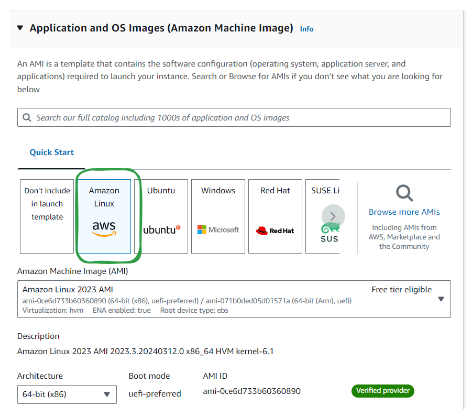
Select your desired AMI, we are choosing Amazon Linux as the AMI.
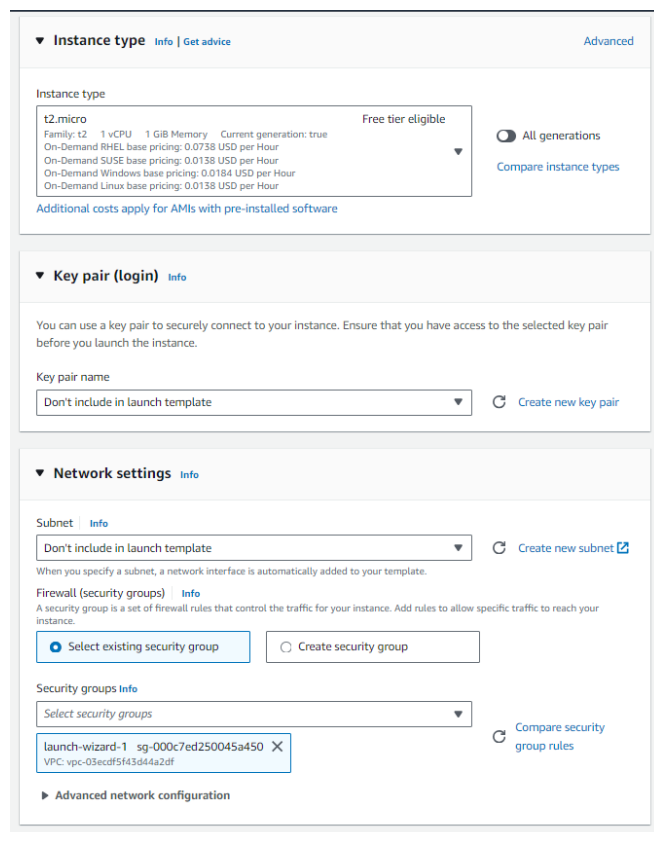
Select an instance type, we are choosing t2.micro as the instance type.
Specify key pair and security groups.
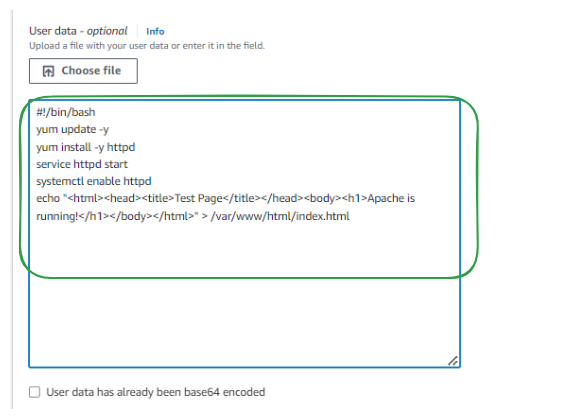
Step 3: Advanced Settings - User Data:
- In the "Advanced settings" section, add the following User Data script:
#!/bin/bash
yum update -y
yum install -y httpd
service httpd start
systemctl enable httpd
echo "<html><head><title>Test Page</title></head><body><h1>Apache is running!</h1></body></html>" > /var/www/html/index.html
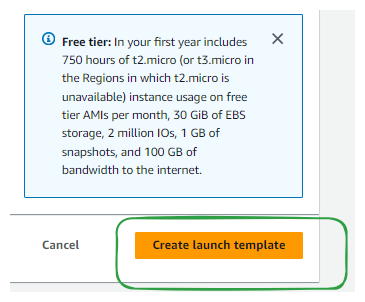
Step 4: Review and Create:
Review your configurations.
Click "Create launch template."
Utilize this launch template for launching instances or configuring auto scaling groups.
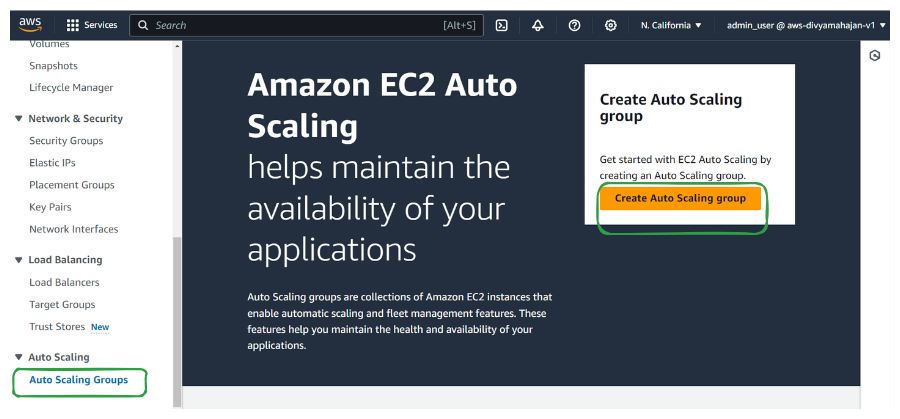
Creating an Auto Scaling Group Using a Launch Template
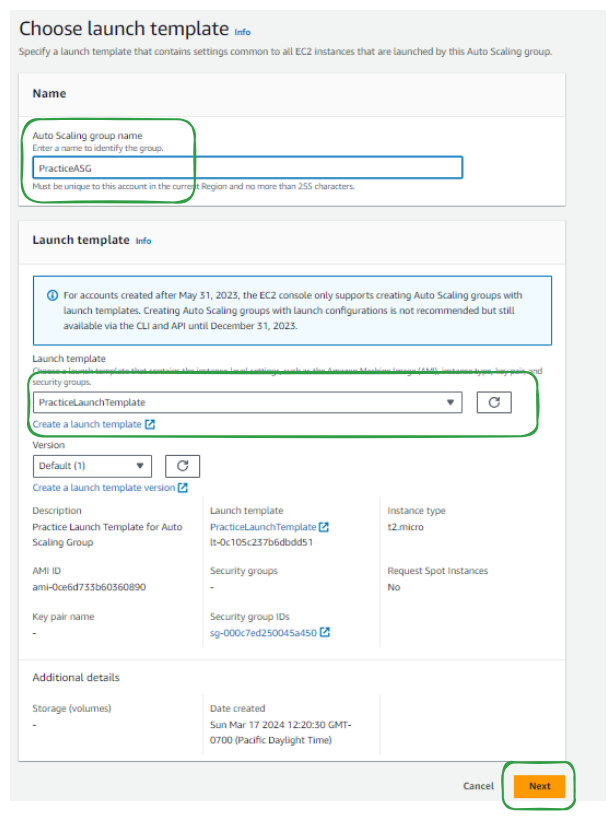
Step 1: Choose Launch Template
Access the EC2 Dashboard in your AWS Management Console.
Navigate to "Auto Scaling Groups" under the "Auto Scaling" dropdown menu.
Click on "Create Auto Scaling Group."
Choose "Launch template" as the launch configuration type.
Select the desired launch template from the dropdown menu.
Click on "Next"
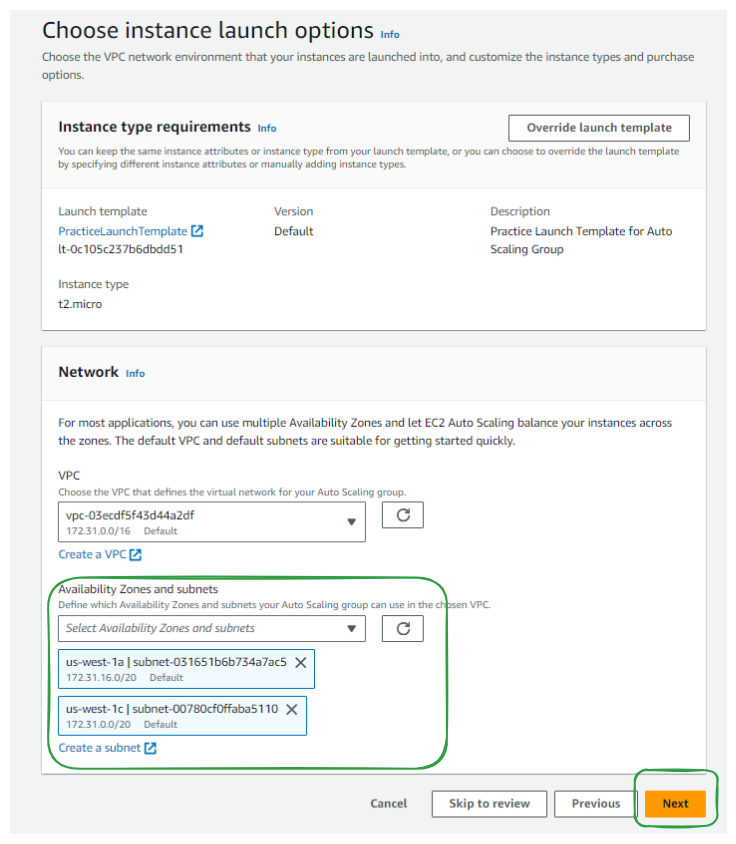
Step 2: Choose Instance Launch Options
You can keep the same instance attributes or instance type from your launch template, or you can choose to override the launch template by specifying different instance attributes or manually adding instance types..
For most applications, you can use multiple Availability Zones and let EC2 Auto Scaling balance your instances across the zones. The default VPC and default subnets are suitable for getting started quickly.
Step 3: Step 3: Configure Advanced Options (Optional)
- Load Balancing:
Choose from: No Load Balancer, Attach to an Existing Load Balancer, Attach to a New Load Balancer
We will Attach to an "Existing Load Balancer" we created in Guide to Create a Load Balancer (ALB)

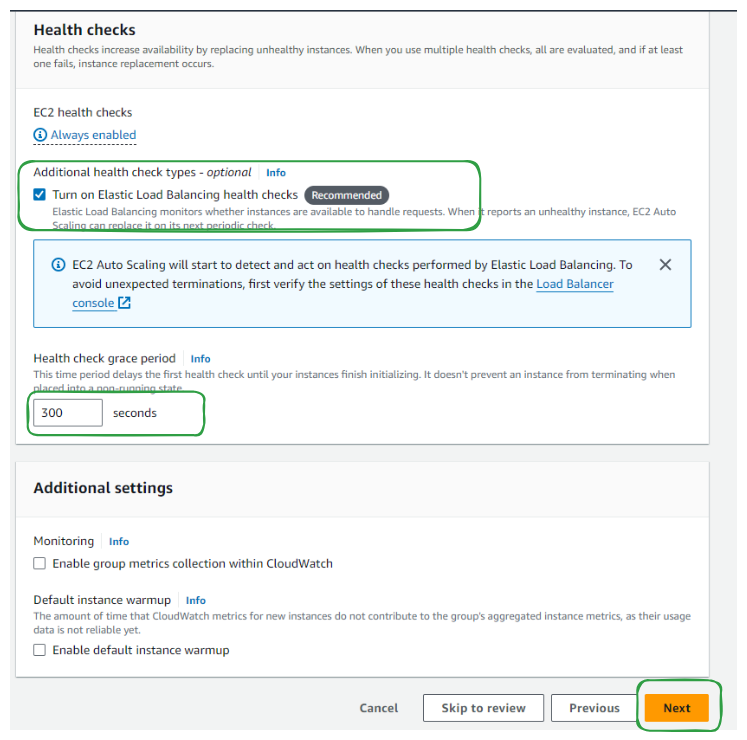
- Health Checks:
Enable EC2 Health Checks (Always enabled).
Optionally, enable Elastic Load Balancing Health Checks for increased availability.
Set delay time for initial health checks in Health Check Grace Period.
- Click on Next
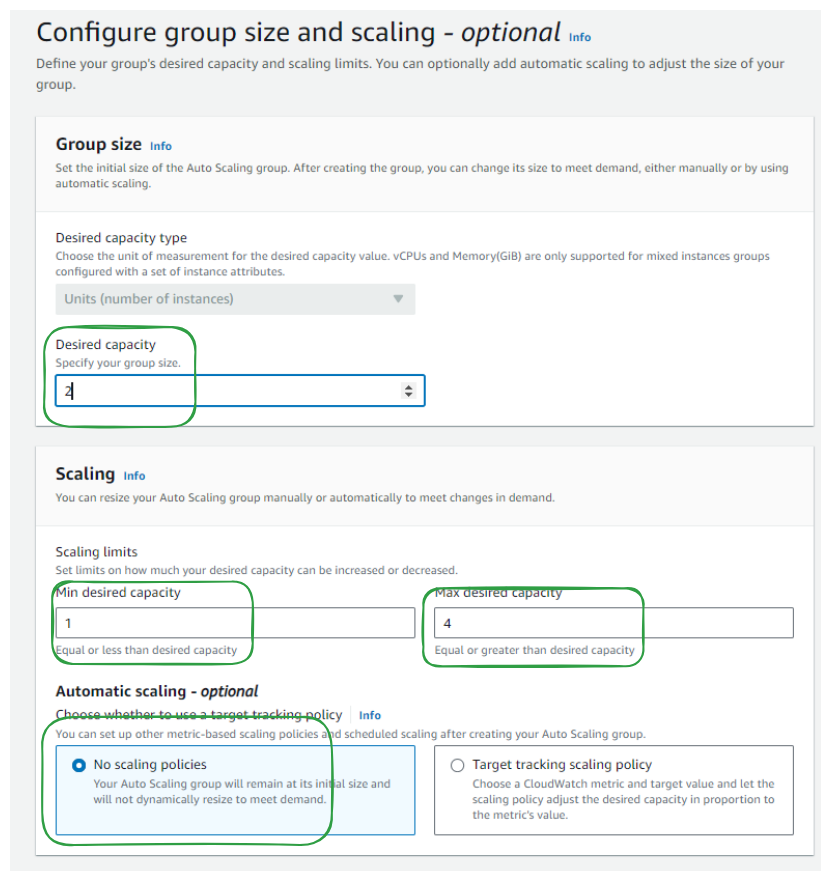
Step 4: Step 4: Configure Group Size and Scaling (Optional)
Group Size: Specify the initial size or desired Capacity of the Auto Scaling group.
Scaling: Define limits for scaling operations:
Min Desired Capacity (Equal or less than desired capacity)
Max Desired Capacity(Equal or greater than desired capacity)
Automatic Scaling (Optional): Choose whether to use a target tracking scaling policy:
No scaling policies: Keep group at initial size.
Target tracking scaling policy: Adjust desired capacity based on CloudWatch metric.
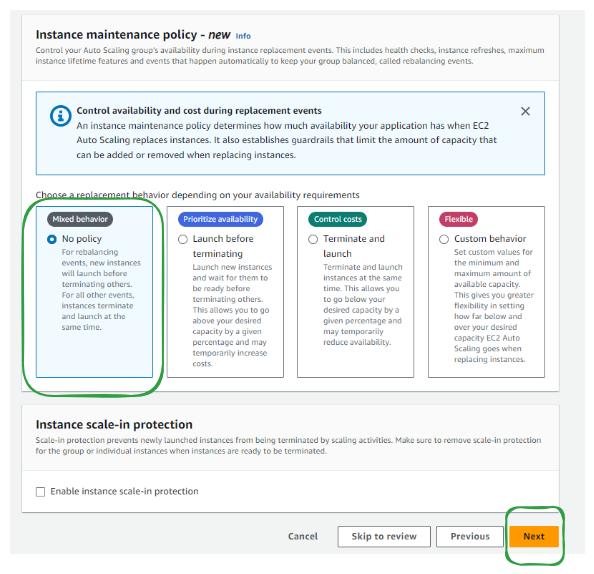
Instance Maintenance Policy: Control instance replacement behavior to manage availability and cost:
Mixed behavior: New instances launch before terminating existing ones.
Prioritize availability: Launch new instances before terminating existing ones.
Control costs: Terminate and launch instances simultaneously.
Flexible: Customize behavior based on capacity needs.
Instance Scale-In Protection: Enable protection to prevent newly launched instances from immediate termination by scaling activities.
Click on Next
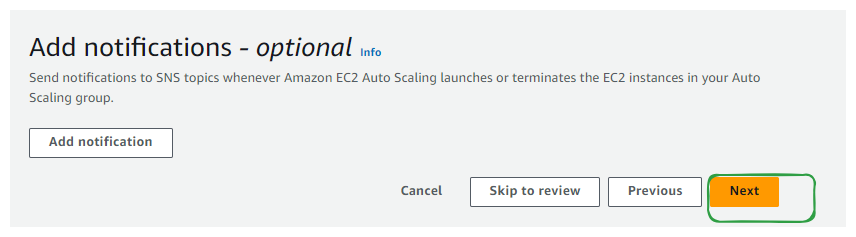
Step 5: Add Notifications (Optional)
Set up notifications to receive alerts about scaling activities or instance health changes if required.
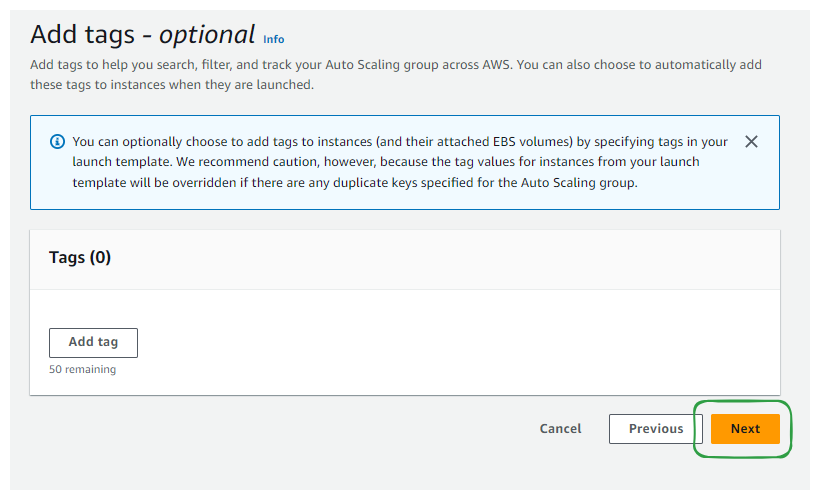
Step 6: Add Tags (Optional)
Assign tags to your auto scaling group for easier management and organization.
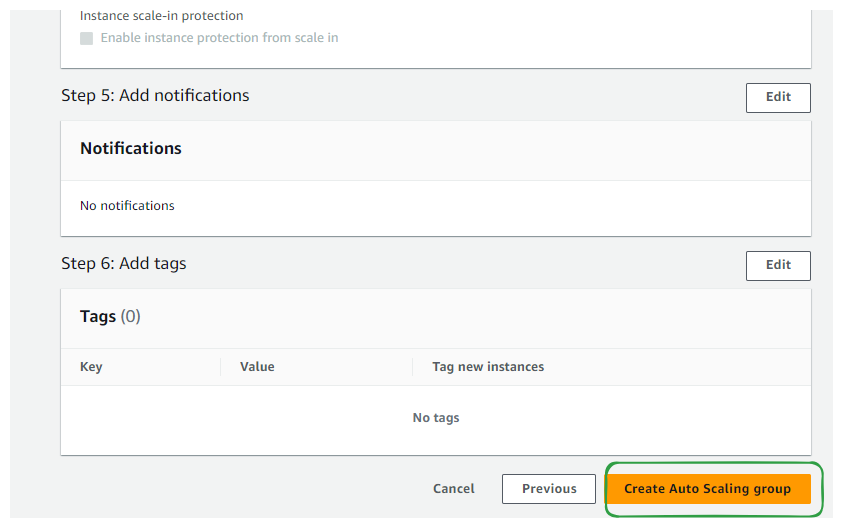
Step 7: Review
Review all the configurations you have made.
Ensure everything is set up according to your requirements.
Click "Create Auto Scaling Group" to finalize the process.
Review and Testing
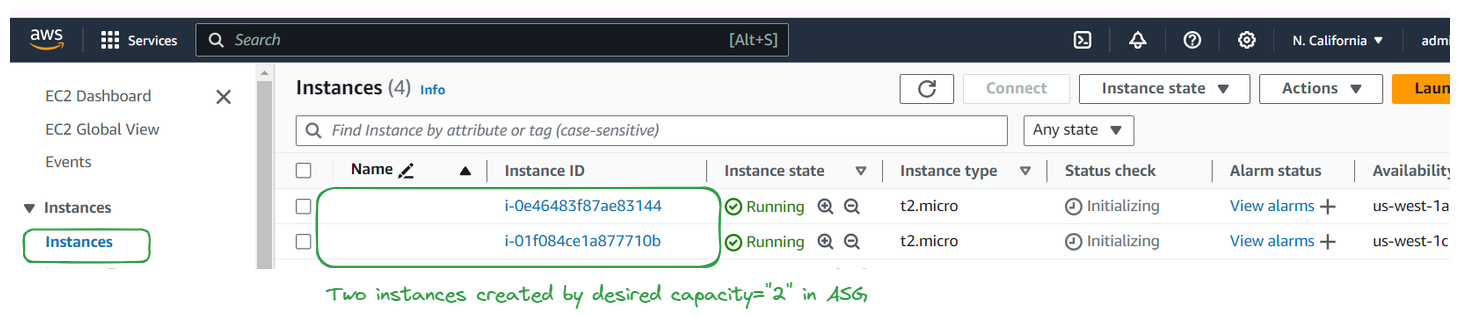
Test 1: Check for instances created ( desired number)
Log in to your AWS Management Console and navigate to the EC2 Dashboard.
From the EC2 Dashboard, go to "Instances" under the "Instances" tab.
You will see the "desired number" of instances running, which should match the specified desired capacity set during the group configuration.
Test 2: Check for Target Groups
If your Auto Scaling Group is associated with a load balancer and target groups, you can also verify the number of instances in the target groups to ensure that they match the desired capacity set for the Auto Scaling Group. Here's how you can do it:
Go to the "Target Groups" section in the Load Balancer dashboard.
Select the target group associated with your Auto Scaling Group.
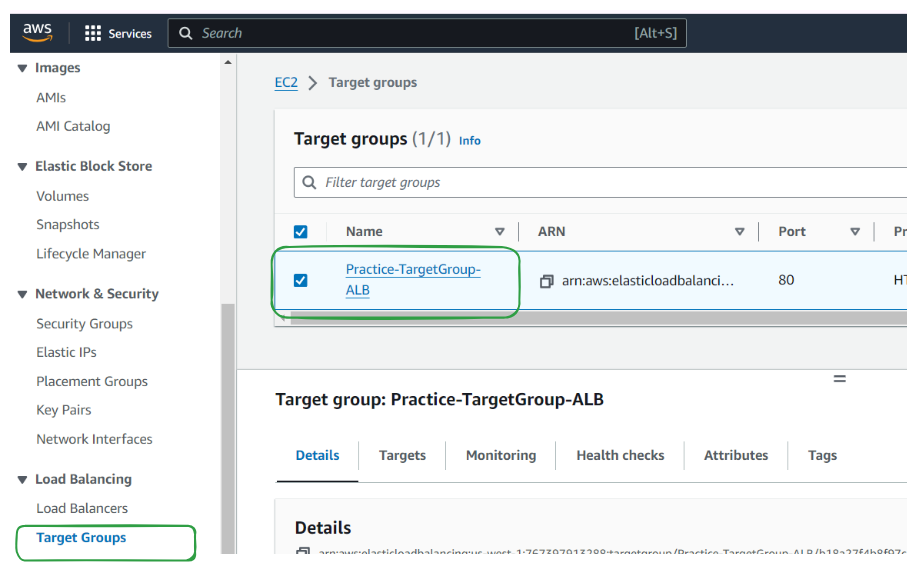
You will see the same number of targets (instances) listed in the target group as the desired capacity set for the Auto Scaling Group.

Verify that the instances listed in the target group are healthy and properly serving traffic.
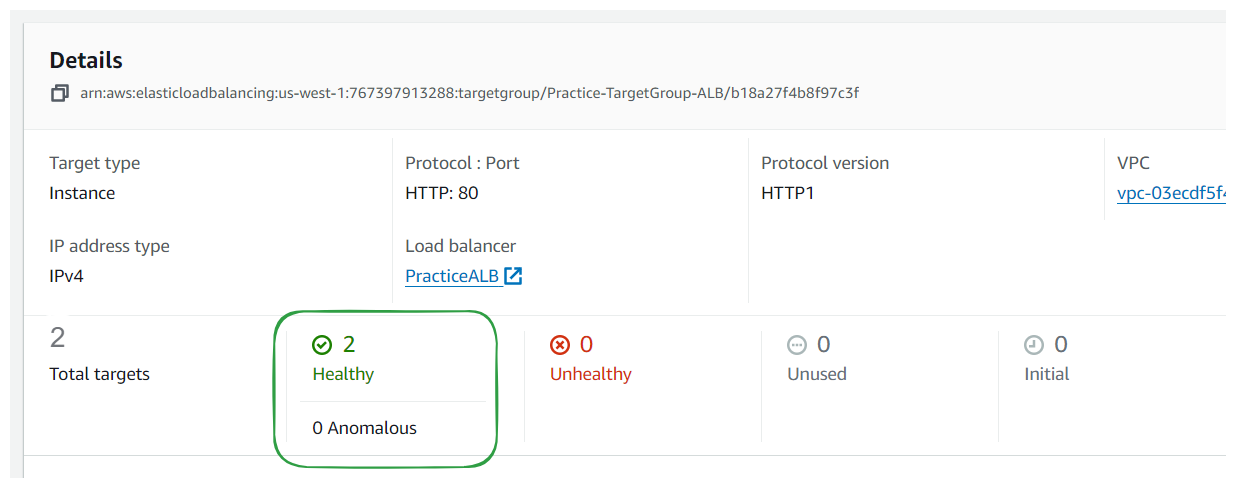
Confirm that any load balancer health checks are passing for the instances in the target group.
Monitor the target group for any changes in the number of targets as the Auto Scaling Group dynamically adjusts the instance capacity.
Test 3: DNS Testing in Browser
Go to the "Load Balancers" section in the EC2 dashboard.
Locate the load balancer associated with your Auto Scaling Group.
Click on the load balancer to view its details.
Copy the DNS name of the load balancer from the dashboard.
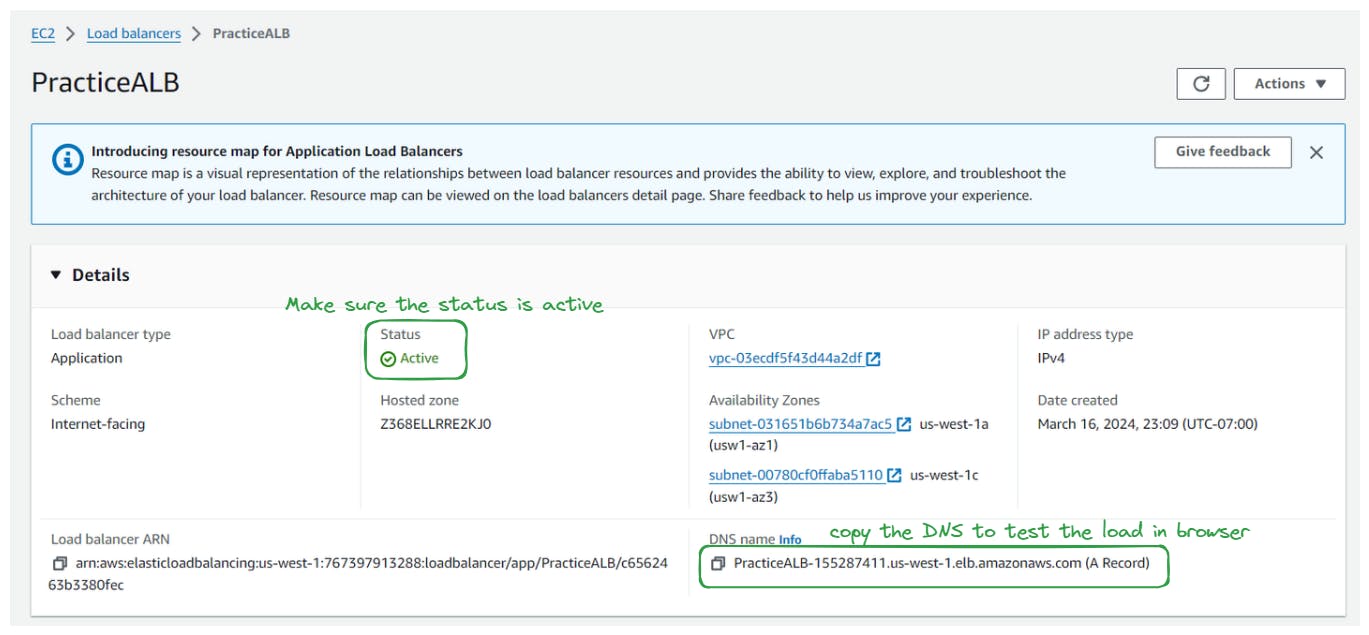
Paste the DNS name into a text editor or another location for future reference or testing purposes.
Optionally, you can open a web browser and paste the DNS name into the address bar to access your application through the load balancer.
Add load by refreshing to see the load being distributed to Different IP


